The Vitals:
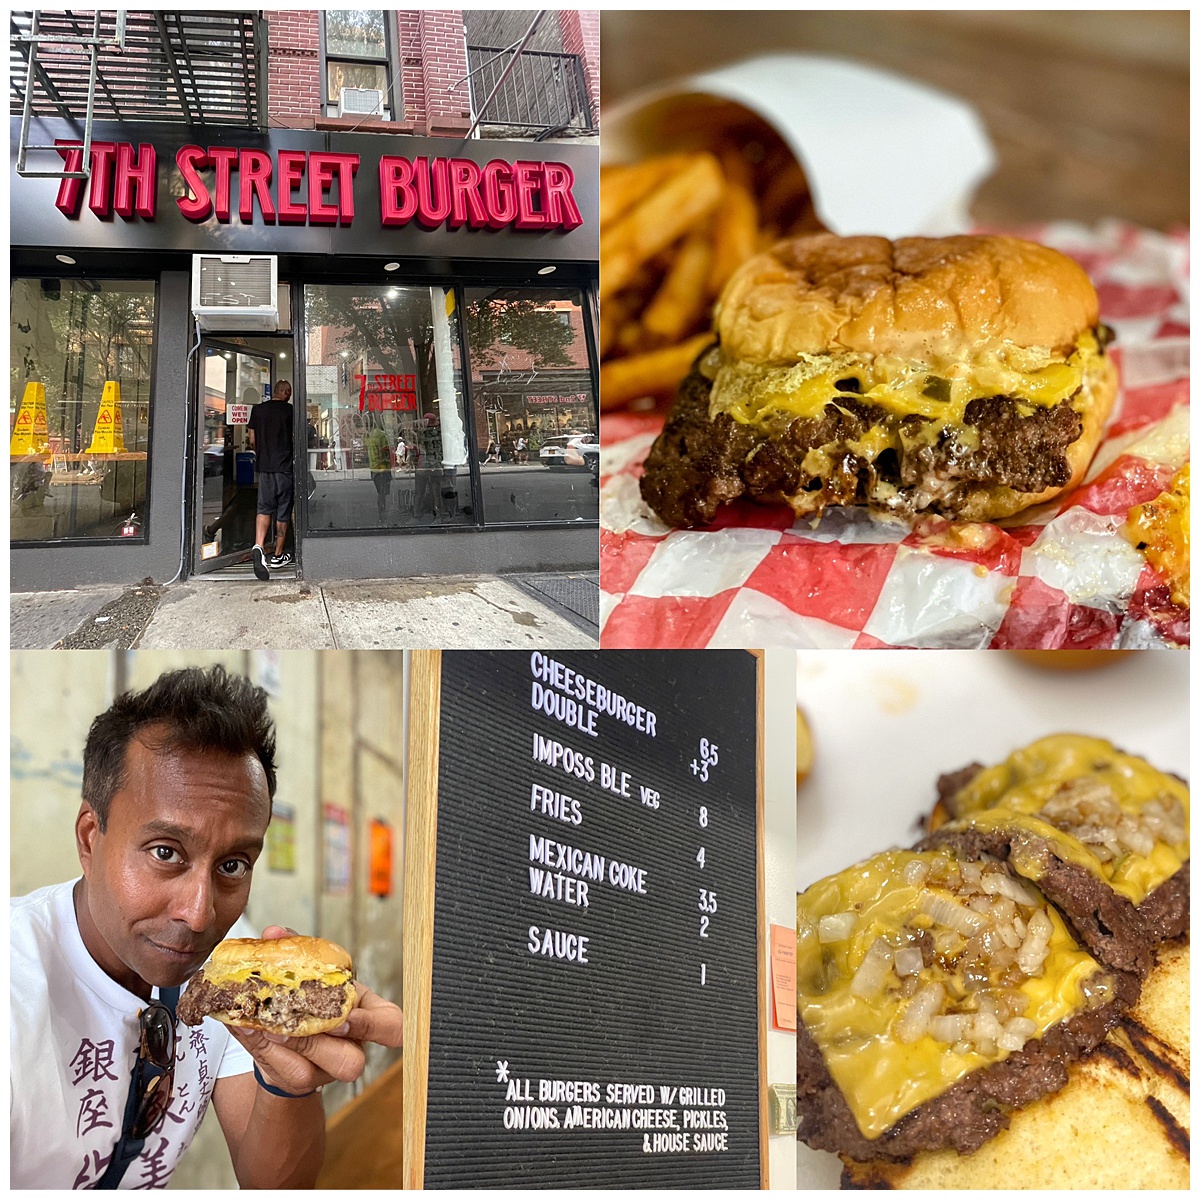
the spot: 7th Street Burger NYC 11 locations in NYC
the eats: Double Smashed Burger
the bucks: $9.50
the full nelson: NYC's Cheap Eats take on the Smashed Burger phenomenon
Last week I returned to New York City and did a sequel of
my burger binge that went down back in 2017. The burger scene continues to evolve, most notably with the red hot trend of smashed burgers. Abbas Dhanani aka
Houston Eatz and owner of Burger Bodega insisted I hit up 7th Street Burger NYC for a smashed burger and he isn't one to steer me wrong.
His Smashed Burger was one of my favorite bites of 2022.
Cheap Eats prices for 2023
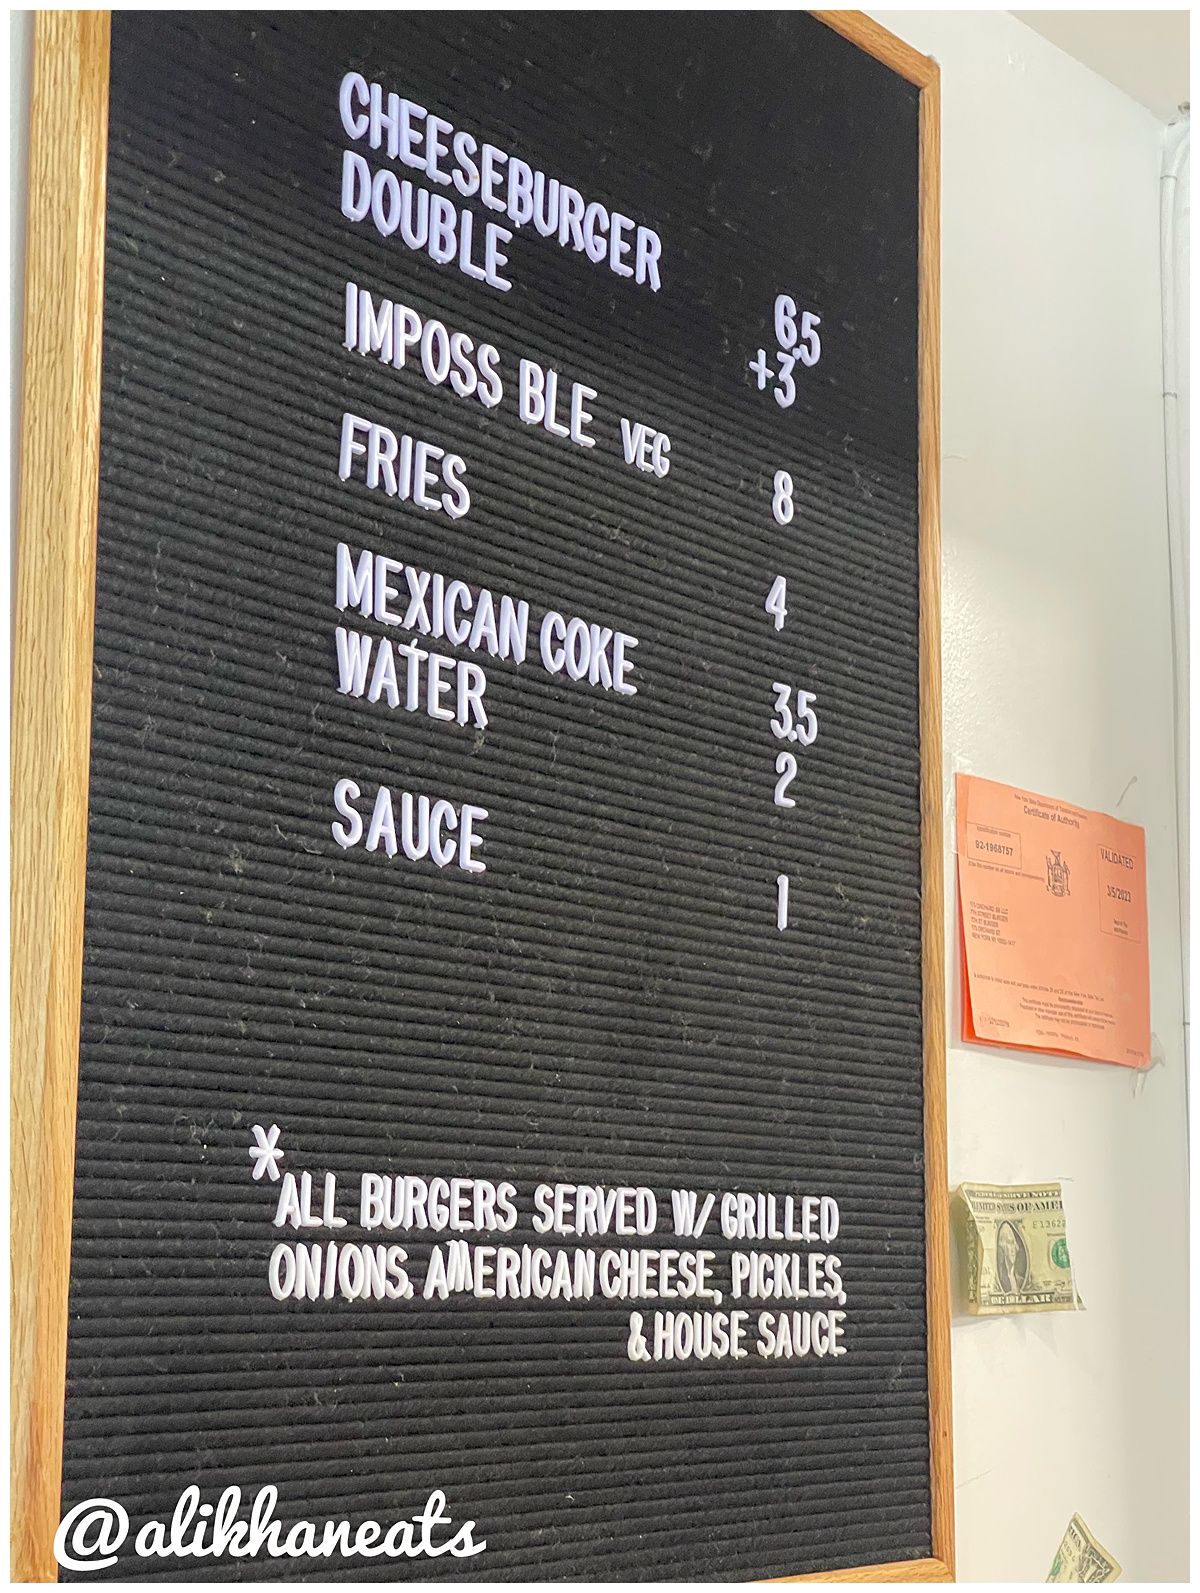
7th Street Burger NYC is bringing in the Cheap Eats prices for 2023. Especially so when considering the fact that we are in Manhattan. What started during pandemic times about two years ago has exploded into 11 locations of 7th Street Burger NYC throughout the city. I'm guessing affordability is a big reason why. And so is this:
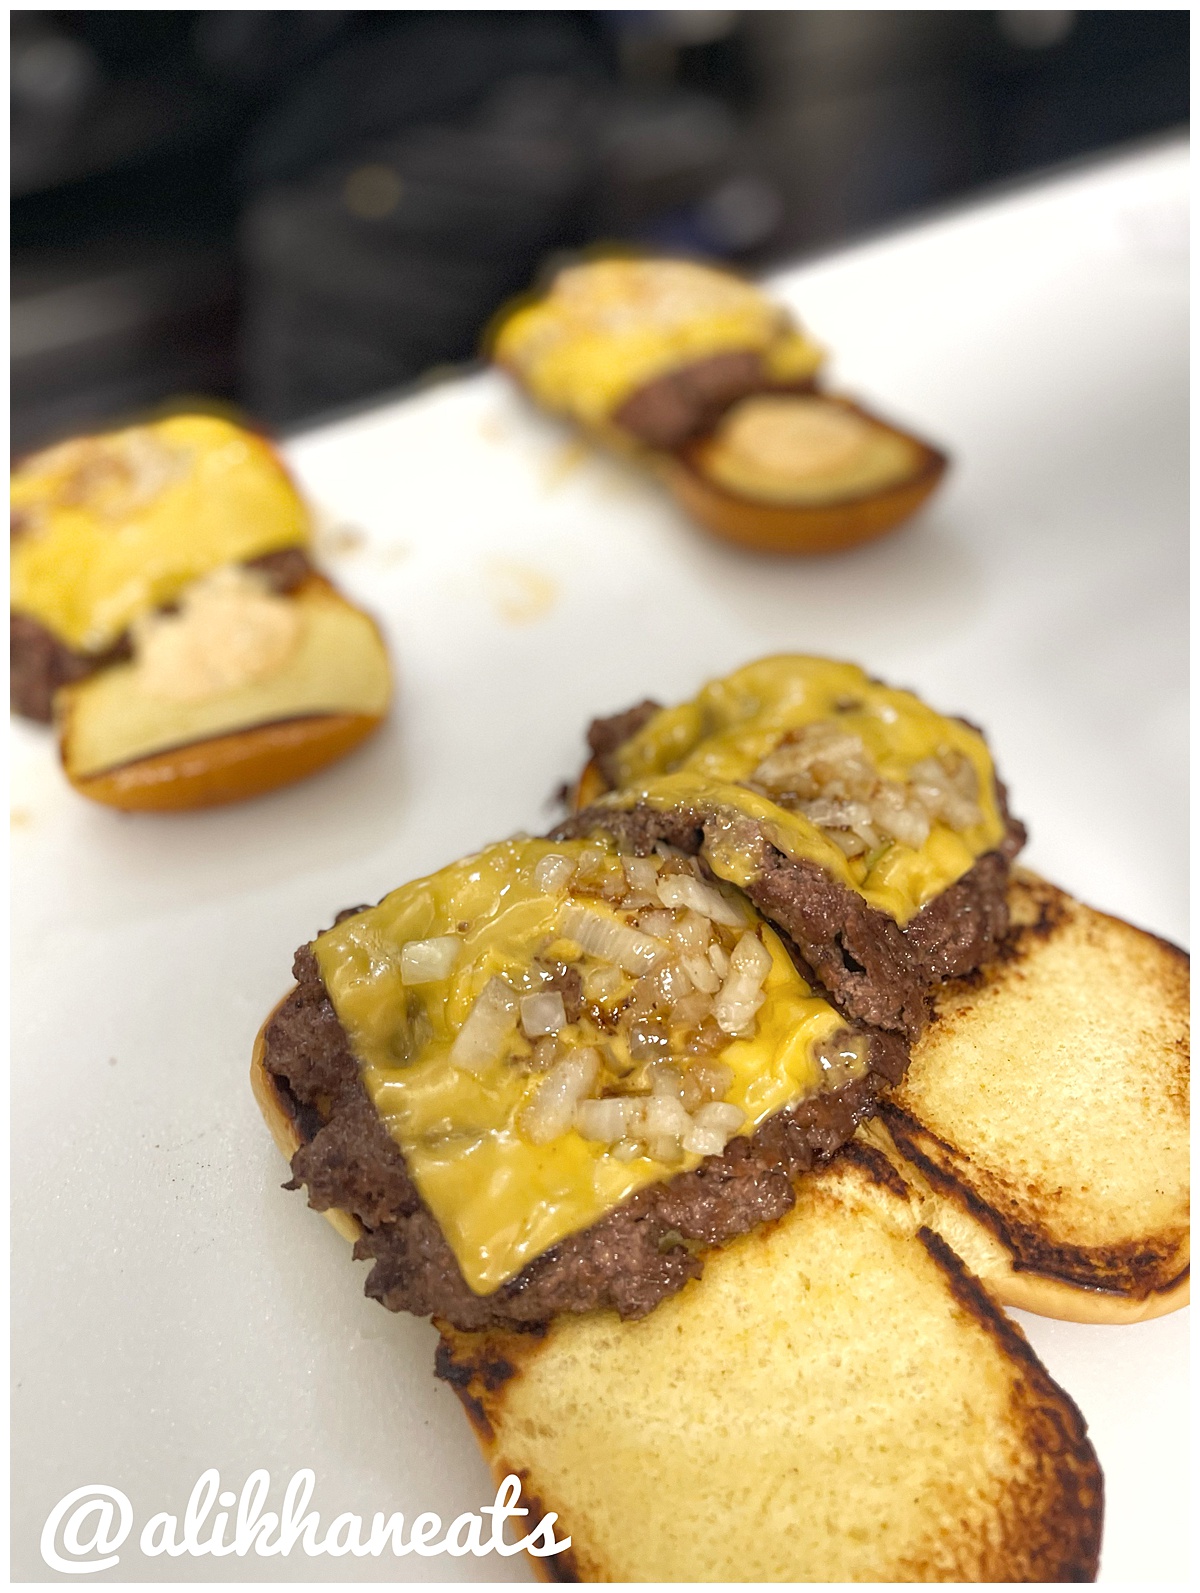
Essential toppings only
I love the cook on the onions at 7th Street Burger NYC. Like
Burger Bodega, they prefer a light cook. Pickle is made in house so think of it as a little fancy but nothing too ambitious to get in the way of plain old burger bliss. American cheese, a housemade "Big Mac sauce" and a well toasted potato roll round out the classic cheeseburger experience.
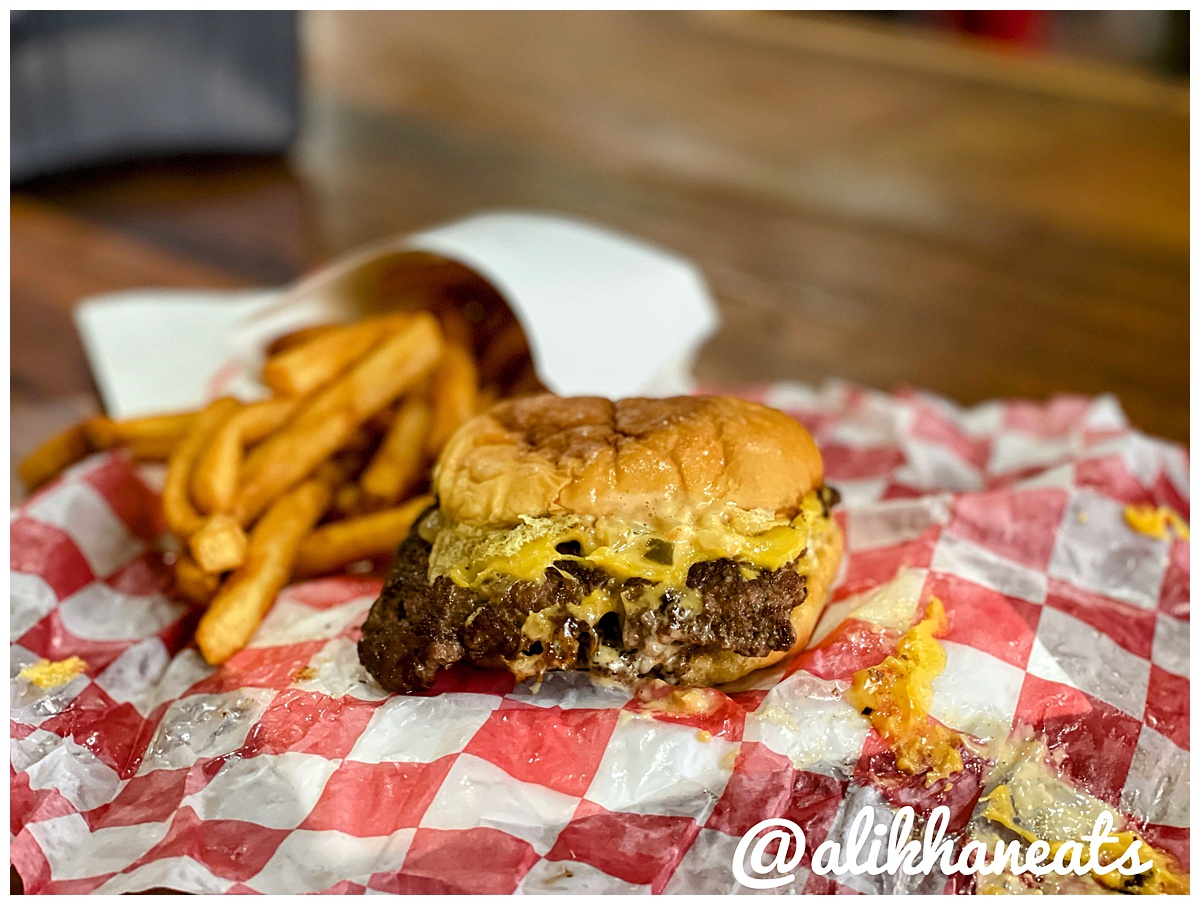
When cheese sticks to paper . . .
. . . you know you're getting an ooey gooey cheeseburger experience. I have advocated for
the wrap and hold method when making smashed burgers at home for the Takeout. So happy to see the practice in effect 7th Street Burgers NYC. And yeah, it really allows the burger to be immersed in it's own essence. Don't forget the napkins.
As a burger tourist, consider the value for 7th Street Burgers NYC and the convenience of 11 locations along with the fact that this burger travels better than most. A simple, cravelable cheeseburger experience that I imagine hits the high octaves both late night and the morning after. This one is Cheap Eats 2023 certified along with being Ali Khan Eats approved.
The Vitals:
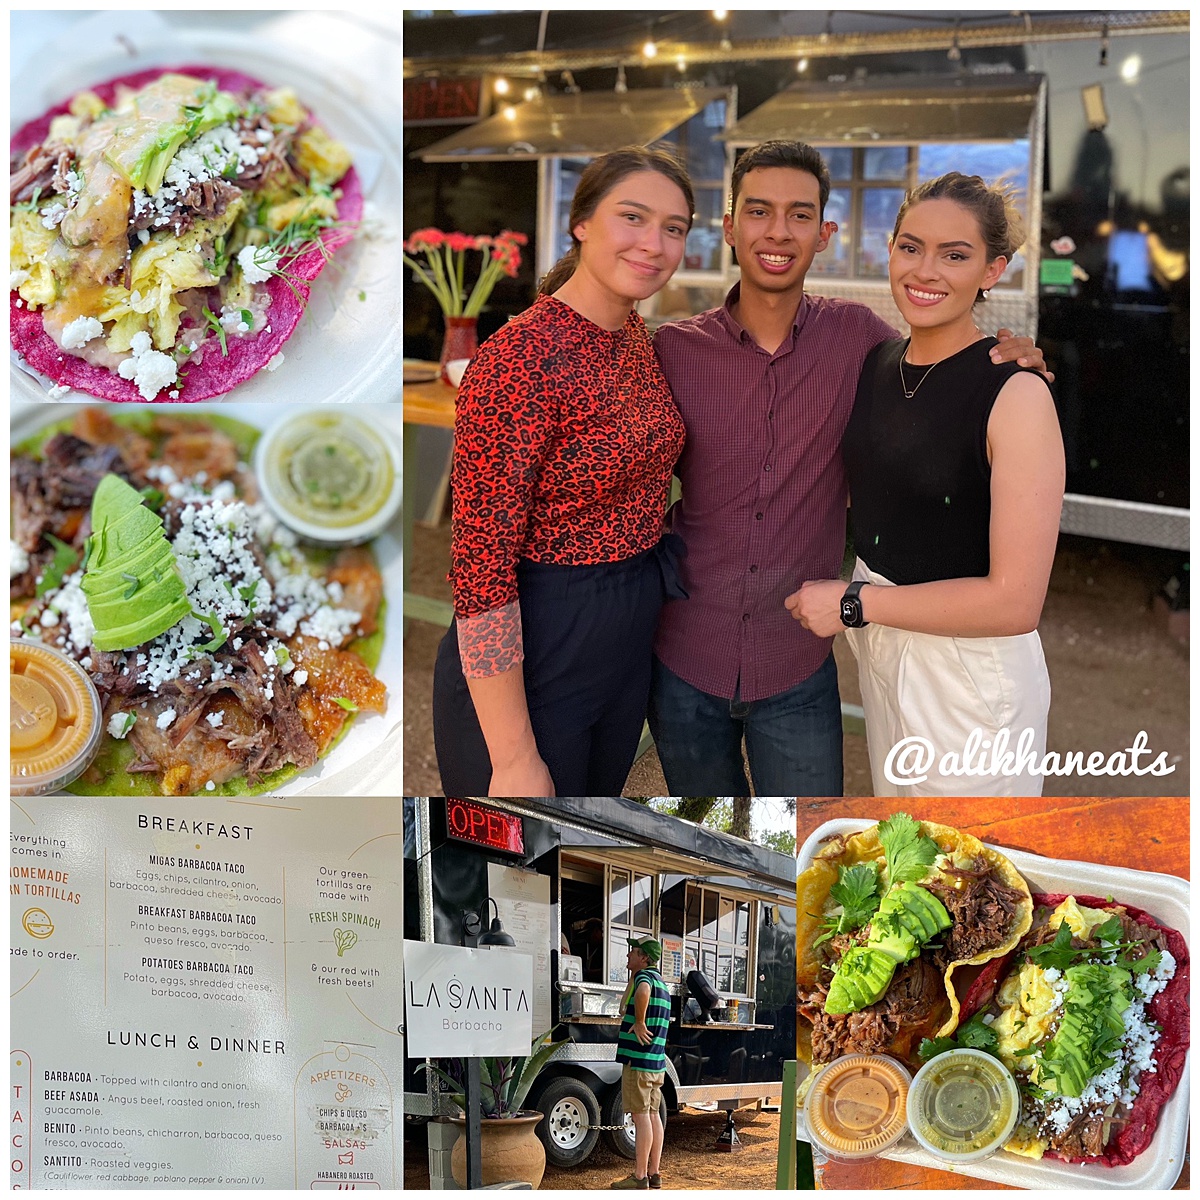
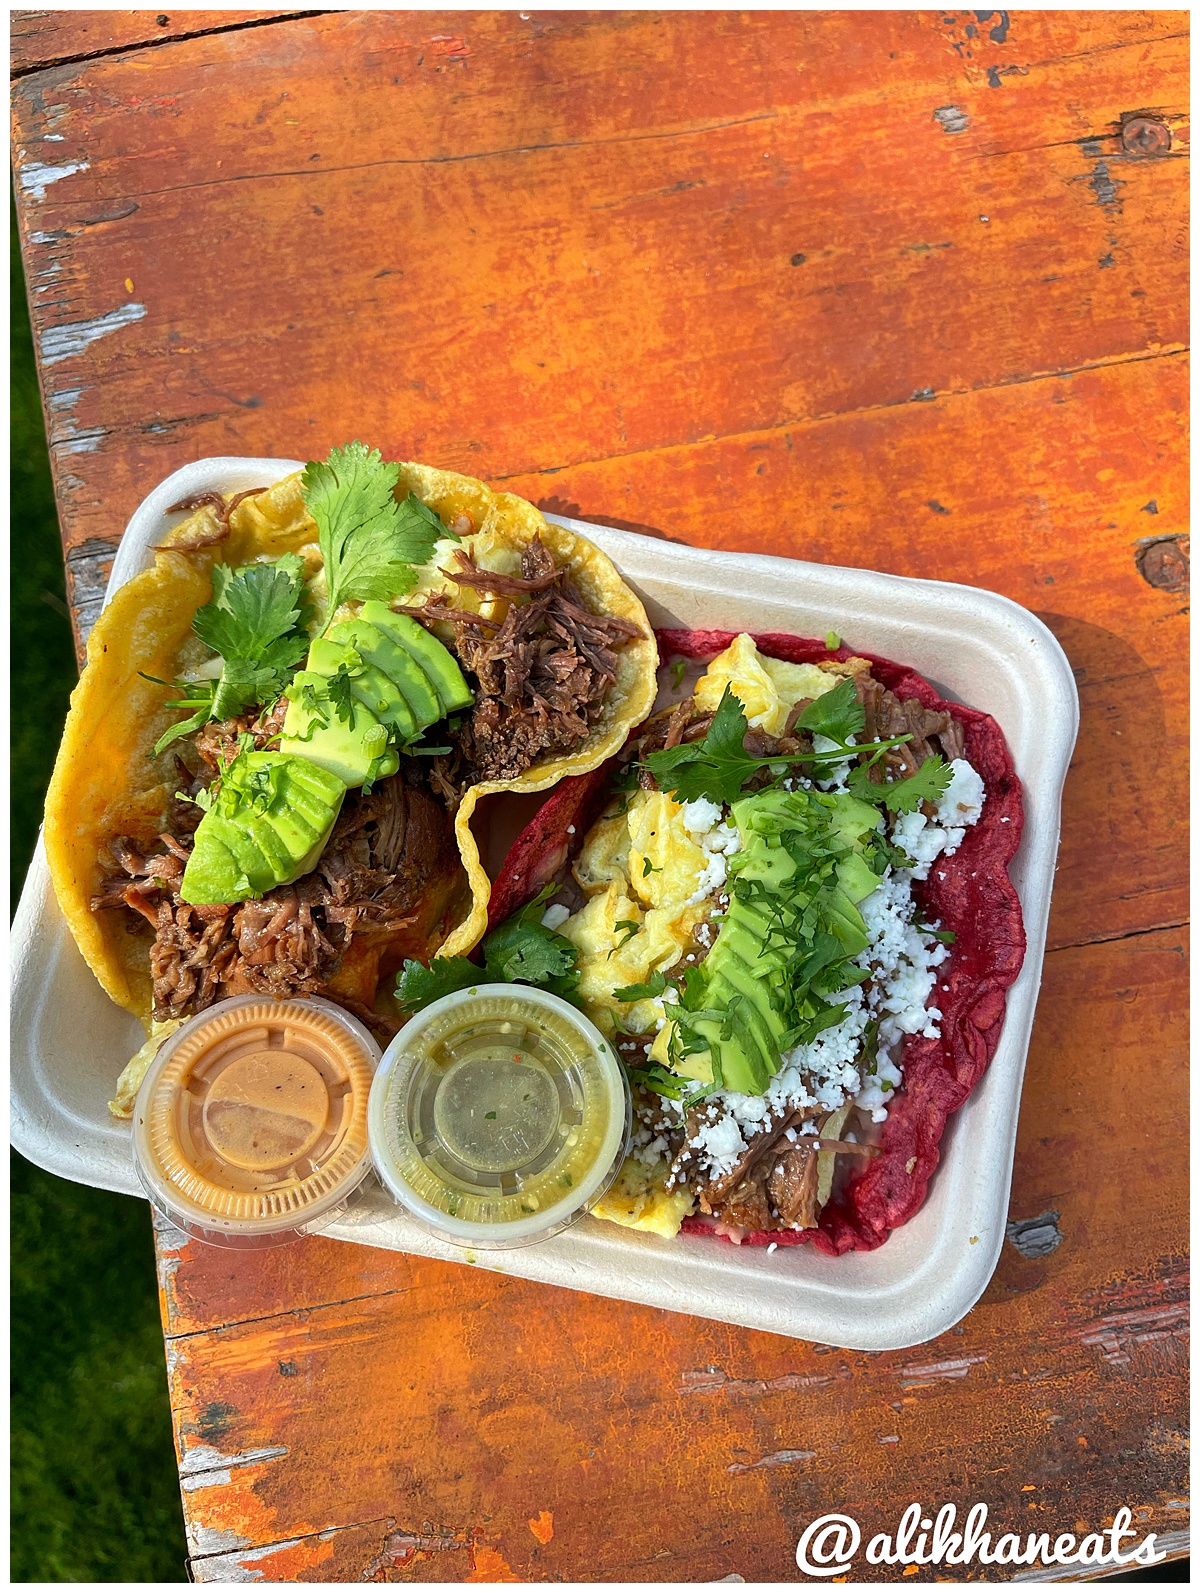
the spot: La Santa Barbacha 2806 Manor Road Austin TX 78722
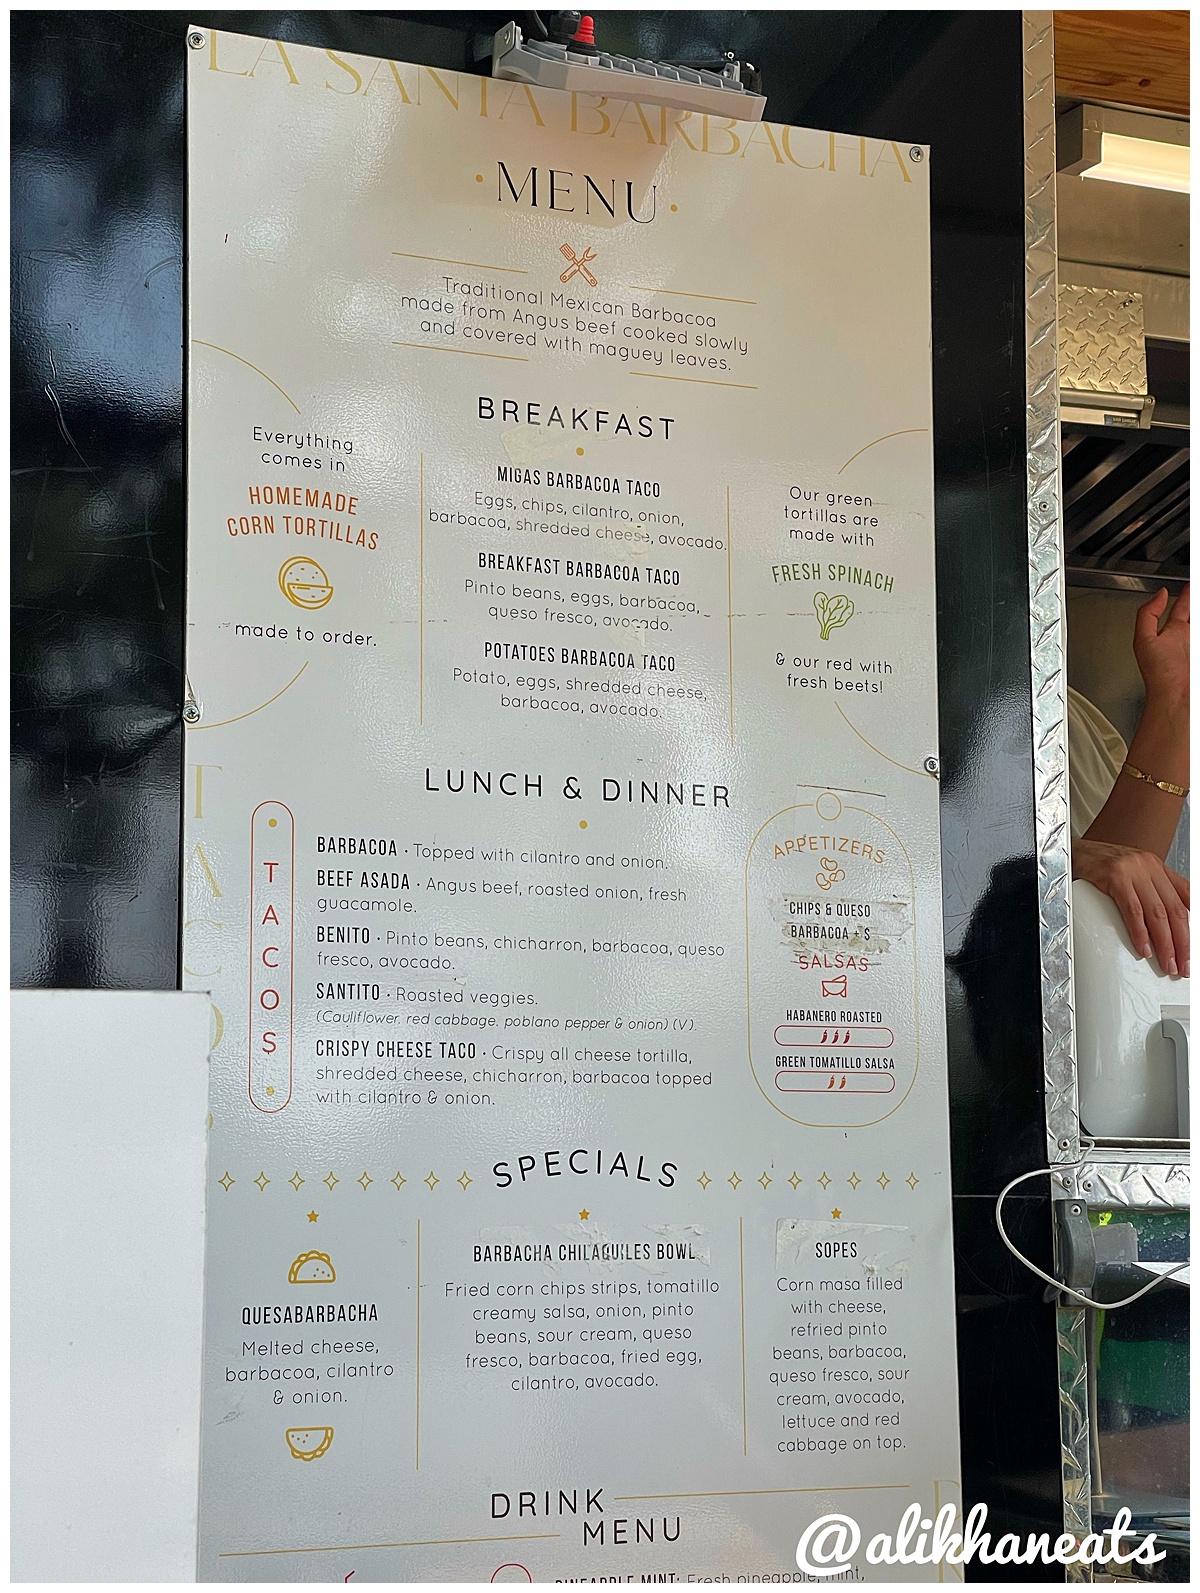
the eats: Breakfast Barbacoa tacos, barbacoa, quesobarbacoa, you can't go wrong, bring a group and try everything
the bucks: $5 each, two is a meal, three is a feast.
the full nelson: Hidalgo style beef barbacoa made into fashionable Austin tacos. Also my fav breakfast taco in town.
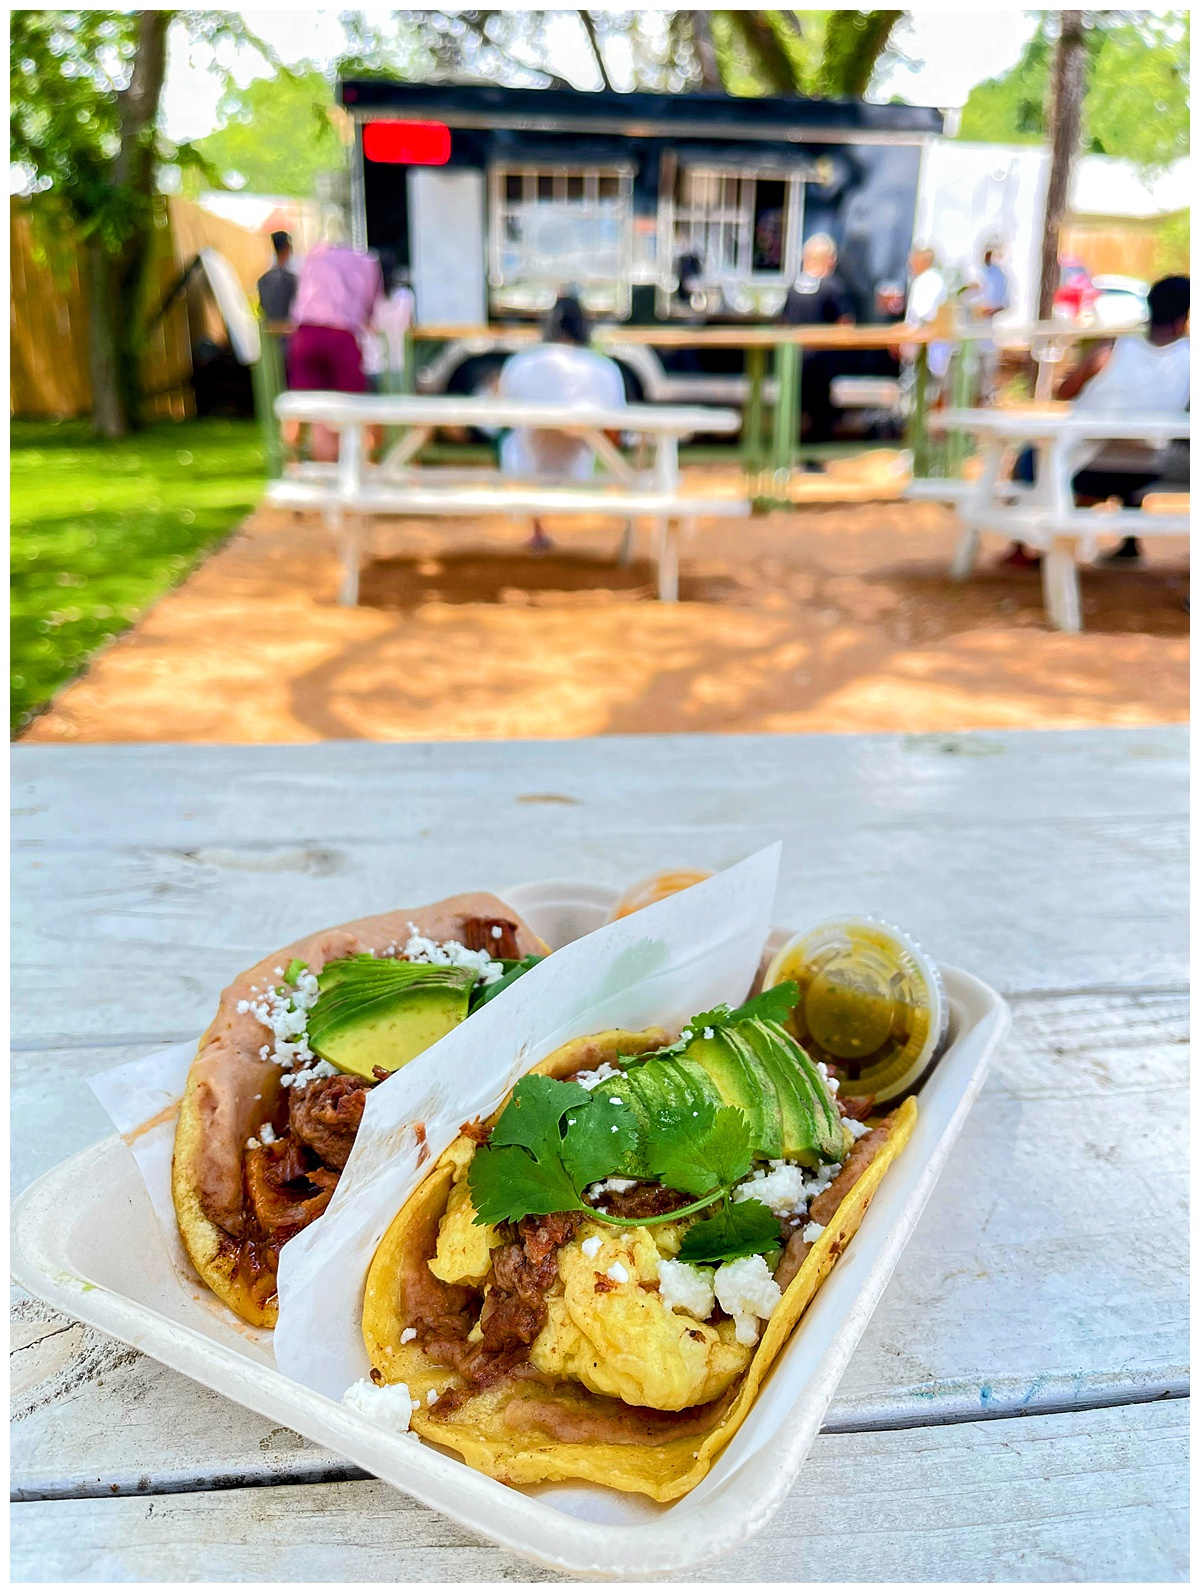
I love breakfast tacos. Eggs and bacon belong in a tortilla just as much as on a plate. You can order as many as you want, absolving yourself of the gut bomb that is the breakfast burrito, if you choose discretion. But there is another shocking truth to breakfast tacos: they can easily be made at home. And I am usually happy to do just that, that is until La Santa Barbacha moved into my neighborhood about a month ago.
My fav breakfast taco. Period.
La Santa Barbacha is a little food trailer walking distance from my house in East Austin TX. Over the course of a month, I have eaten their four times. These days I rarely tend to repeat visiting restaurants but for La Santa Barbacha, I make a wholehearted exception. At $5 a pop these tacos aren't cheap, which is a hallmark of cherished breakfast taco spots like
El Milagrito in San Antonio TX. But they are generous servings of exquisitely tender braised short rib, carefully plated on gorgeous homemade tortillas and wholly unique to the Austin taco scene, maybe even the Texas taco scene.
Steeped in family tradition
Rosa, Daniela and Uriel Landaverde learned a lot from their parents when growing up in Guanajuato Mexico when it comes to the family tradition of barbacoa. If you're unfamiliar, barbacoa is both a dish and method which is to slowly cook meat in a long braise that utilizes steam more than cooking liquid. Traditionally cooked underground and on weekends, the Landaverde family would prepare barbacoa after church. That also inspired the first part of the name as "La Santa" means" family, religion and traditions" explains Rosa. "Our family grew up around religion, traditions and festivities. ‘La Santa’ focuses on our roots back in Mexico, where since we were kids,
our parents cooked barbacoa to sell after the celebration outside of the church on a sunny sunday."
A true family recipe.
Their father cooked the barbacoa in the "pozo"(underground pit) along with their mother who also prepared everything else.
"He has been making barbacoa de pozo for over more than 50 years." Rosa tells me. Selling barbacoa is a true family tradition as well. "When we first thought about making barbacoa in Austin, Texas and selling it, we all wanted to include 'barbacha' as part of the name of the business. [Barbacha] is a nickname which we all have been familiar with because our dad called [it] that. He adopted it into our family since our childhood". “La barbacha está lista, vámonos a venderla” which translates to the barbacha(barbacoa) is ready let's start selling it, signaled when the family would sell their barbacoa. I can totally imagine being a little kid and calling barbacoa "barbacha" - that kind of nickname is soaked in family affection, even better is that it's a nickname soaked in so much flavor.
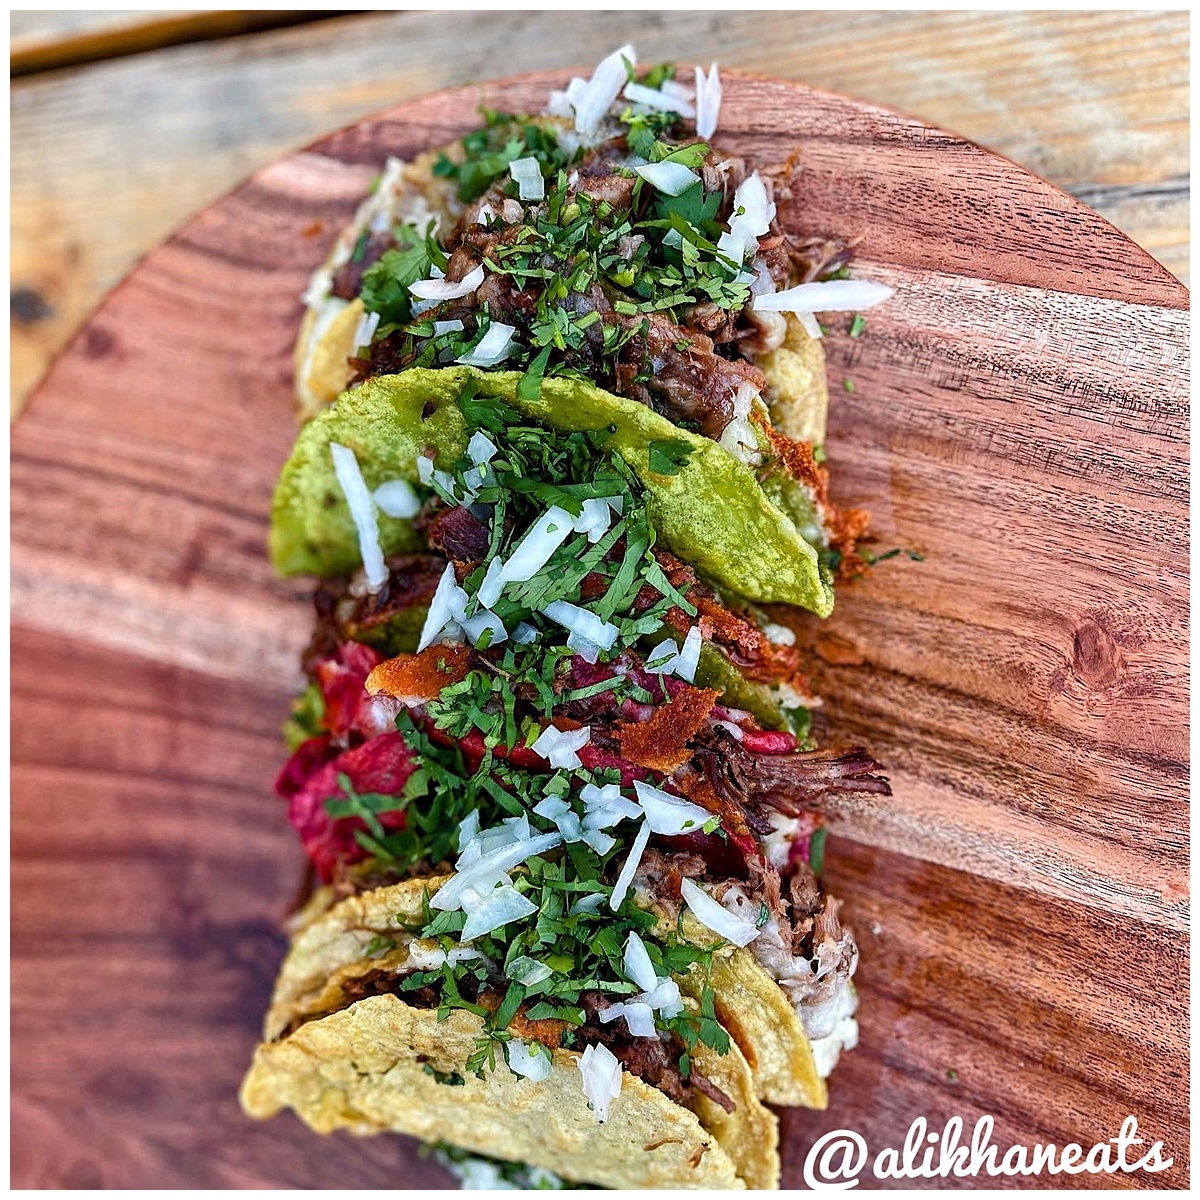
Bring friends. Try everything.
I really can't pair down a favorite item on the menu but I am stuck on getting at least one breakfast taco. Rosa recommends that first timers try the classic barbacoa, dressed with cilantro, onion and tomatillo salsa. Last year, on a scorching evening in July, I was won over by that very taco, easily the most sophisticated beef barbacoa I've had at a food trailer.
In my experience, Tex-Mex renditions of barbacoa can come off greasy and bland. Sometimes it's watered down salsa or a lack of trimming of the particular cut beef that is to blame. Or maybe it's La Santa Barbacha's use of short rib: a well marbled cut suited to the method of the cook but not as beleaguered by gristle like an untrimmed beef cheek. I'm guilty of such cooking mistakes and that pot becomes a tough sell, believe me.
Bang for your Buck Brunch
I could almost re-categorize these breakfast tacos as brunch tacos, a nod to the quality. The perfectly creamy scrambled eggs are consistent because they are cooked to order. Yes, the pride and joy of their family that is the barbacoa, La Santa's bread and butter, but the salsas are recipes easily worth keeping a family secret.
And those gorgeously colored tortillas? They are made by a process of blending the masa(nixtamalized corn) with vegetables like beet(the red tortilla), and spinach(green tortilla). "We wanted to create something colorful, fresh and authentic based on our past but presenting our future where Mexican cuisine can be elevated with simple additions making a better experience to our customers." Rosa explains. See what I mean about brunch tacos?
It's been a minute since I've been this enthused about a restaurant. Sure, $10 to $15 for some tacos out of a truck might seem expensive given the genre but these tacos defy the limits of the genre. Beyond the generous portions, there are true fine dining feels happening at La Santa Barbacha. A fine combination of family tradition and culinary ambition. Almost as fine a combination as La Santa's barbacoa, scrambled eggs and their fiery habanero salsa. And if you'll excuse me, I'm off to make a next visit right about now.
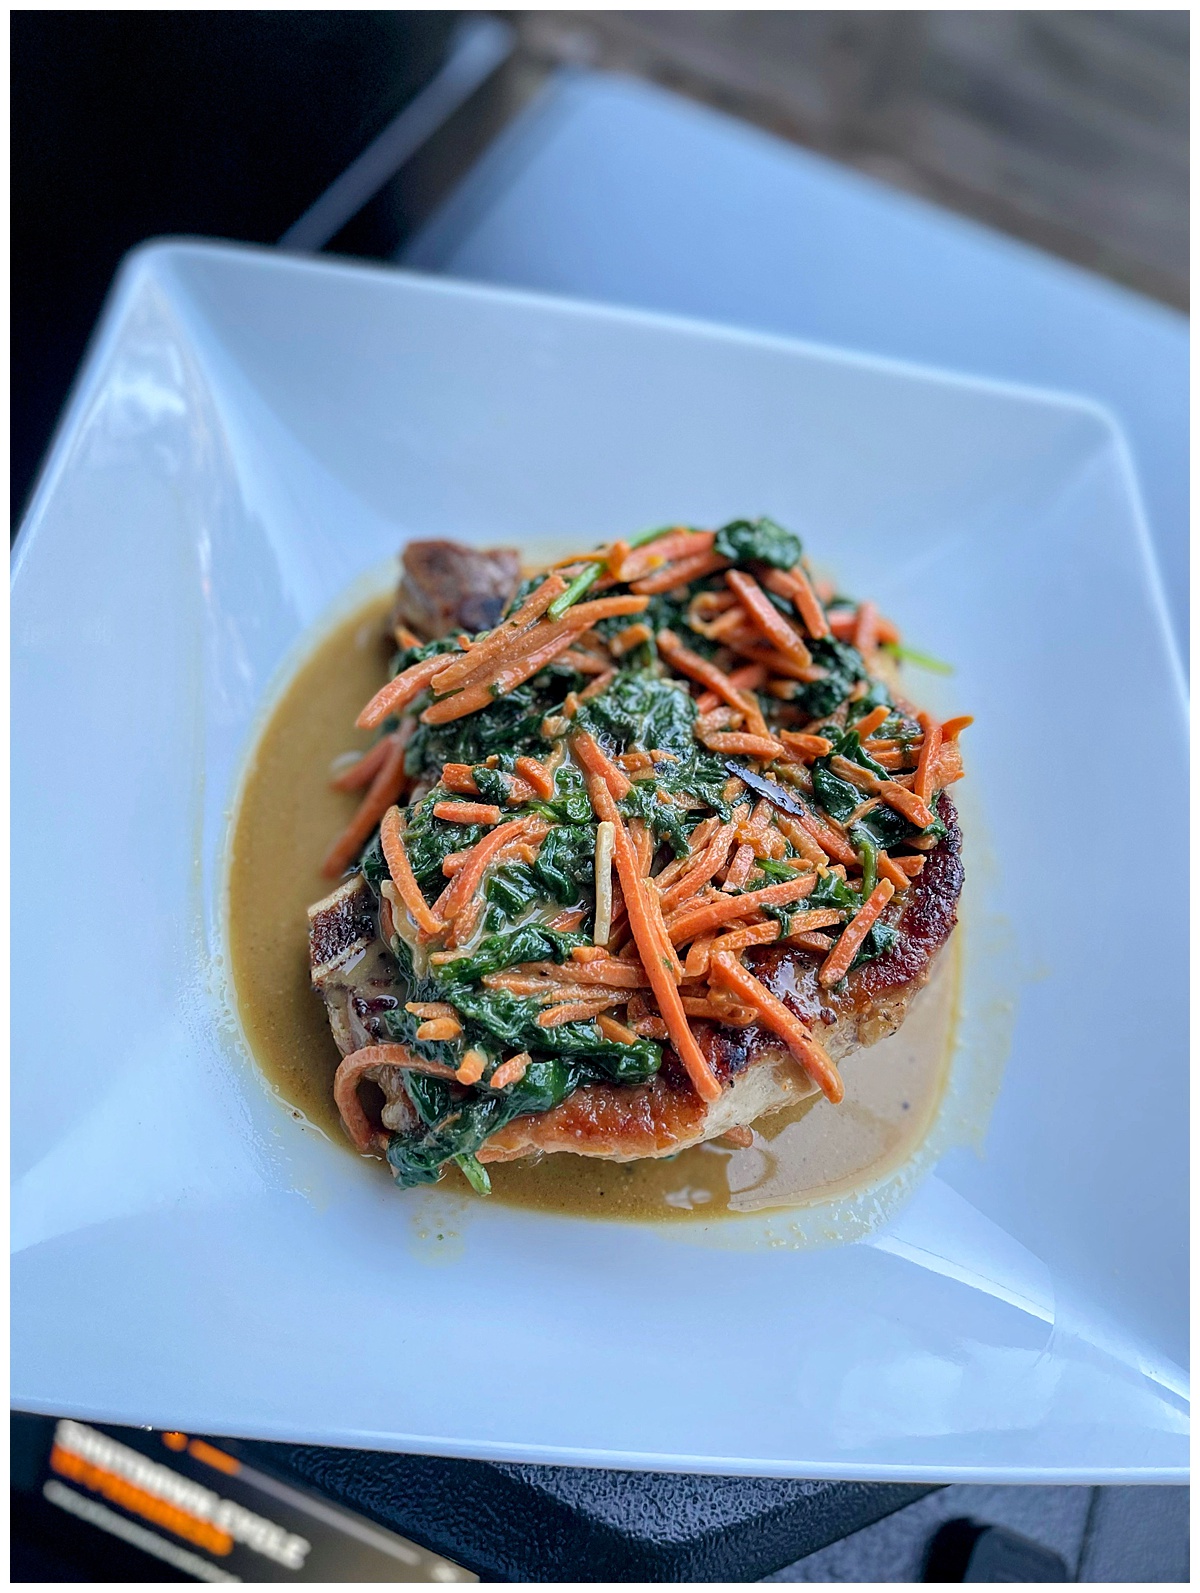
Got leftover ramen broth?
My kid loves ramen. But he really loves noodles. So whenever we buy him a $15 bowl of ramen(yeah he likes the good stuff from the popular restaurant)s, we have leftover ramen broth.
Thankfully the leftover ramen broth he leaves us is
Tonkotsu: a pork bone broth that is extra creamy because of the collagen that releases from the long simmering times. It takes a great deal of time and effort to achieve a perfect Tonkotsu broth, so you can't throw it away. Sure you could reheat it, maybe add some noodles, but what about an ultra rich pan sauce for pork chops? Yeah, I think so too.
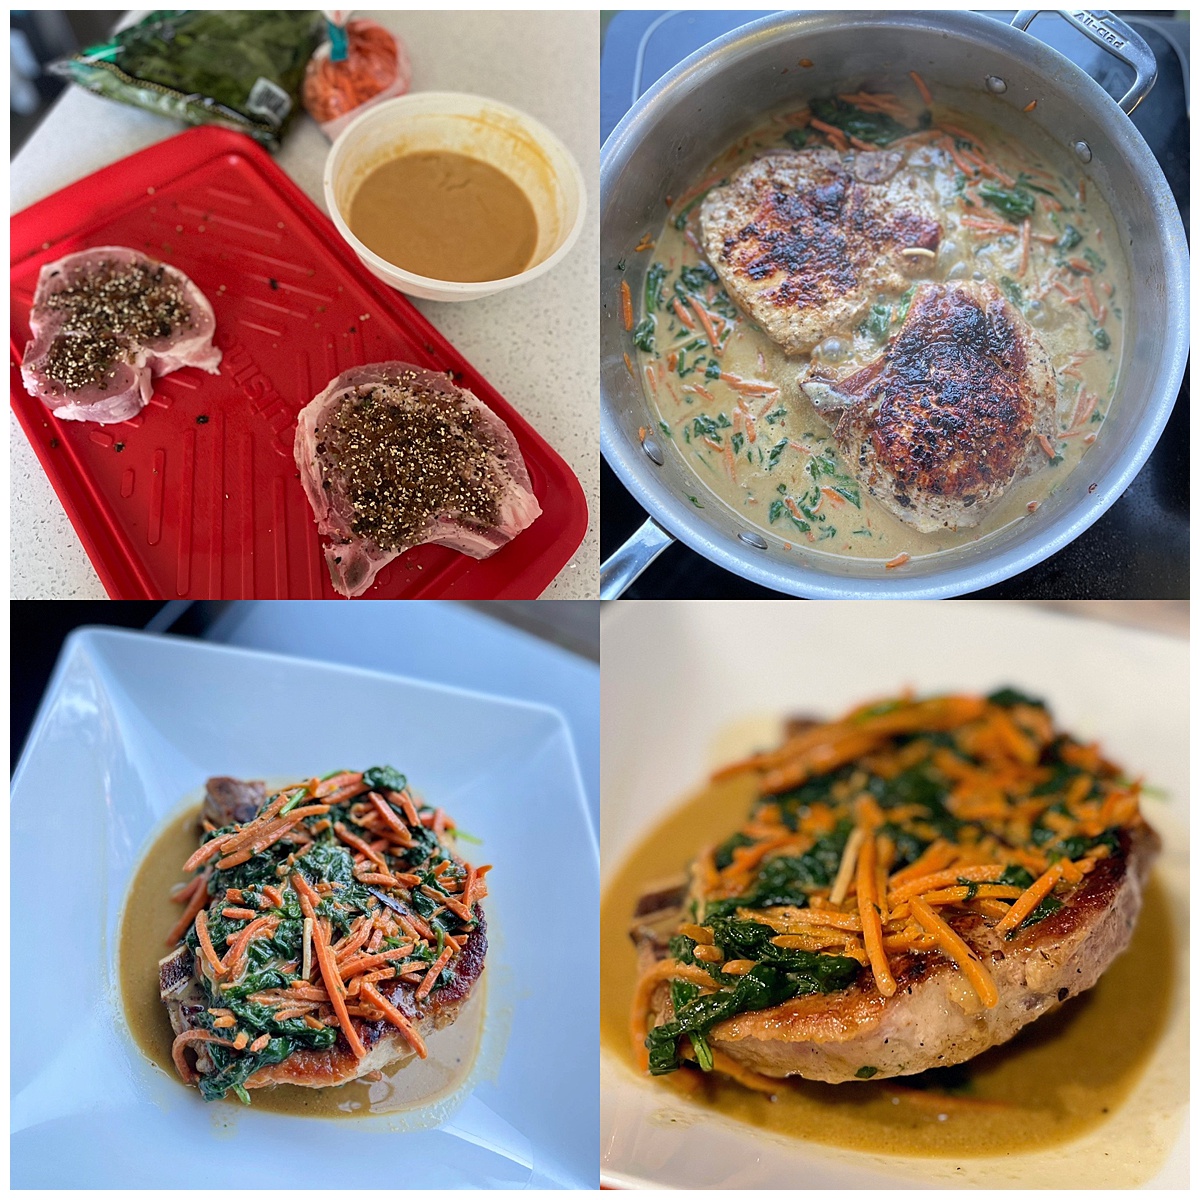
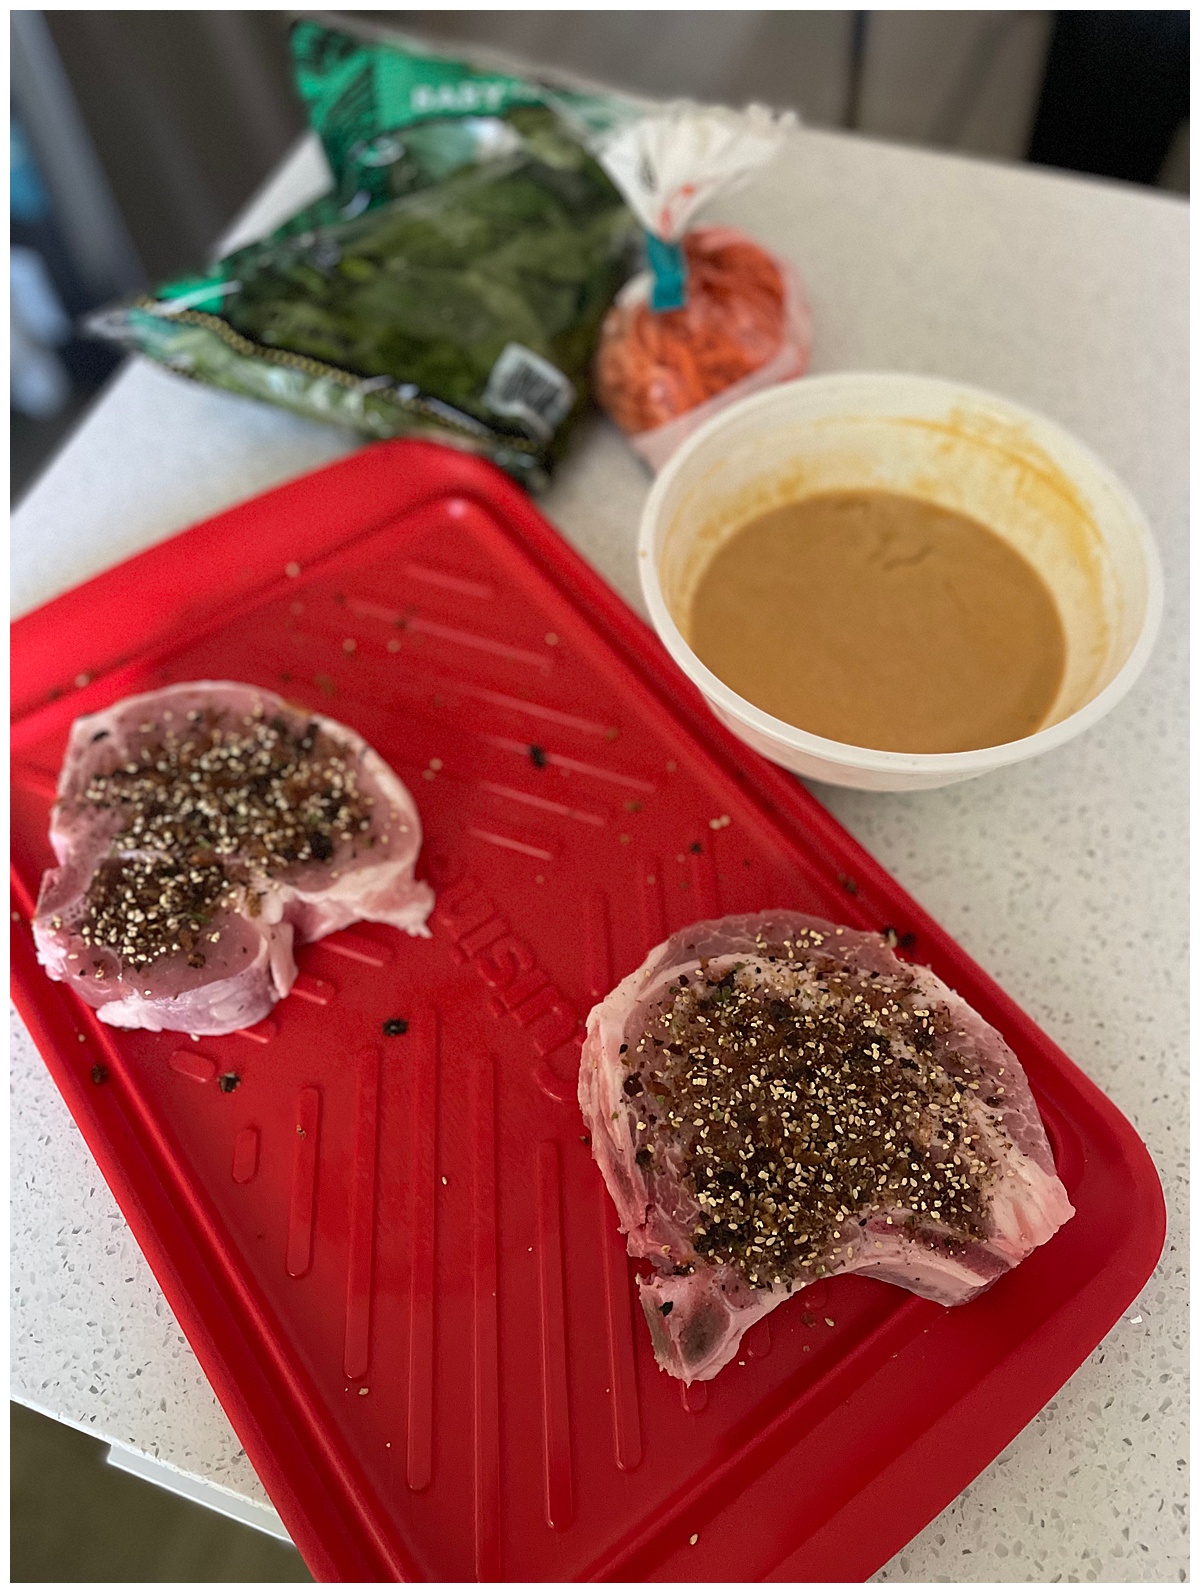
Ingredients:
- 1 cup leftover ramen broth(Tonkotsu)
- 2 thick cut supermarket bone in pork chops
- 1 bag of baby spinach
- 1 cup shredded carrot
- 2 tablespoons Furikake
- 2 tablespoons Avocado oil
- 2 tablespoon Sesame oil
Steps:
- Season Pork chops(see note directly below)
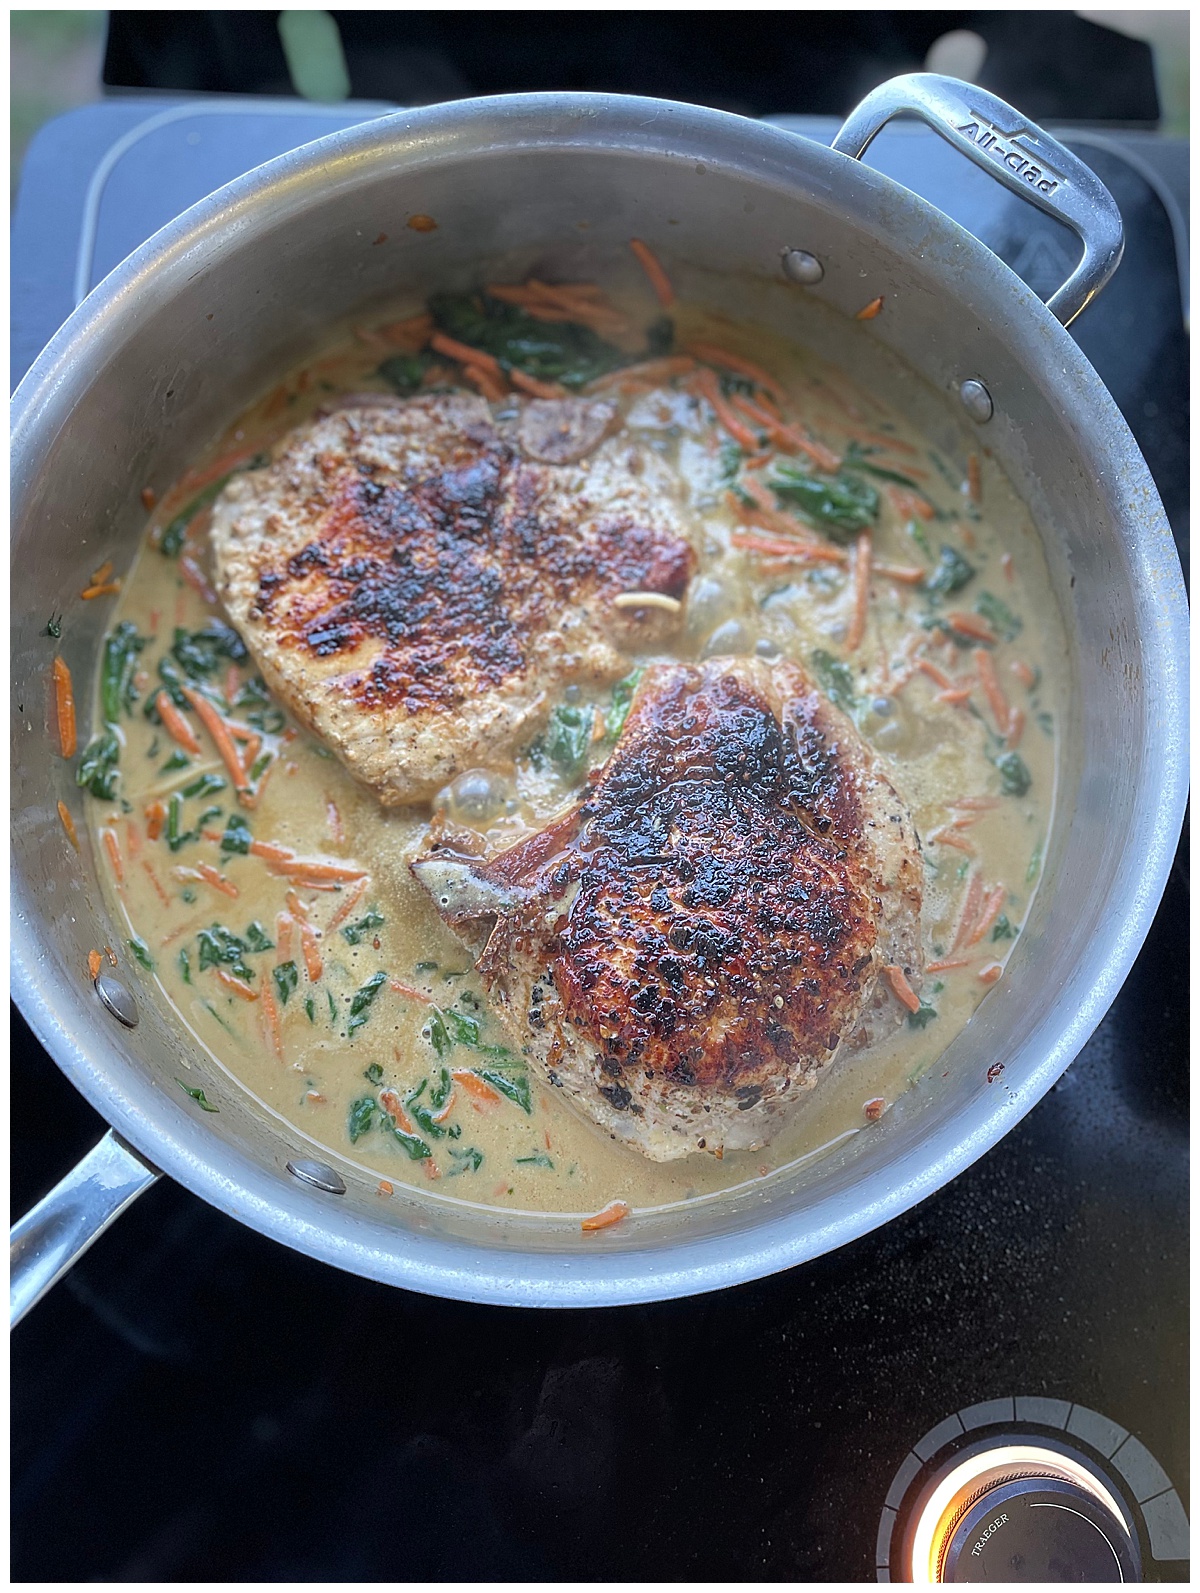
- Add avocado oil heat pan over medium high heat
- Add pork chops and sear about 5 min a side till temp hits 135 degrees and reserve on a plate
- Wipe out pan(if using Furikake seasoning method)
- Add sesame oil over medium heat
- Add carrots and cook for 5 minutes or when the edges start to darken
- Add bag of spinach cook till wilted, season to taste with salt but you won't need much because of leftover ramen broth
- Add leftover ramen broth, simmer for a few minutes
- Return pork chops to pan. Simmer in sauce till internal temp of pork chops hits 145 degrees. Then serve.
*you might want to reconsider this but . . .
I seasoned my pork chops with
Furikake, which is a Japanese seasoning typically used as a topping for rice, fish, and vegetables. I've used it as a rub to
slow roast salmon at moderate temps(300 degrees) and really enjoyed the umami flavors the seasoning brings. I rubbed the pork chops in Furikake and seared them in the pan. It made for a lovely tasting pork chop but
you will need to wipe out the pan before making the rest of the dish as the cooking the seasoning over high heat will leave bitter notes.
Leftover ramen broth looked about as good as I imagined.
And it tasted just as good too.
I would absolutely make this again with leftover ramen. I suppose this is a recipe hack but it's also a reminder that Tonkotsu broth is arguably a sauce and with a little simmer can make for the most decadent pan sauce for meats, especially pork chops.
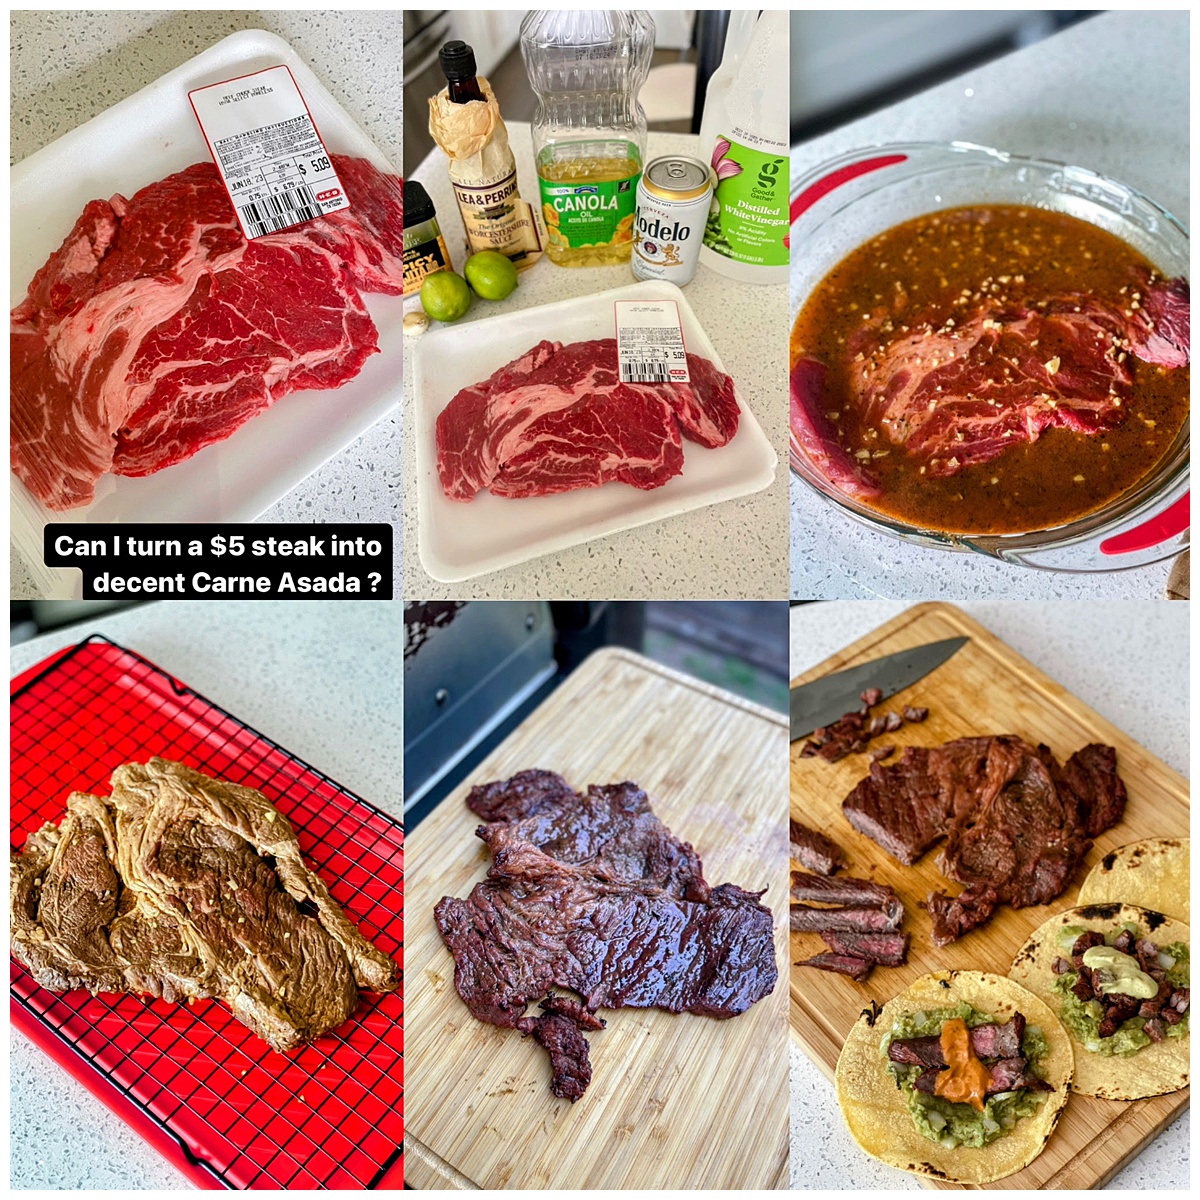
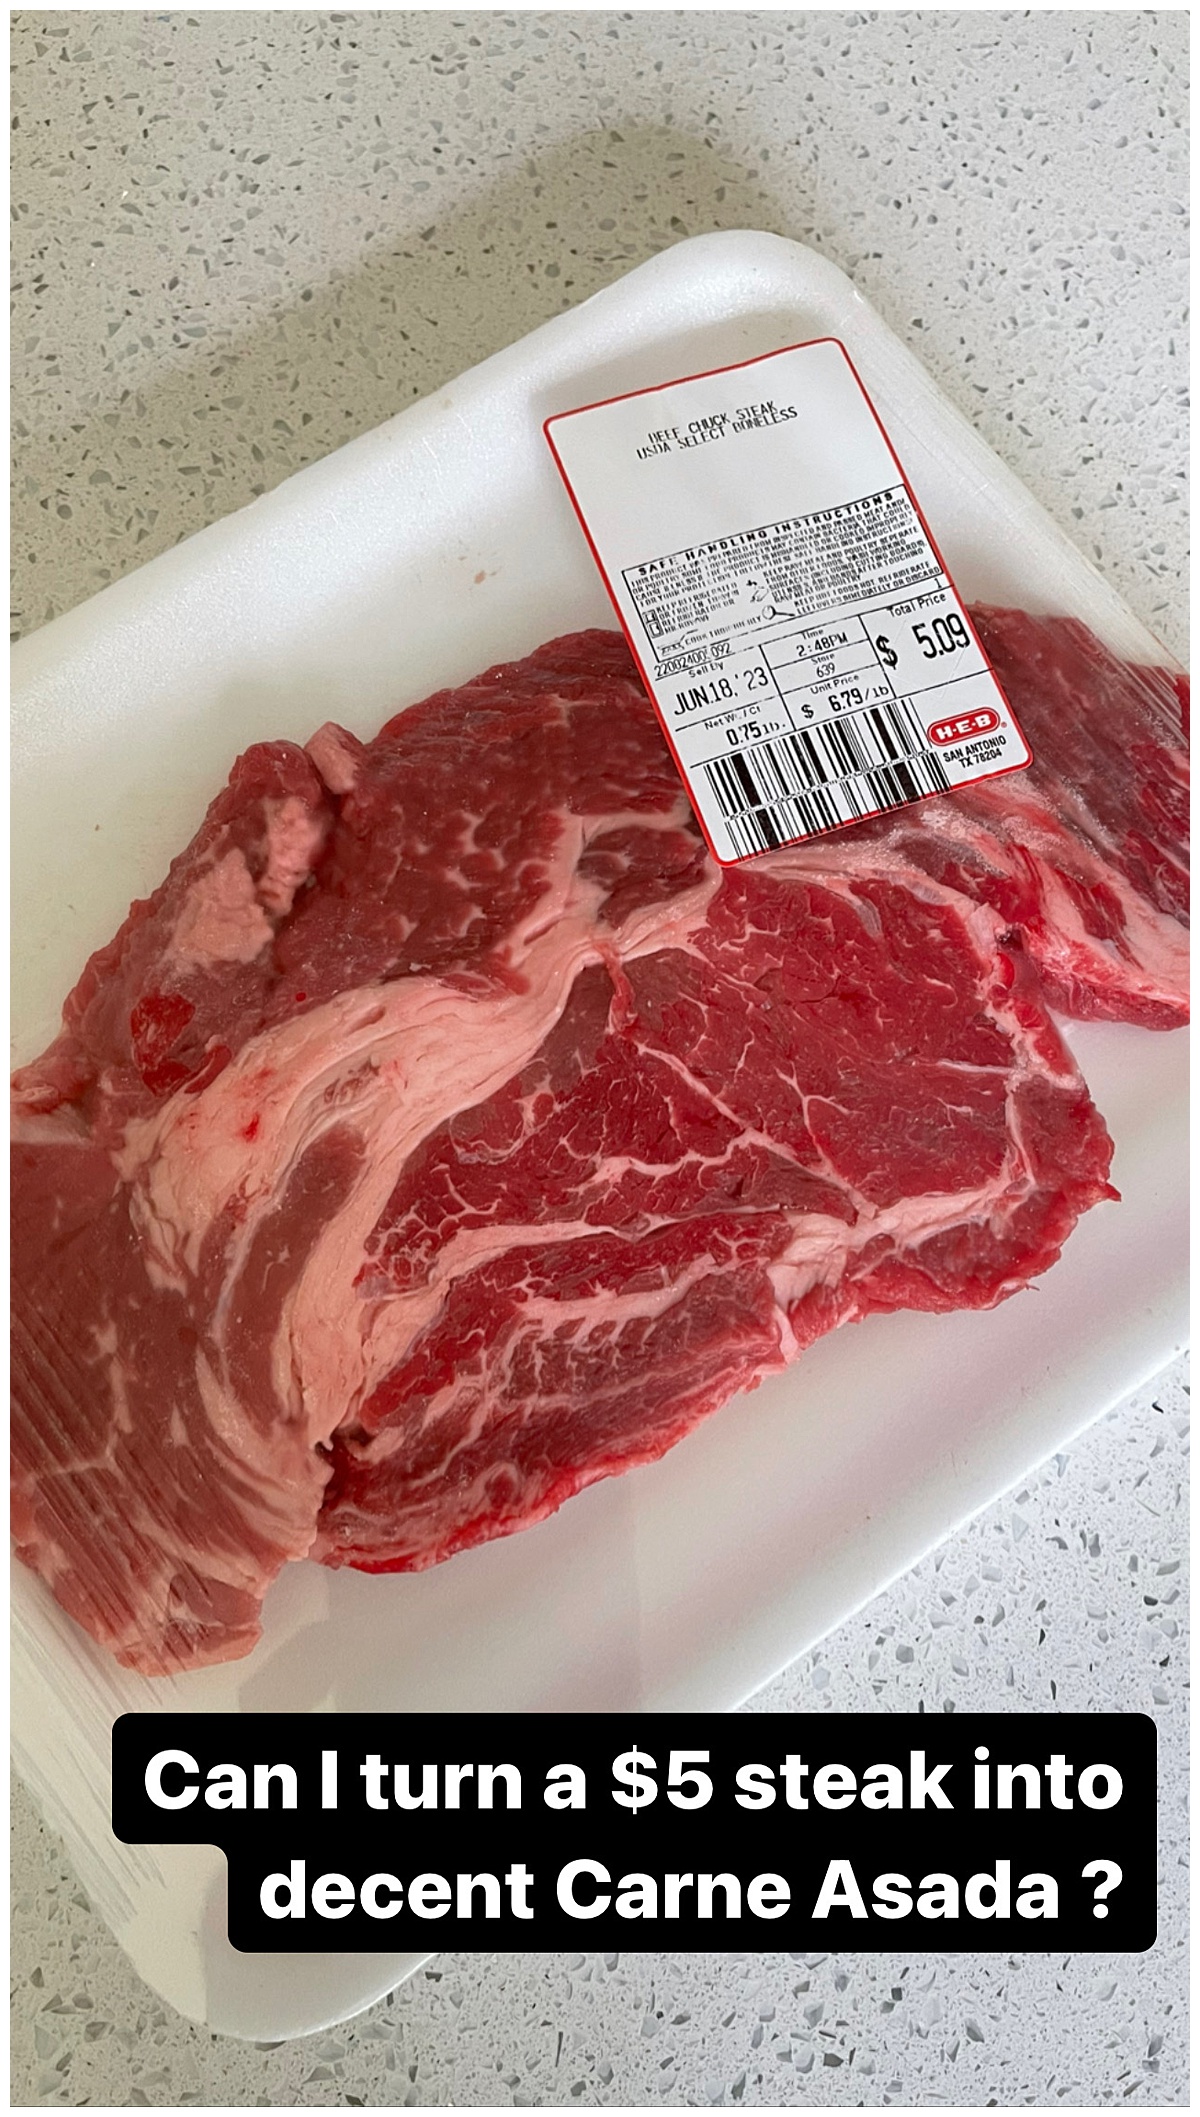
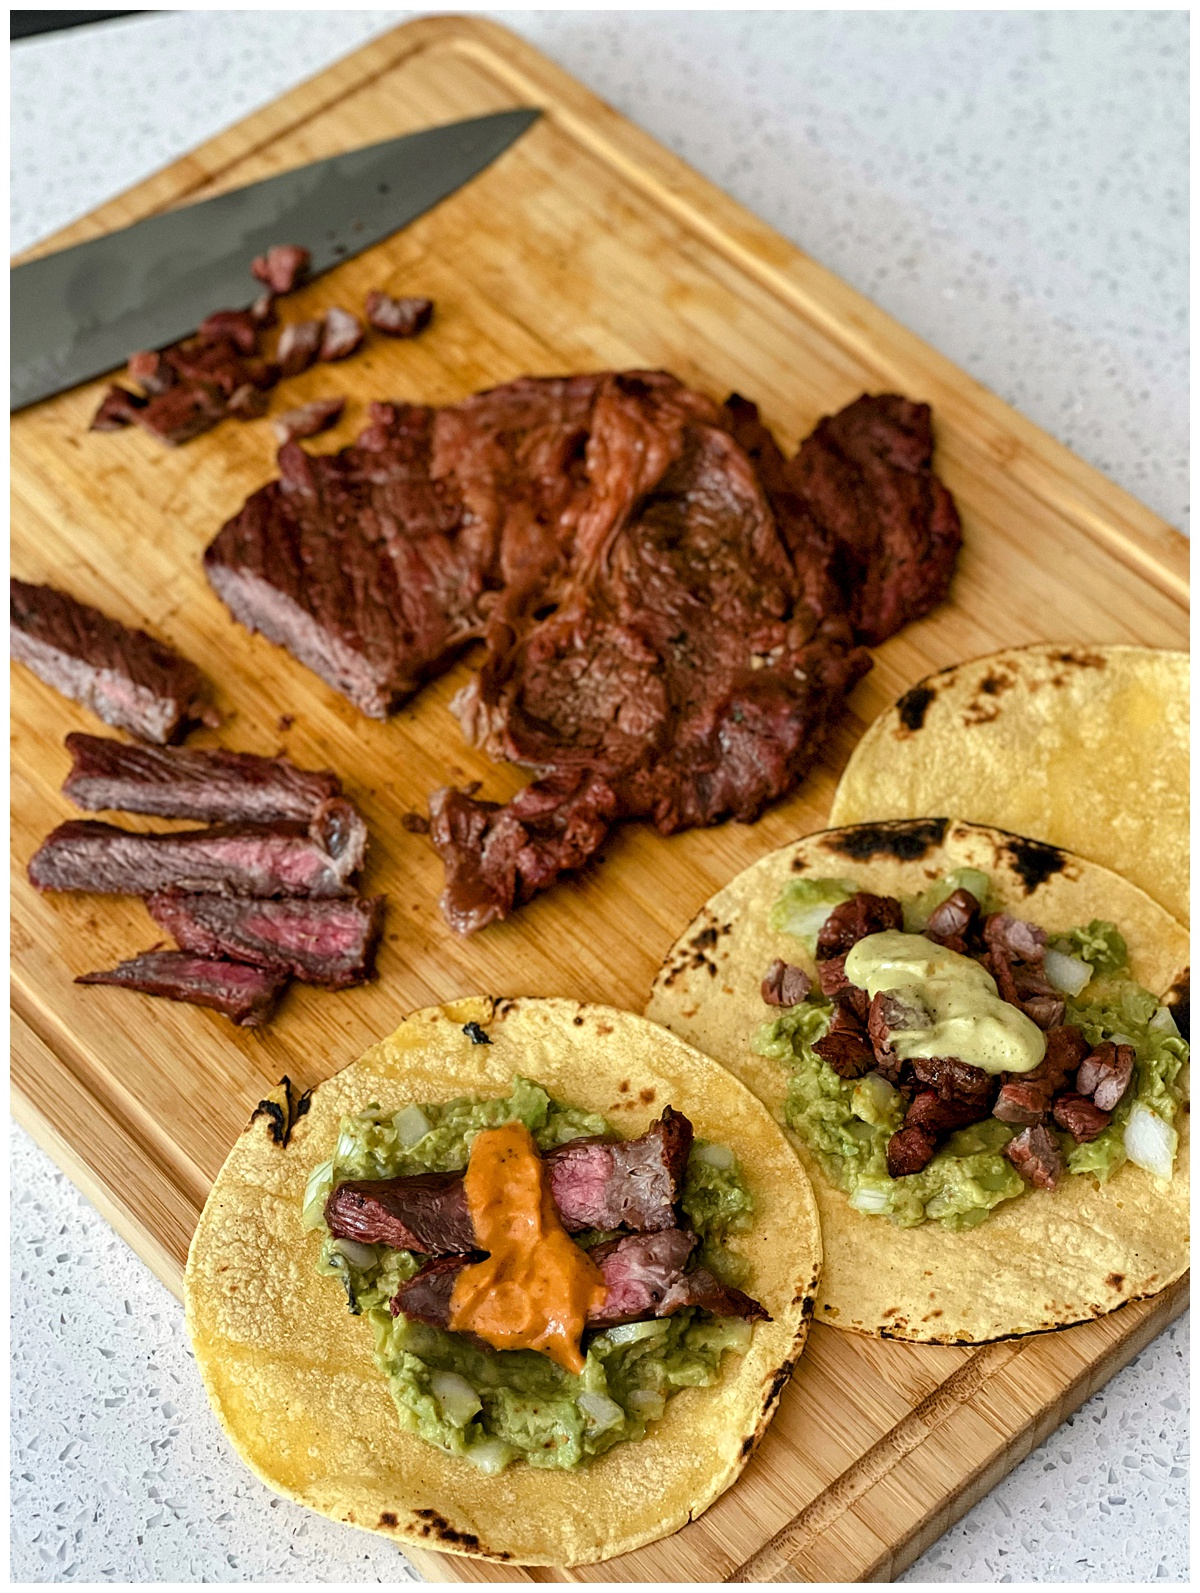
Can a good Carne Asada marinade work miracles on a lesser cut of meat?
I mean, that's the dream right? A good Carne Asada marinade were created to transform tougher cuts of steak into splendid steak tacos. But is there a limit? What's the threshold of acidity and spice when sized up against a cut of beef like chuck steak? I decided to find out.
What is a Chuck Steak?
I literally googled that and came across a great article from Spruce Eats you can read
here. The broad strokes are that from the shoulder of the cow, where one finds chuck roast(great for stews), you
can find decent steak cuts. Full service butcher shops will break this steak down into
Chuck Eye steaks, Flat Irons and Petite Tenders. The first two are excellent steaks to cook for the money in my experience. The Petite, not my fav tbh.
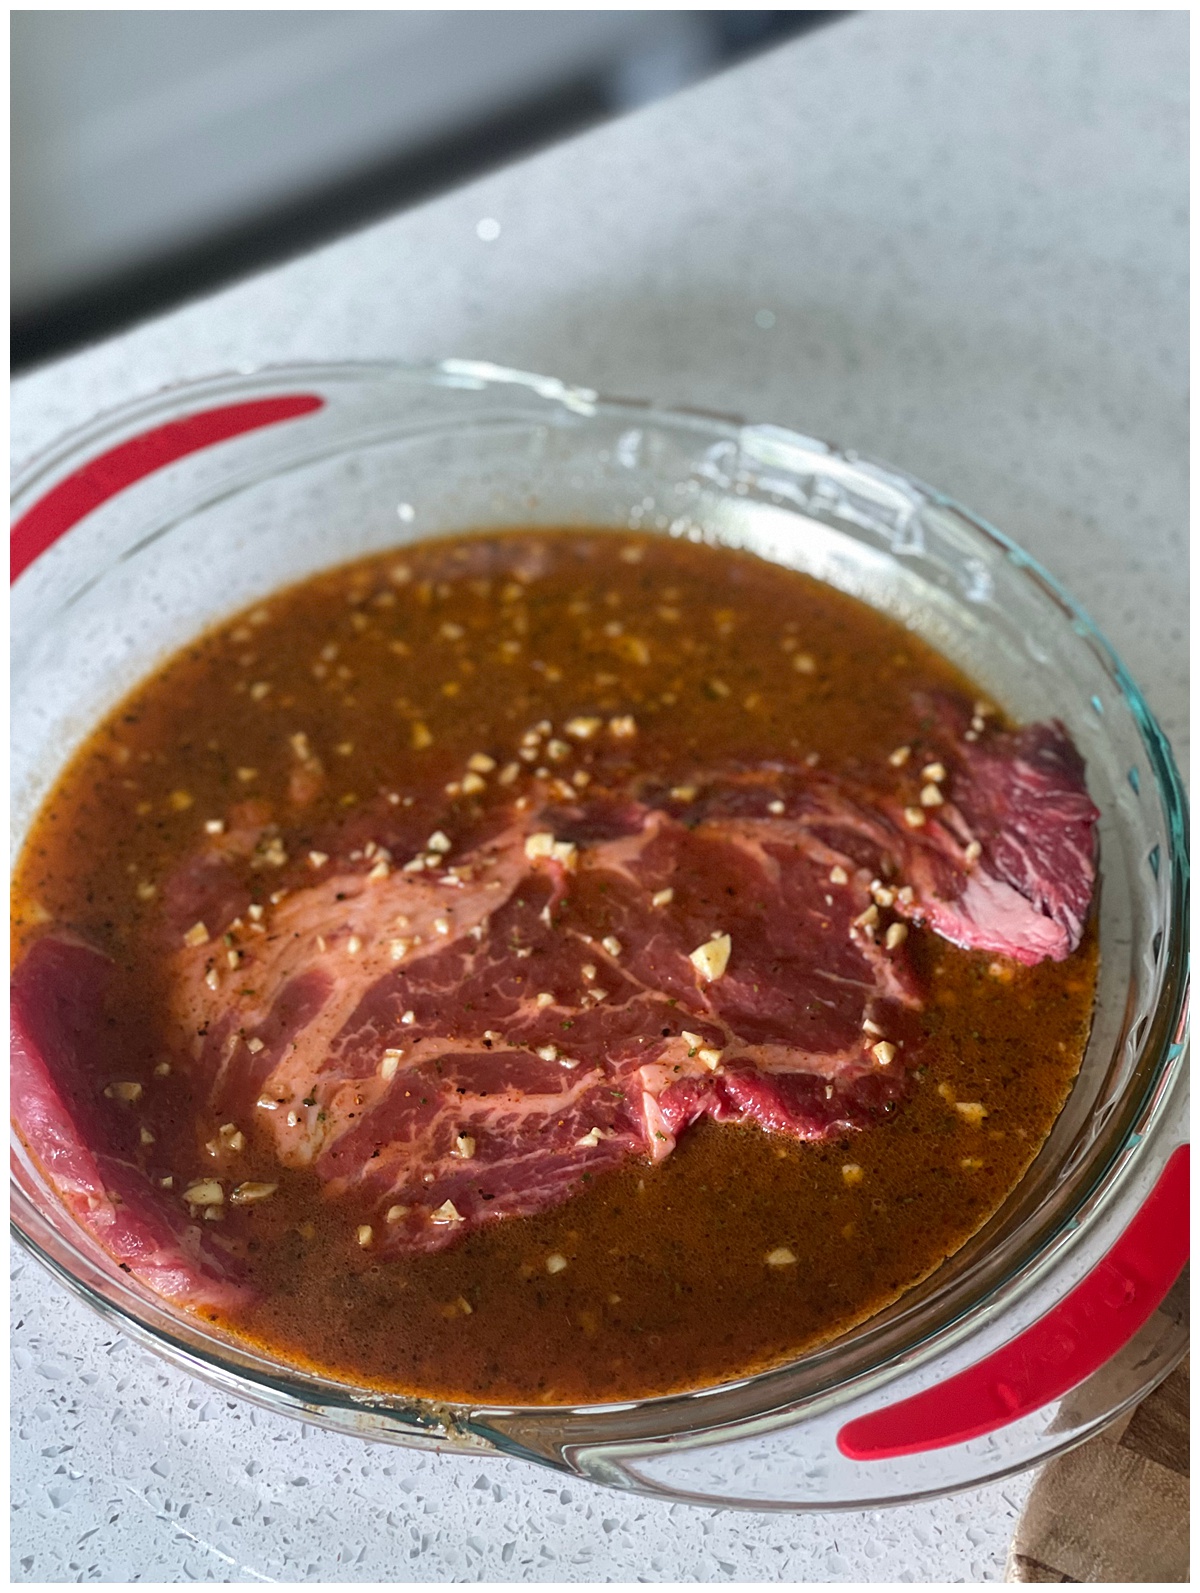
The cut I got was essentially a catch all of those cuts plus some fat/gristle and plus some tougher cuts. It was also $5 for a 3/4lb slice. Time to find a marinade.
From the pages of Food & Wine magazine . . .
Asada: The Art of Mexican Grilling is a cookbook by Bricia Lopez and
Javier Cabral. I've followed Javier's work for years when I was a fellow Los Angeles based food writer. This recipe hits all the notes of Carniceria style Carne Asada Marinade punch, down to the beer. If there was going to be any Carne Asada marinade that I thought could transform this cut into actual Carne Asada, it would be this.
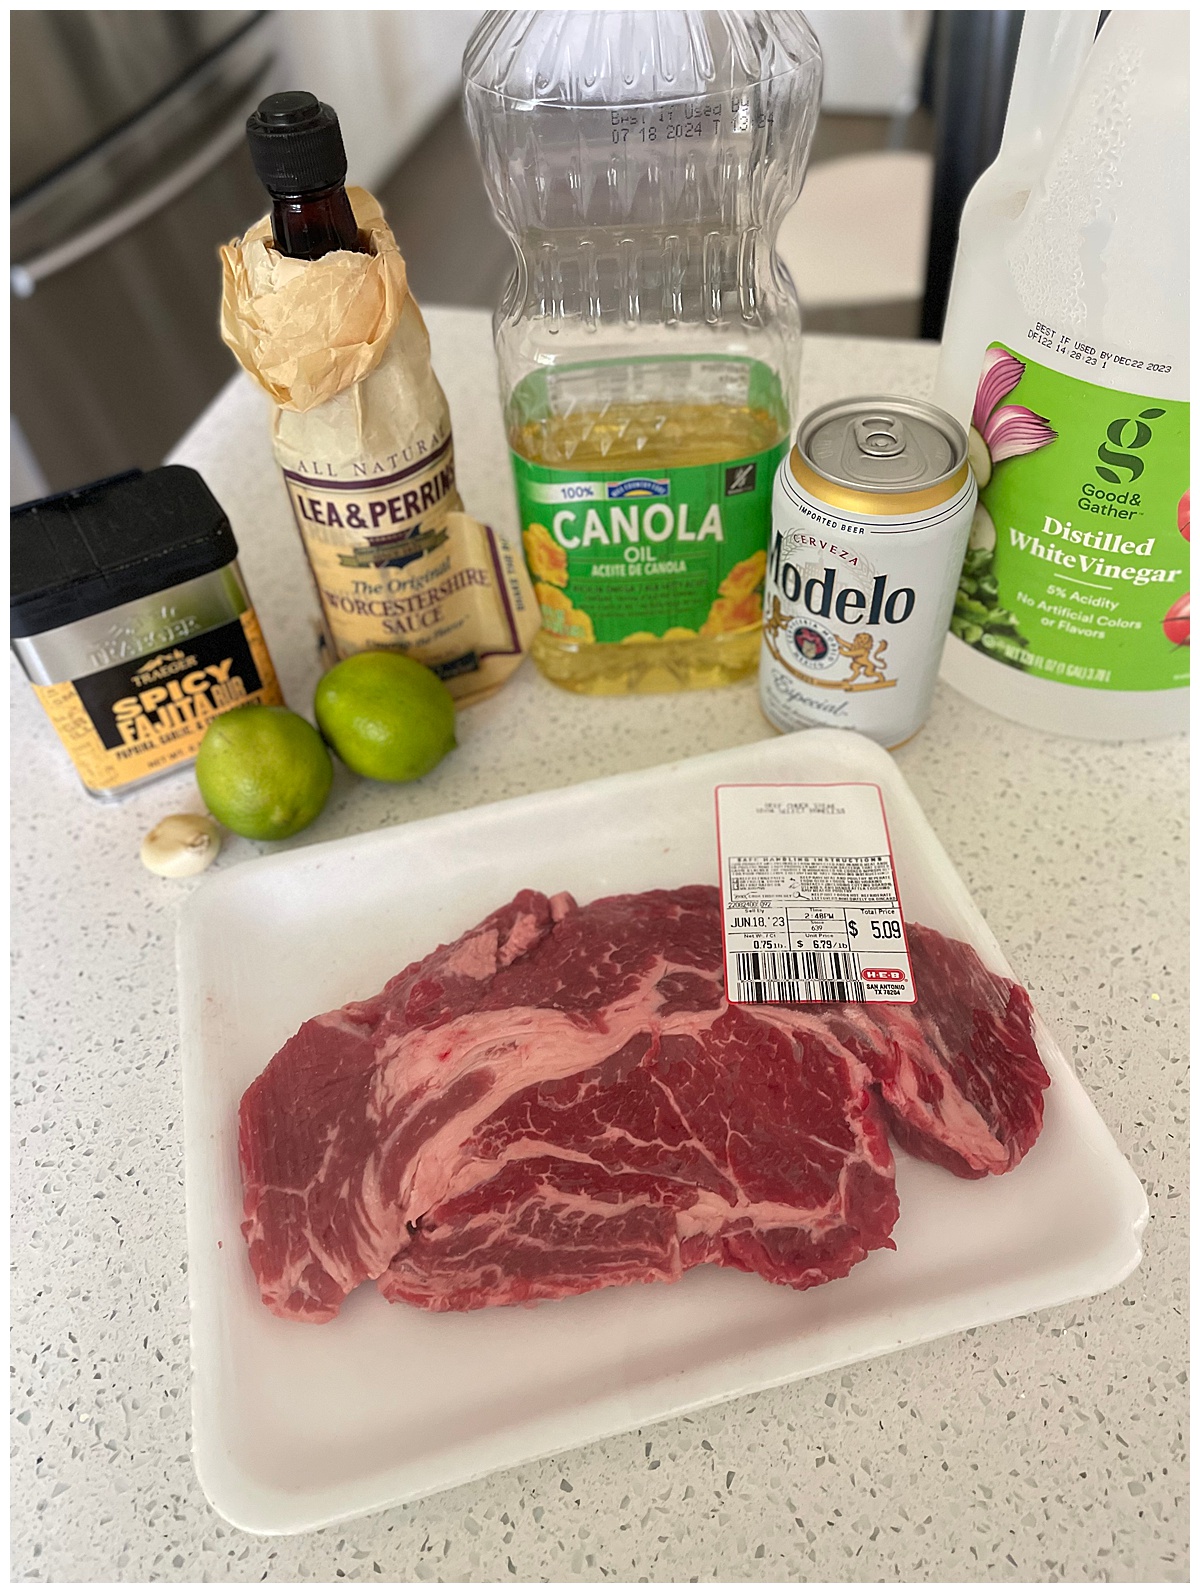
*note: I subbed the spices in the marinade for a catch all Fajita spice rub from Traeger Grills. I love this rub and use it all the time when I grill flank steak for tacos.
Marinade: (enough for 1lb)
- 1/3 cup Modelo beer
- Splash of OJ
- Splash of White Vinegar
- juice of 1 lime
- 2 tbsp Canola Oil
- 1 tbsp Worscertshire
- 1 tbsp chopped garlic
- 2 tbsp Traeger Fajita Spice Rub
Steps and Technique
- in a small bowl whisk all ingredients of marinade
- Pour over steak and seal in a plastic bag
- marinate for 6-12 hours
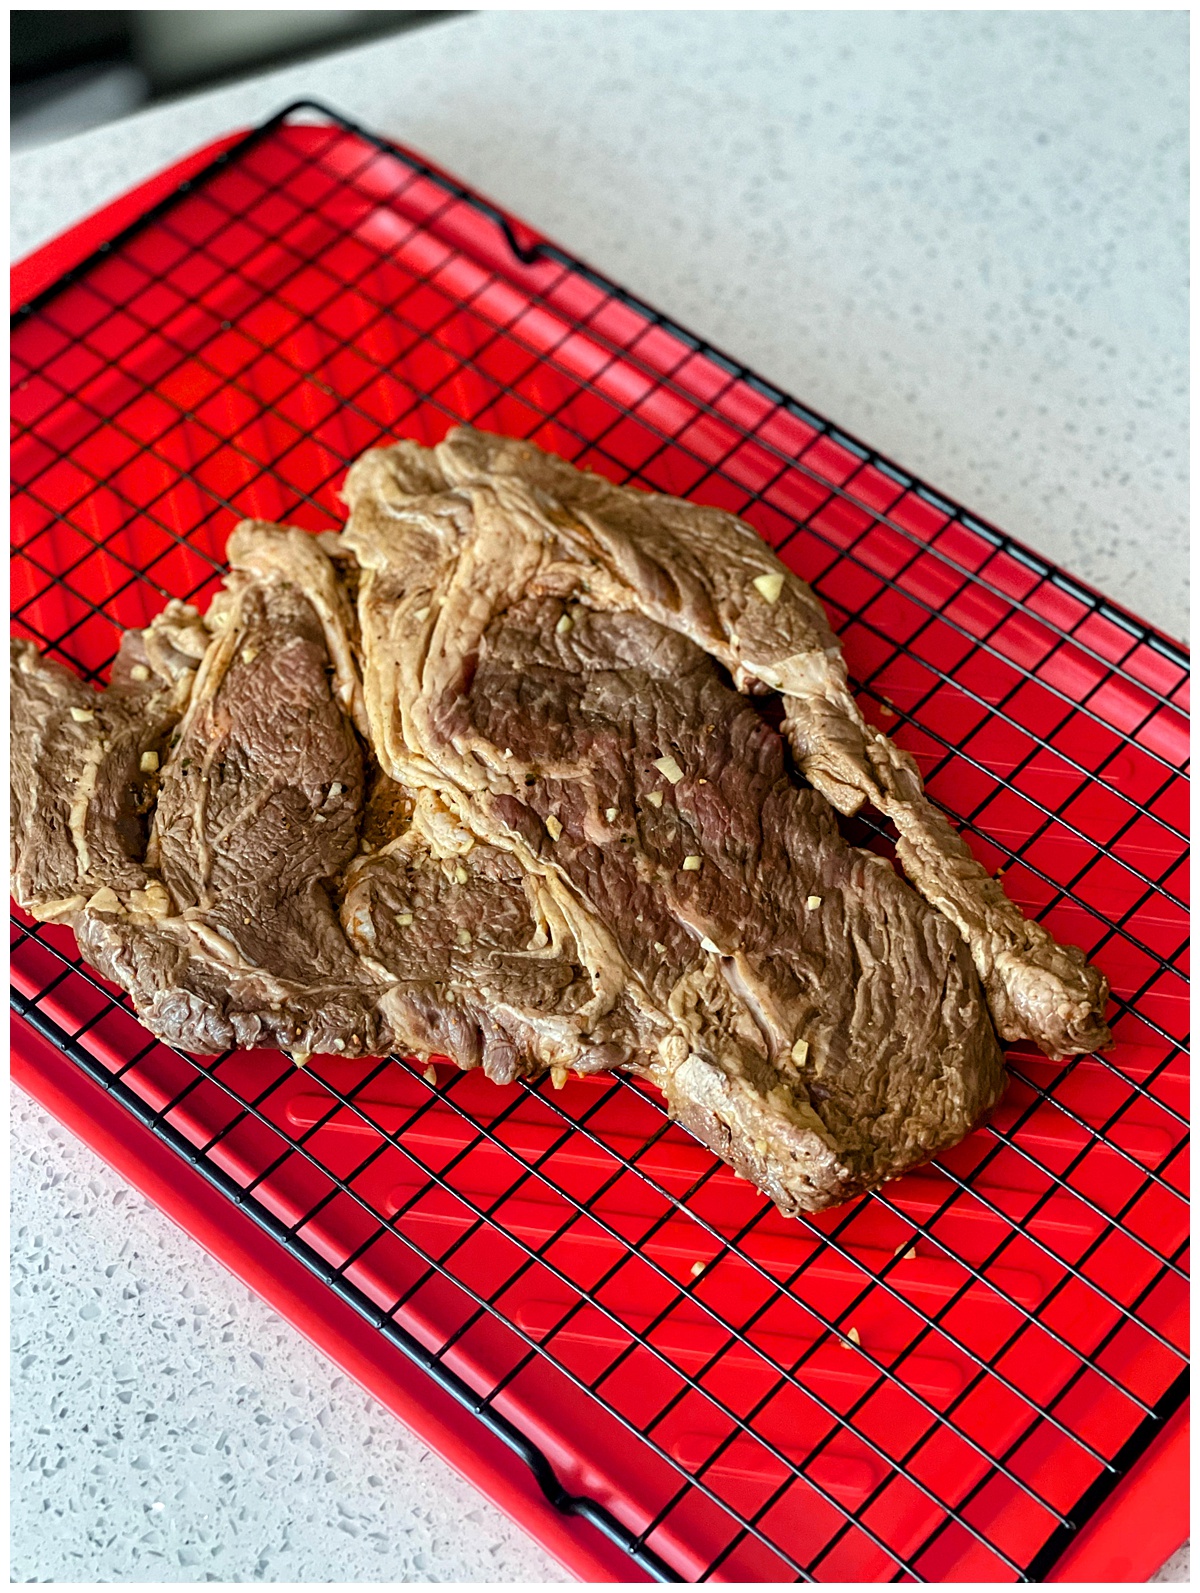
- Remove from marinade, pat dry with paper towels
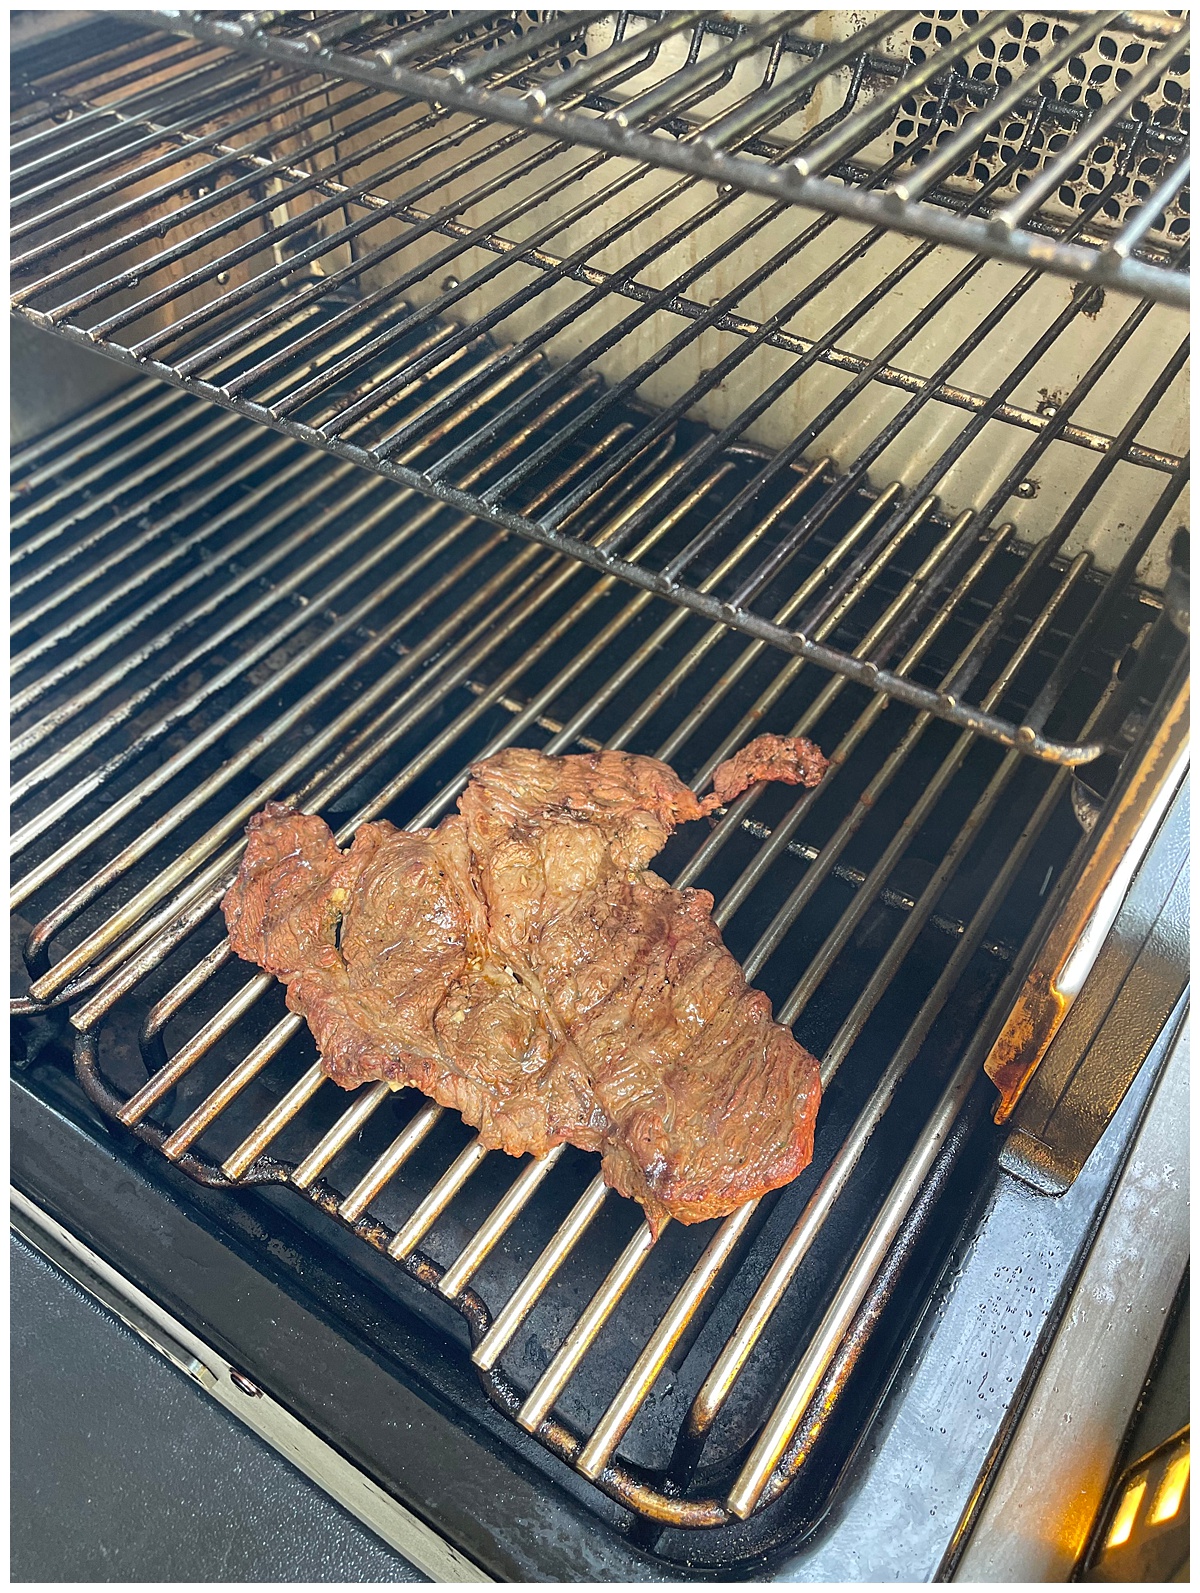
- Grill till medium(140 degree internal temp)
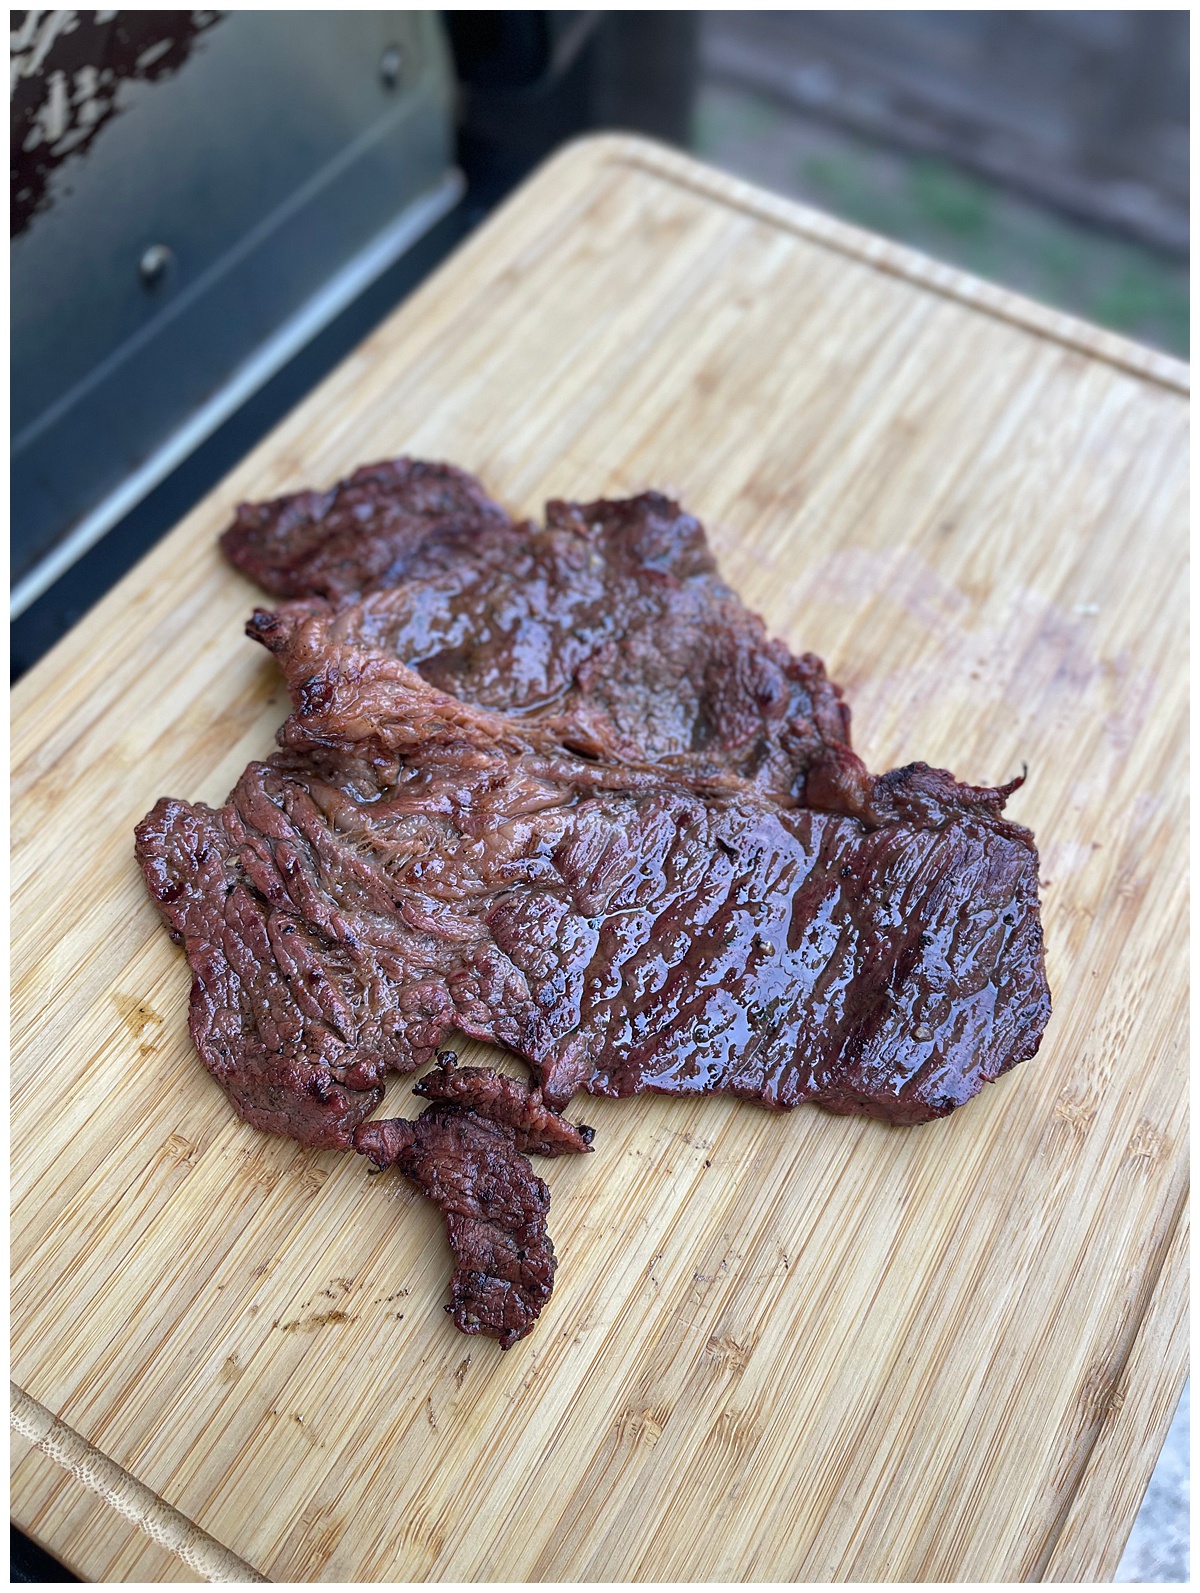
- Rest, than chop meat to use as taco filling
- Serve on corn tortillas with guacamole and salsa of choice
The Verdict:
The Carne Asada Marinade turned the Chuck Steak into a passable Carne Asada. For what it's worth, I marinated for 24 hours which IMO was overkill. Especially with beer in there, I would say 6 hours is enough. When it comes to tenderizing the meat, the acidity of the marinade does do the job. Still, when I typically make Carne Asada, I tend to let the quality of steak, my salsas and the tortillas do the talking.
At almost $7 a pound I could have gotten my go to: grass fed flank steak for $10 a pound. That steak requires little besides a hot grill and plus a dry rub/salt & pepper. So was the effort of making this Carne Asada marinade on a $5 steak worth it? No. If I was cooking for a huge crowd, I could see myself going down this road again but the Chuck Steak I plucked from supermarket was the best of the lot. The rest looked a lot less marbled and kinda beat.
Thoughts on a sequel
I would give this marinade a second run on inside skirt, which is tough enough to warrant this effort and can be far more flavorful if you upgrade to USDA Choice or grass fed or sourced from a farm.
The big takeaway:
I've never been one to pat dry meats after marinating them. I figure why not keep all that flavor in the marinade right? Well, it turns out that even if you pat dry the steak and ditch the excess marinade, the flavor remains and you get a way better sear.
Even on a Traeger that doesn't have an open flame under the cooking grate,
you will get a good sear if you remove your meats from the marinade and
pat them dry.
Definitely try this method and give the marinade a test drive. I think it could really sing if cooked over hardwood charcoal . . . if only it wasn't triple digits right now.
https://www.tiktok.com/@alikhaneats/video/7206691285158186282?is_from_webapp=1&sender_device=pc&web_id=7200438834697946670
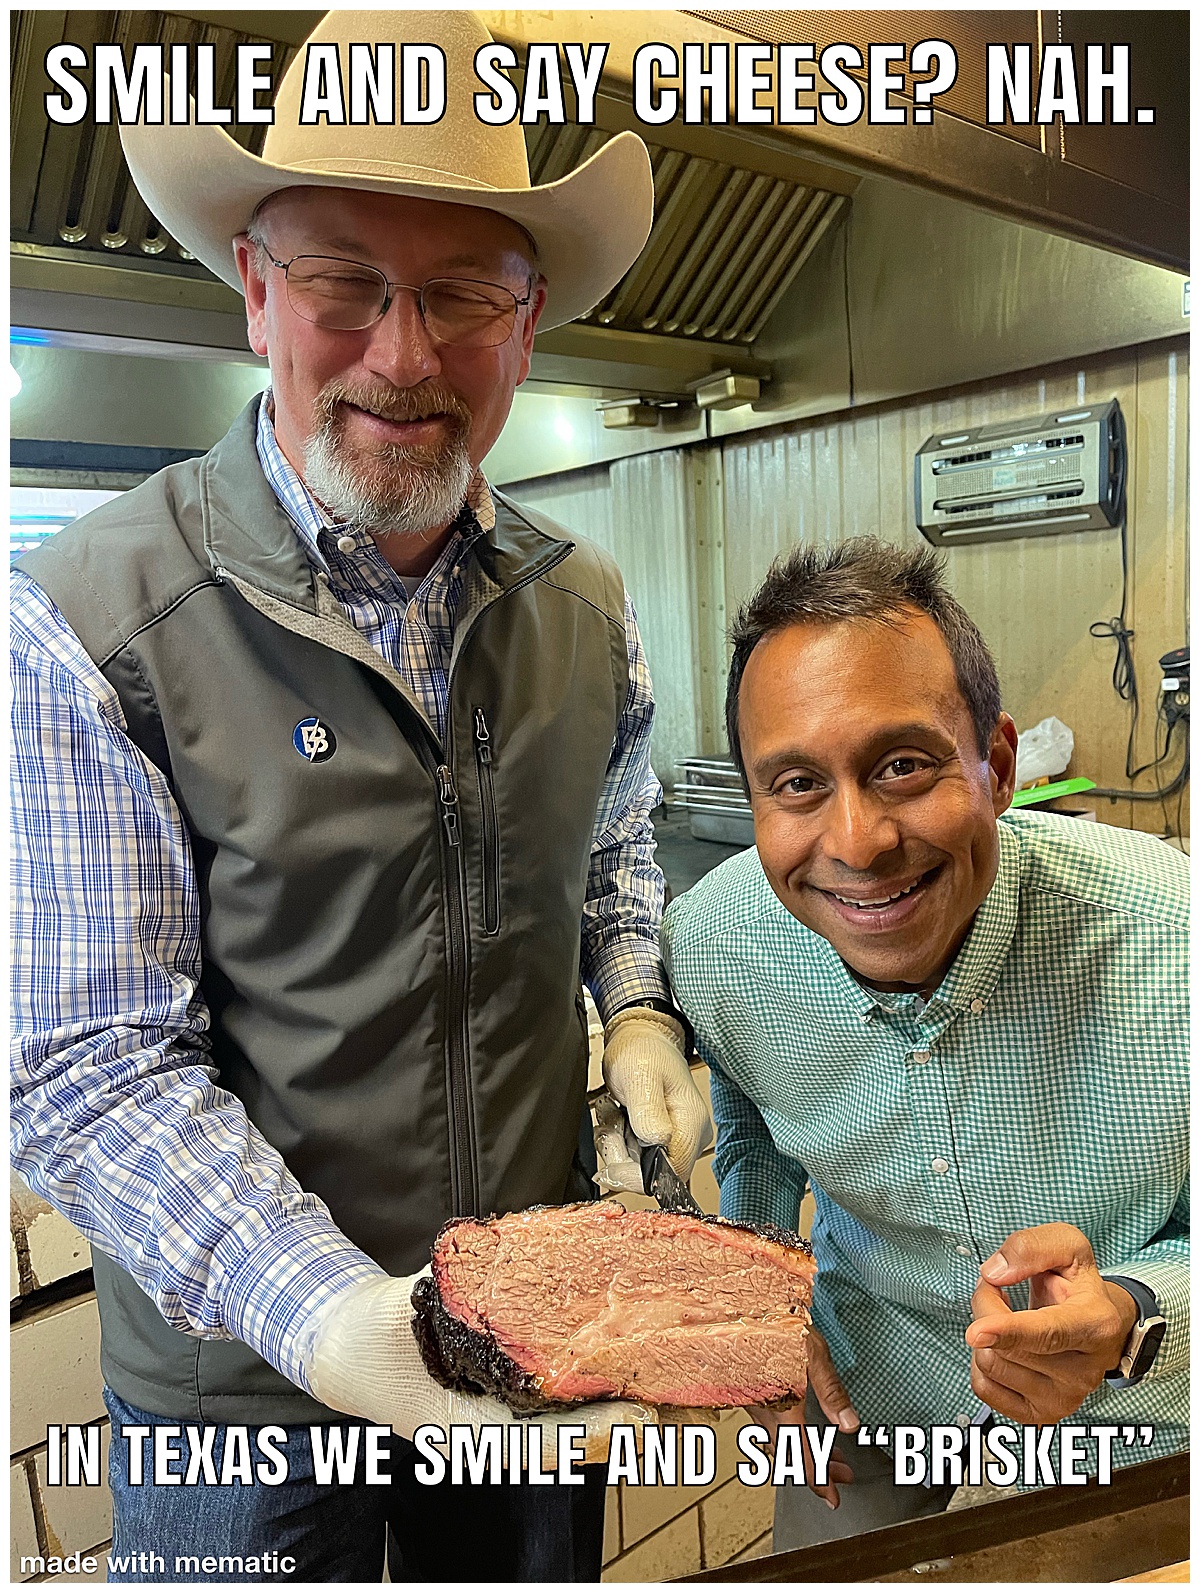
Yes, you can smoke brisket at home
The idea of cooking a brisket for the first time is daunting. And it should be. Preparing this substantial cut of beef perfectly, takes time, skill, and attention to detail. But don't worry! You can learn the art of making smoked brisket with enough practice and some free expertise. I’ll go over all the information you need to know, including when to wrap the brisket, in this beginner's guide.
First, let's talk about what brisket is.
A particular cut of beef called brisket is taken from the cow's breast or lower chest. It is a substantial, delicious, and tough cut of meat that is well-suited for slow roasting, braising, and other slow-cooking techniques. The point and the flat are the two basic components of a brisket. The point is fattier and more marbled, while the flat is leaner and more evenly shaped. Sometimes the two components are sold separately and often at barbecue restaurants they are sold individually as some prefer one over the other.
A hallmark of Jewish cuisines as well as American Barbecue, brisket is a heavyweight entree worthy of special occasions and holiday dinners. In American barbecue, brisket is rubbed in spices smoked for many hours, traditionally in an offset smoker fueled by wood. Jewish cooking frequently involves braising brisket in liquid and aromatics until it is fall apart tender. Recently Mexican cooks have turned to brisket to make barbacoa, which involves slow-cooking the meat in a pit wrapped in leaves for hours till tender or using it in a stew called birria.
In any scenario, brisket needs a lot of cooking time to break down the connective tissue and become soft because it is a tough cut of meat. When it does become tender it also becomes astonishingly flavorful, with an intense beef flavor that arguably has no rival.
Prepare your brisket
To pull off the holy grail of smoked meats, shop wisely. It's crucial to choose a brisket that is fresh and well-marbled. The quality of the beef is crucial. Don’t skimp on price especially during your first go round. Choose USDA choice or Prime and go to a trusted butcher when possible.
The trim is critical. Trim off any excess fat from the brisket, leaving about ¼ inch of fat on the meat. This will help the smoke penetrate the meat and prevent the brisket from becoming greasy. Next, season the brisket with your favorite rub. You can use a store-bought rub or create your own by combining salt, pepper, garlic powder, and other spices. Highly recommend watching this video from BBQ legend Aaron Franklin on prepping a brisket here.
Smoking your Brisket
The process of smoking entails continuously exposing the meat to smoke produced in a smoker. The flavor of smoke is a hallmark in the experience of barbecued brisket. Maintaining a constant temperature and smoke level during the cooking period is crucial for properly smoking a brisket. This entails utilizing a smoker with accurate temperature control and adding wood or charcoal as necessary to keep the smoke level constant. Pellet grills like Traeger have become synonymous with first timers making brisket because of the consistent temperature control and the long cooking times required.
In my Traeger grill, I set my temp to 225 with the super smoke setting to do a brisket. In a traditional offset smoker you could go as high as 250, even 275 degrees. If you’re setting up a charcoal grill to smoke, you will need an accurate temperature gauge to monitor the heat. Consistent heat at temps around 200-250 degrees are key. And that has to be maintained for 12+ hours depending on size of the brisket.
When do you wrap a brisket?
The question “When do you wrap a brisket?” is a big question newbie brisket smokers. Briskets are frequently wrapped during smoking to preserve moisture and softness and to hasten the cooking process. The level of bark (crust) desired, cooking time, and personal choice all play a role in determining whether to wrap a brisket.
The Texas Crutch
After a few hours of smoking, this method entails wrapping the brisket with foil or butcher paper (also known as the Texas crutch). The brisket will cook faster, retain moisture, giving you a juicy brisket when you wrap butcher paper, especially in foil. The brisket produced by this approach tends to have a softer bark and less smoky flavor, but it will cook faster, keeping your cook around 12+ hours vs 17+ hours.
No Wrap
As an alternative, you might decide to smoke your brisket without any sort of wrapper. If not carefully supervised, this procedure could take longer to cook and produce a brisket that is drier. But you will get a superior bark.
As a general guideline, the brisket should be wrapped when the internal temperature is between 160 and 170 degrees Fahrenheit. Typically, depending on the size of the brisket, this takes 5 to 6 hours. To help keep the meat wet while it is wrapped in foil or paper, add some beef tallow, though a well marbled brisket should be juicy enough. I prefer peach paper but foil works too.
When and if you wrap your brisket will ultimately rely on your preferences and the results you want for your brisket. You could decide to wrap the brisket after a few hours of smoking if you want it to be juicy and tender with a softer bark. You can omit the wrap entirely if you want a thicker bark and don't mind a longer cook time.
The road to 200+ degrees
The brisket should be wrapped and smoked until it achieves an internal temperature of 202 to 205 degrees F. Many experts recommend going till you hit 203 degrees internal temp Depending on the size of the brisket, this could take another 4-6 hours, or longer. Remove the brisket from the smoker once it reaches the correct temperature, and then let it rest . . .
Rest it in a cooler.
If you haven’t wrapped(and you probably should) I would wrap the brisket now and place it in a well insulated cooler. A whole packer brisket(point and flat) in a well insulated cooler should rest for a couple hours. It’s important to use a high quality cooler and I would not only wrap the brisket in Peach Paper or foil but also then wrap it in a towel, preferably one you don't mind smelling like barbecue. Some pitmasters will rest their brisket overnight, as long as you can maintain an internal temp of no lower than 140 degrees, you can keep resting. Any lower and you risk food safety.
My Brisket blessing
Smoking brisket is journey whose hallmarks involve perseverance and practice. When you do get there, the results are well worth the trouble. Like climbing a mountain, smoking a perfect brisket is a well earned accomplishment and when you ascend that summit, you will be the talk of your neighborhood block.
Pro tip: you can freeze the leftovers and make chili. Also brisket is very delicious in taco form with salsa. Plan ahead, and remember that it will take a few tries to get it right but you can do it! Conquer the brisket and you can smoke almost anything!
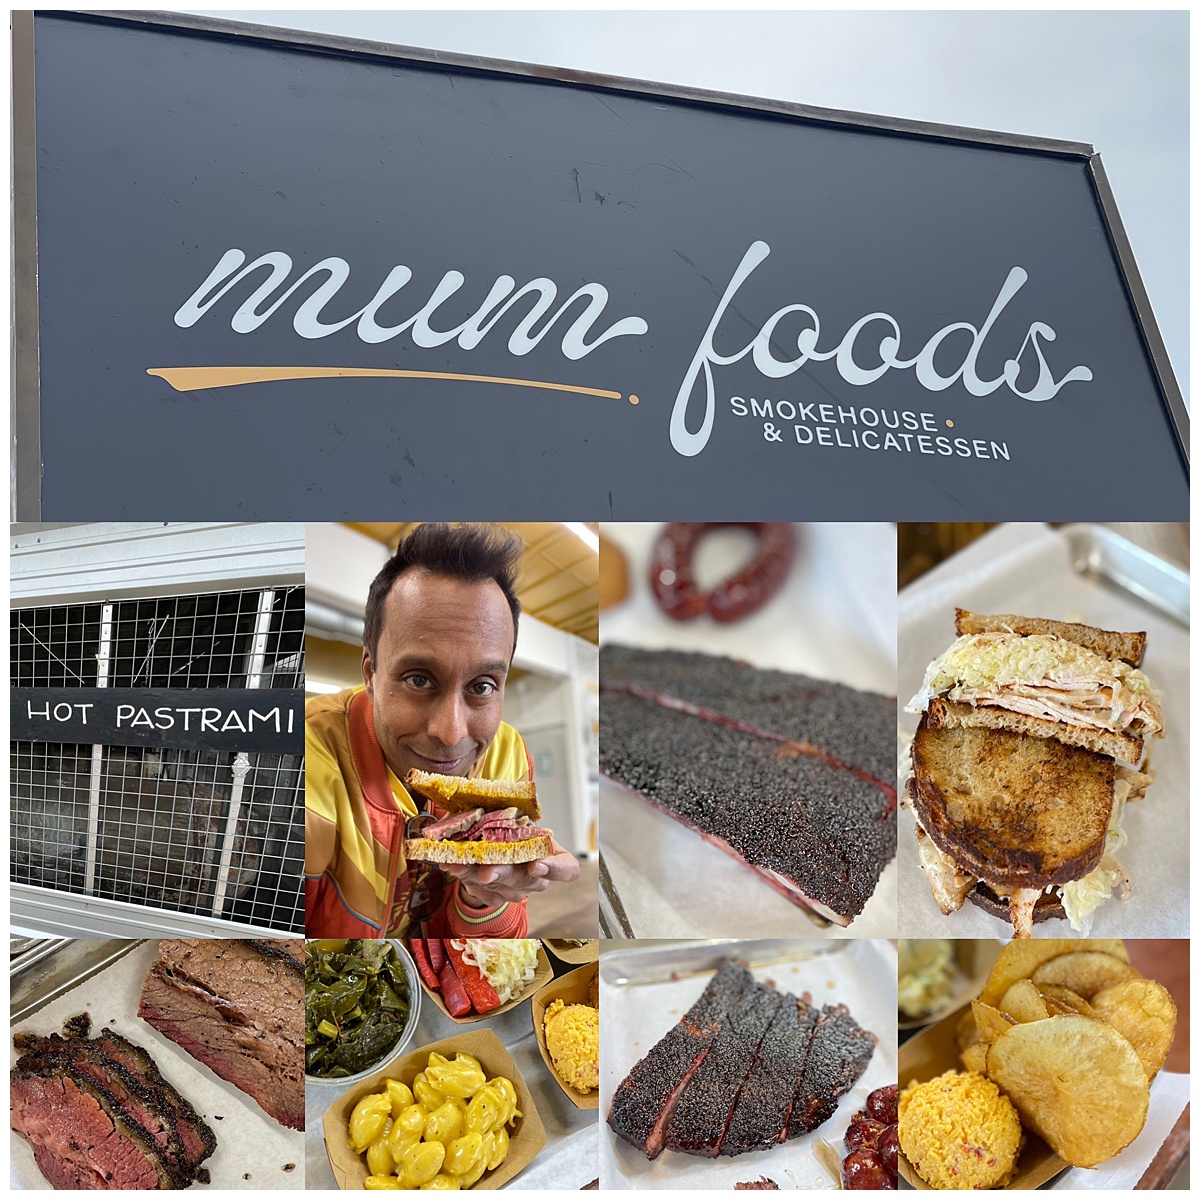
The Vitals:
the spot: Mum Foods 5811 Manor Rd. Austin TX 78723
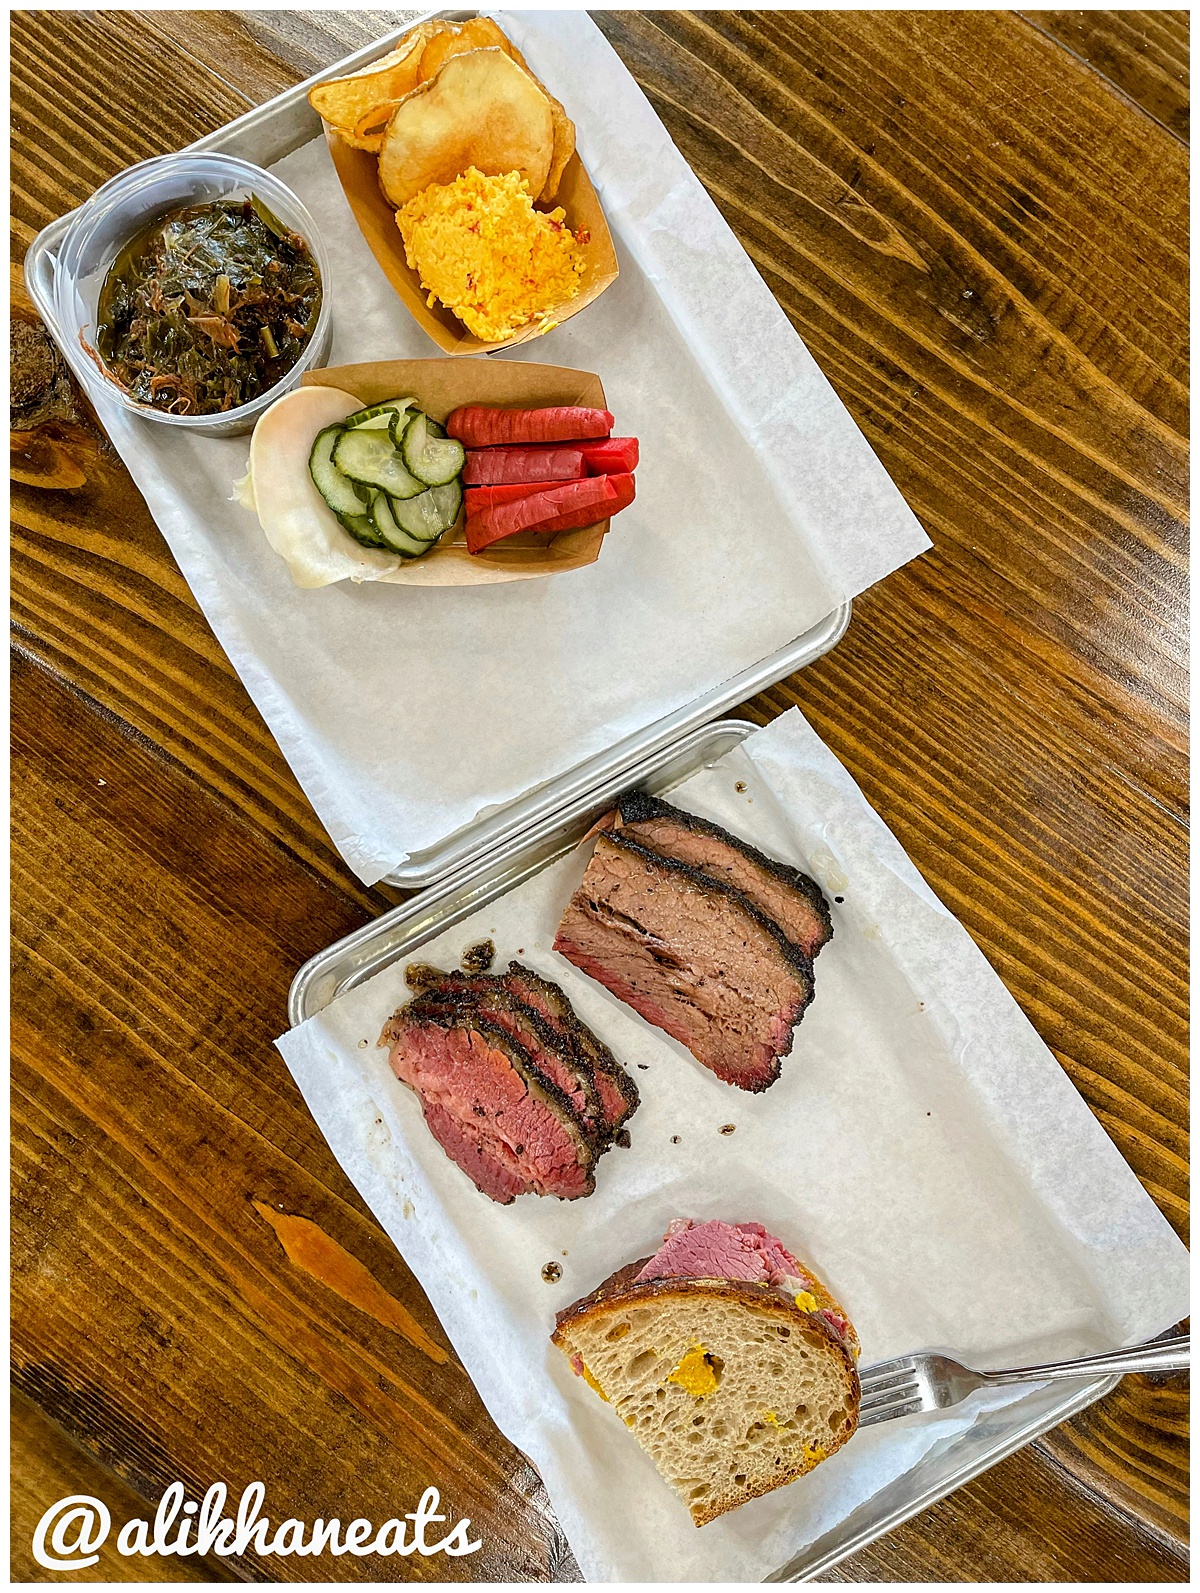
the eats: Pastrami, Brisket, Corned Beef, Ribs, Sausage, def the sandwiches, all sides esp the pimento cheese and chips, only hiccup was the burnt ends
the bucks: Bring your wallet, full sandwiches like $17, you can easily spend $30 a person but worth it
the full nelson: my fav restaurant in Austin right now
My new fav restaurant
I've been to Mum Foods twice so far this year and it has become my new favorite restaurant in Austin. The barbecue scene continues to heat up and while places like
Interstellar BBQ and
KG BBQ(who just snagged a
James Beard nomination) also enter the conversation, Mum Foods is bringing the modern Jewish Delicatessen vibe to deli starved Austin Texas. The tariff is stiff at Mum Foods to the tune of just under $20 for a sandwich but the craftsmanship is worth it, plain and simple.
My first visit
Was on a weekday so I missed out on the brisket by the pound, which is only served on weekends. I did get ribs, burnt ends, sausage, a pastrami sandwich, and a mess of sides. I'll get this out of the way: the burnt ends were a pass. They seemed like they were leftover from the weekend. Not bad, but not worth coming back for when you consider everything else.
On a recent episode of
NFL Tailgate Takedown, I said Mac and Cheese was overrated. I will retract that statement when it comes to the shells n cheese at Mum Foods. OMG side for sure, oh and about those pickles . . .
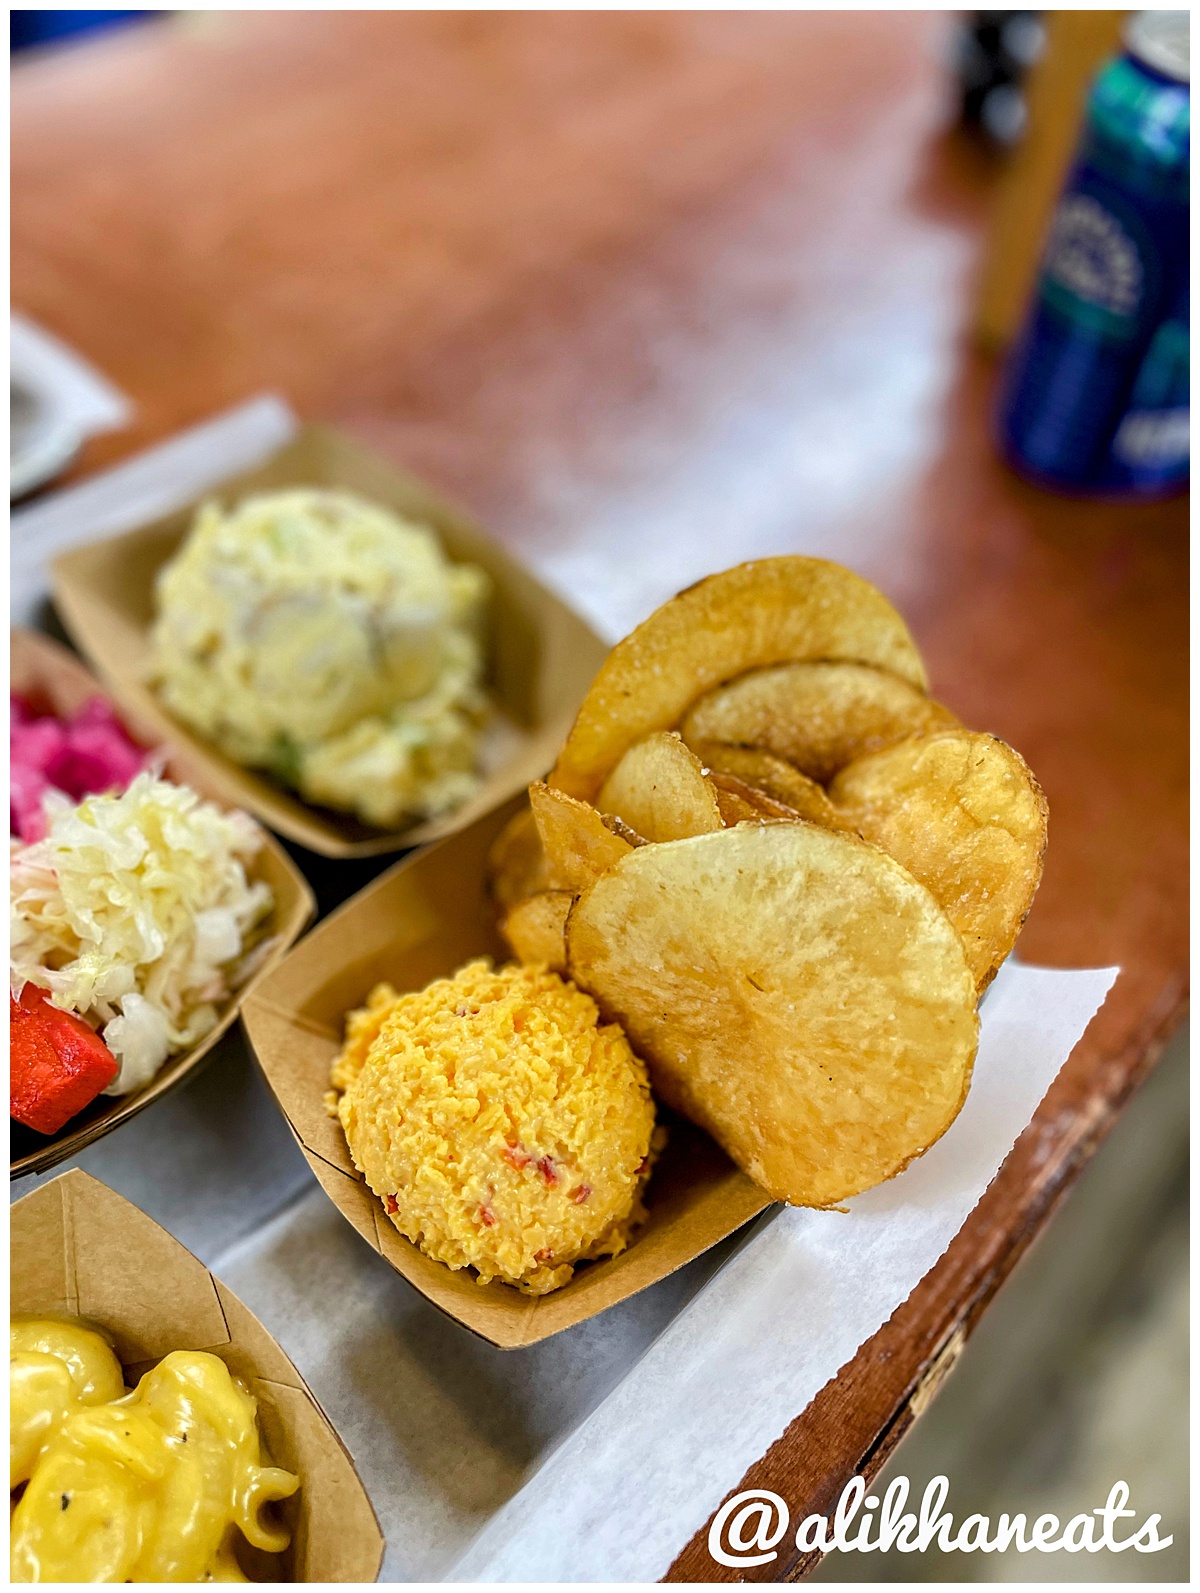
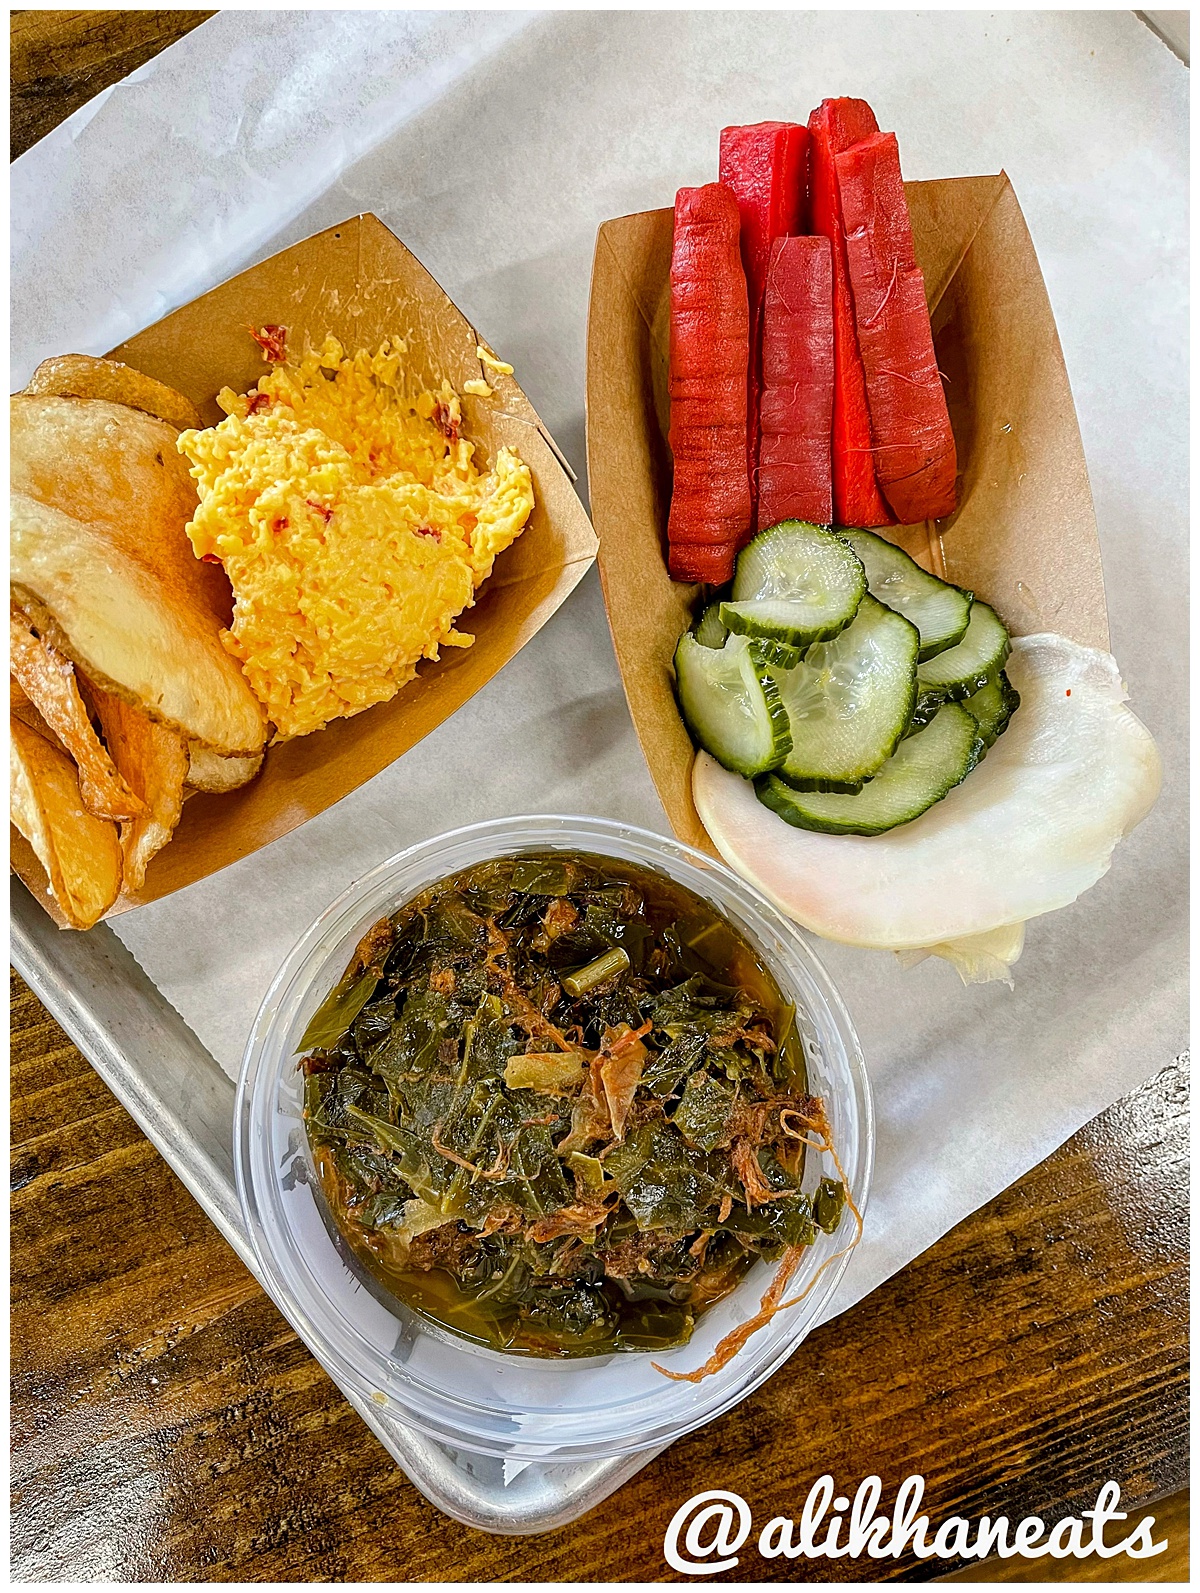
Artisan pickled veg alert
Yeah, those look straight out of a Whole Foods Market cookbook. Great stuff and much needed for all the richness. Oh and speaking of richness and my fav side:
Better than chips and queso
Yeah, I'll take housemade potato chips and Pimento cheese(of this caliber) over the Tex Mex Margarita soaker that is Chips n Queso any day of the week, twice on Sunday. I love being controversial when it comes to food. Now on to my second run at Mum Foods.
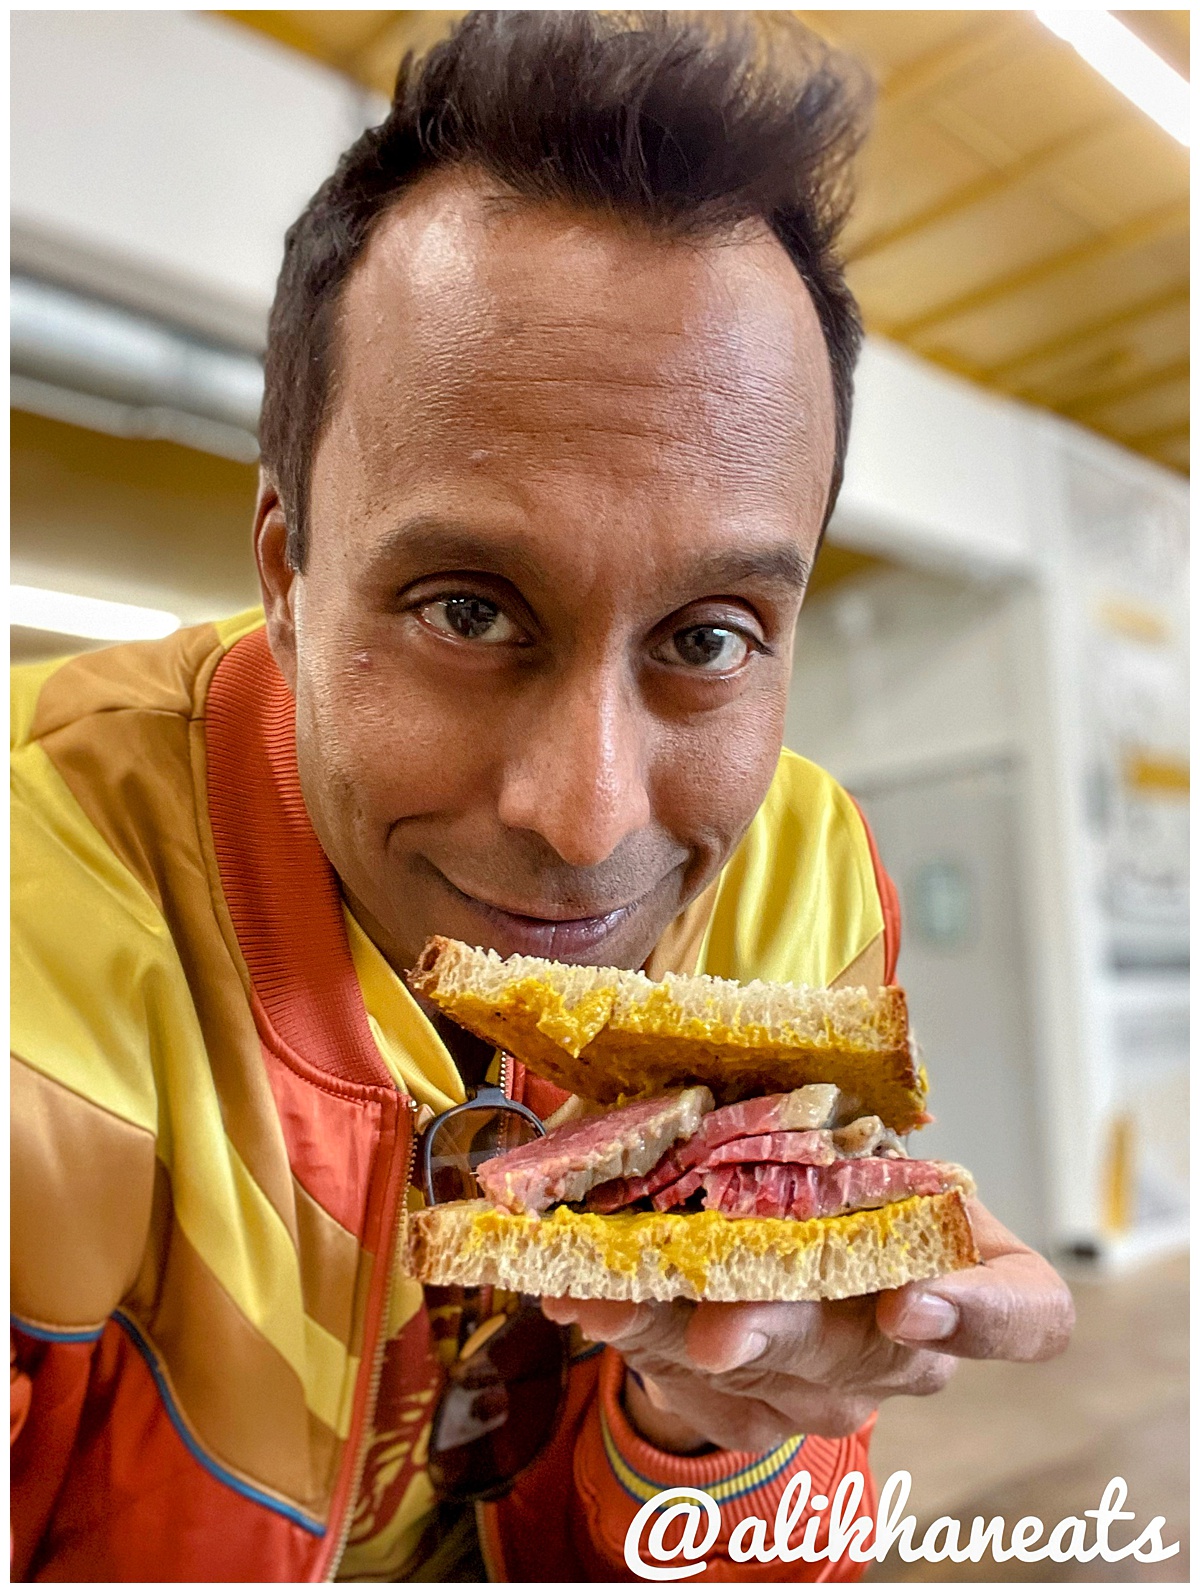
Lean on hard on the red meats
Not only did I get pastrami by the pound but we also got a corned beef on rye, adorned simply with housemade yellow mustard. I mean, this is why you are here: deli faves in a Texas smoker. Also I wanted to give a shoutout to the meat ladened greens. As a stand alone meal, this would be a macrobiotic approved bout of meat sweats. Everything pictured here is awesome and so so Ali Khan Eats Approved.
Don't sleep on the turkey
I've been saying this for years ever since I went to my first Craft BBQ joint in Austin back in 2015. The best pitmasters can make gold out of brisket
and turkey. The Turkey sandwich at Mum Foods is as fine as it gets and I recommend going with the coleslaw and Russian dressing aka "The Rachel". While the turkey is moist, the added texture of the cabbage in the coleslaw plus the double creamy hit of the coleslaw dressing and the mayo in the Russian dressing make for one memorable turkey sando.
I love this spot.
It aint cheap but it is also worth every damn penny. Mum Foods is in a groove and it is my favorite restaurant in Austin so far in 2023. Great coffee shop in there as well and I can't wait to tear into their small but well curated wines by the bottle too.
This burger has captivated me since 2001
For decades one burger that has stood out in my palate has been Chef Sang Yoon's burger at his restaurant, Father's Office. In what ushered in both the era of gastropubs and chef driven burgers, Father's Office was the perfect storm for a broke food lover in his 20s. Back in 2001, foodies were still an underground niche and going out to eat meant "what's the occasion?". I'd like to say casual gastropubs helped change all that but it was a ripple compared to the Tsunami that social media would bring later on that decade.
But enough about food history - let's talk about how you can make a friendly home version of a burger that was designed to
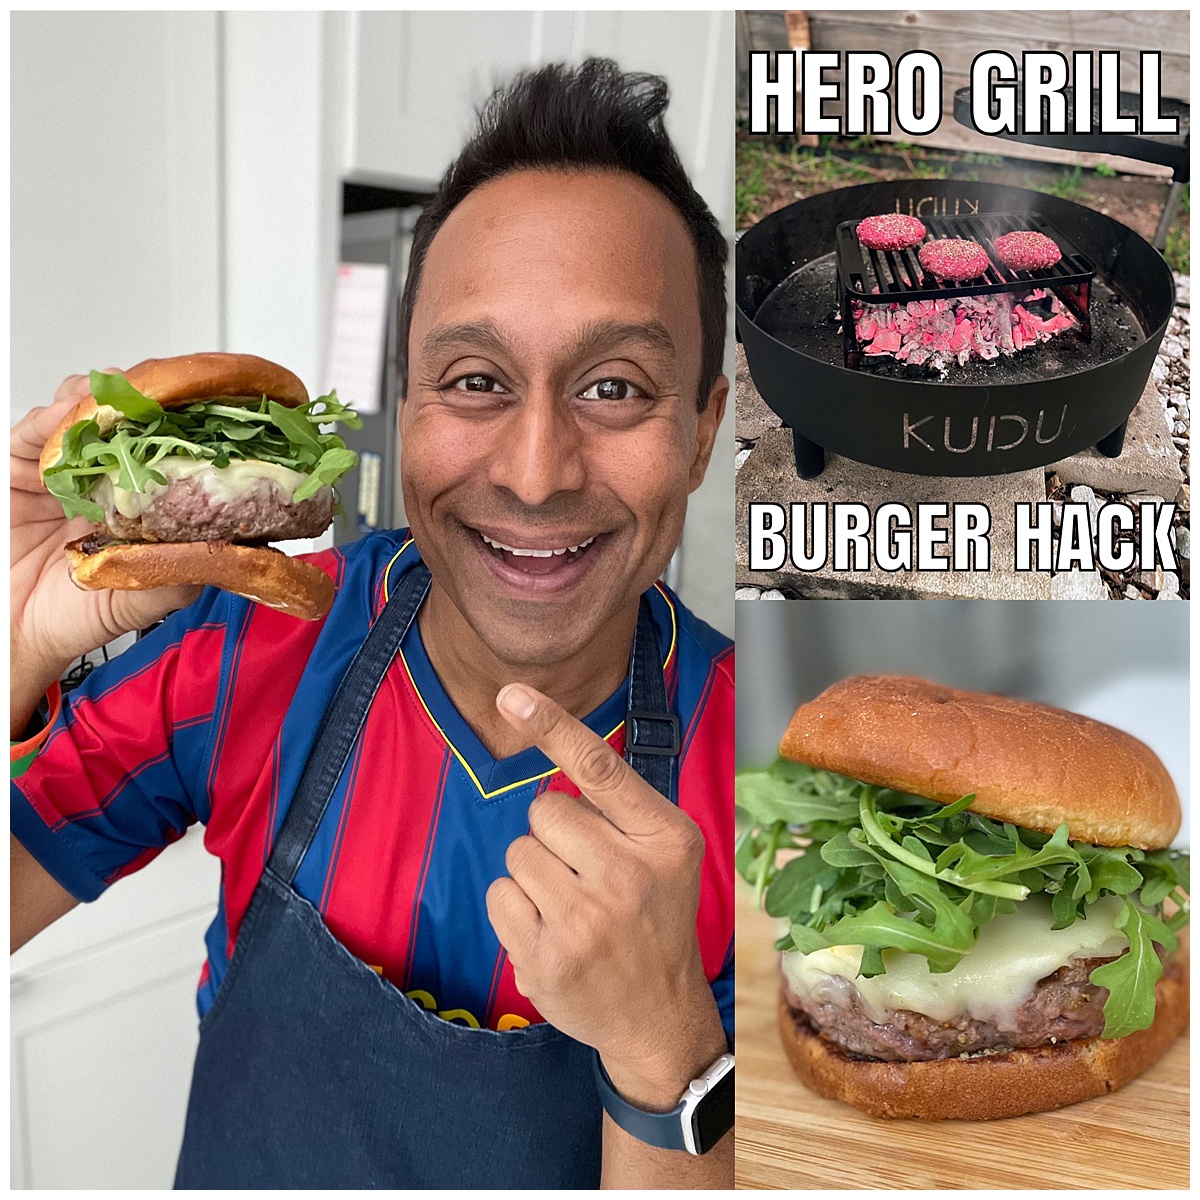
harness the flavors of French Onion soup . . . .
Note: I developed this recipe for the grill but a cast iron works well too. If you do grill, I recommend a high temp fire and/or utilizing a grill grate set up like this Hero Grill hack, where the grate is right over the embers. This will allow you to cook hot 'n fast, allowing for less cooking time and less moisture loss. Save the drippings for the bottom bun!
The Father's Office inspired burger recipe
Ingredients:
- 1 pound of ground beef(for three burgers)
- Potato bun or Pain Au Lait bun(less buttery than brioche, still decadent)
- Arugula
- ½ Red onion
- 2 strips of bacon, chopped
- Balsamic vinegar
- Butter
- Two egg yolks
- Dijon mustard
- Garlic
- White Wine Vinegar
- Olive Oil
- Salt and pepper
Steps:
- Form 5 oz burger patty, 4” wide, 3/4 “ thick
- Brush with olive oil, season with salt & pepper or burger seasoning of choice(I used a steak rub)
- Grill to desired doneness - this burger works well on the medium rare to rare side
- Toast buns, spread aioli on both sides, caramelized onion on bottom bun, arugula on
Caramelized onions
Ingredients:
- 1 medium red onion, thinly sliced
- 3 slices of bacon
- 1 tbsp of butter
- 1 tbsp of balsamic vinegar
- 1 clove minced garlic
- Salt and pepper to taste
Steps
- Cook bacon in dutch oven over medium heat till crisp
- Remove bacon and pour out any excess drippings till 1 tbsp remains
- Reduce heat to low, add onions and cook for 15 min with lid on, stirring frequently to prevent burning, till lightly caramelized
- Add garlic, cook for a few minutes, make sure garlic doesn’t burn
- Add balsamic vinegar, cook for 1 minute more
- Add bacon, season with salt and pepper and set aside
Aioli
Ingredients:
- 2 egg yolks
- ½ cup olive oil
- 1 tsp grated garlic
- 1 tsp dijon mustard
- 1 tsp of white wine vinegar
- Salt and pepper to taste
Steps:
- Place room temp egg yolks, garlic and dijon mustard in bottom of a bowl
- Gently whisk in olive oil in a slow steady stream(take your time!) or use an immersion blender and a snug container like a mason jar or measuring cup
- Season with salt to taste, adding for more mustard or vinegar as necessary
Note: if the aioli is thin or starts to break and/or you are getting impatient - adding a little store bought mayo is a quick fix. It sounds counterintuitive but you will get the right consistency instantly and the taste will blow away regular mayo, trust me!
Buttermilk Butter Chicken Recipe:
I shared this on my Instagram reels recipe a few weeks back; here is the nitty gritty. Below is the picture play by play.
ingredients
- 2lbs chicken breast
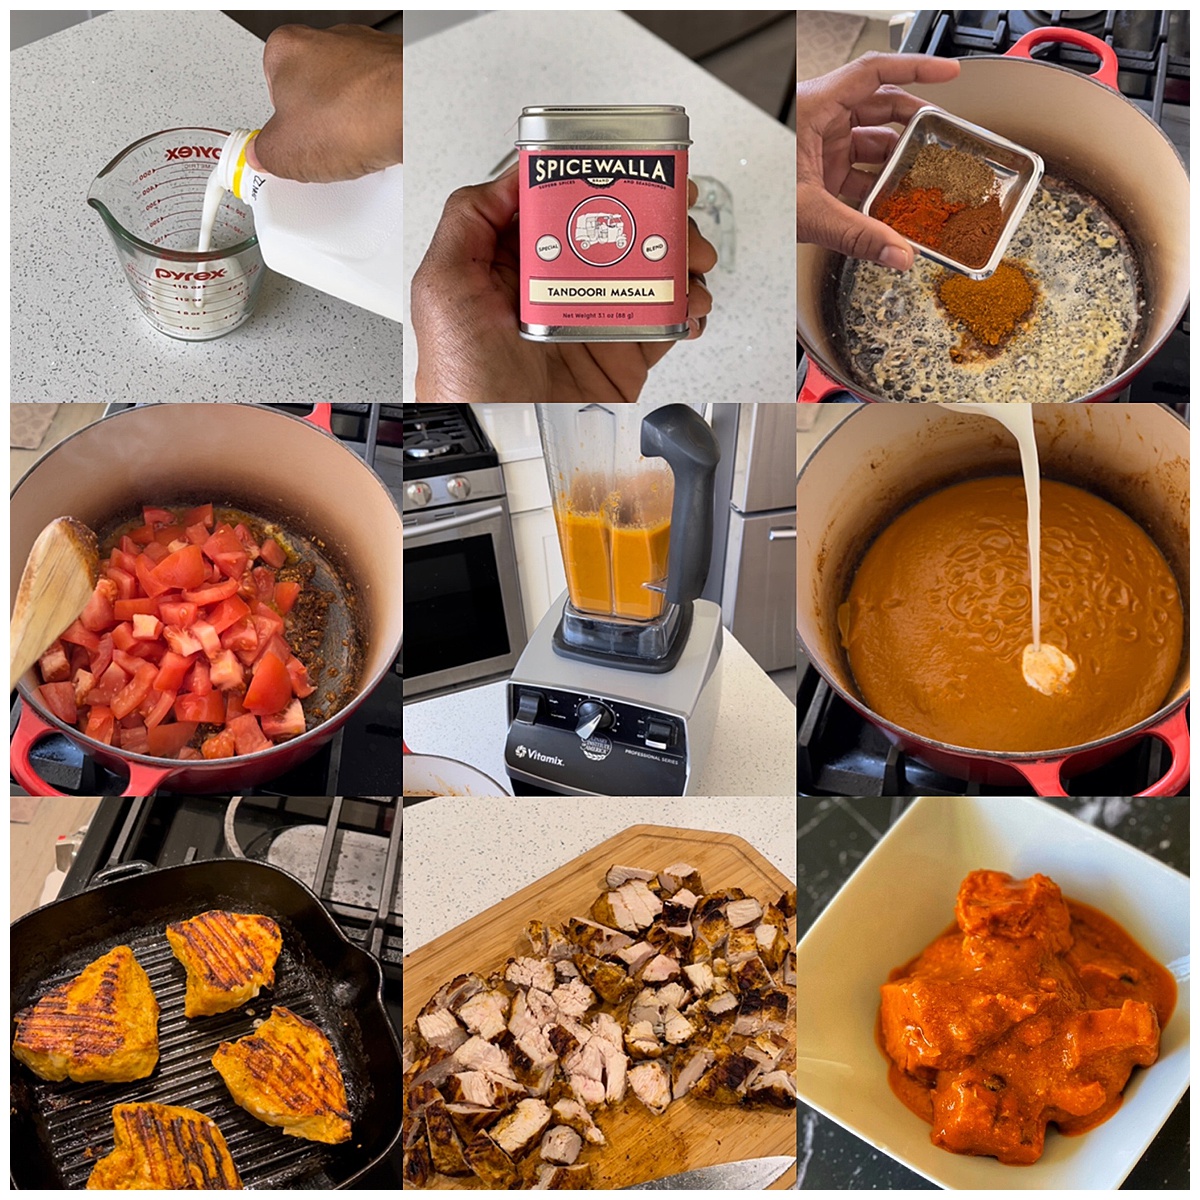
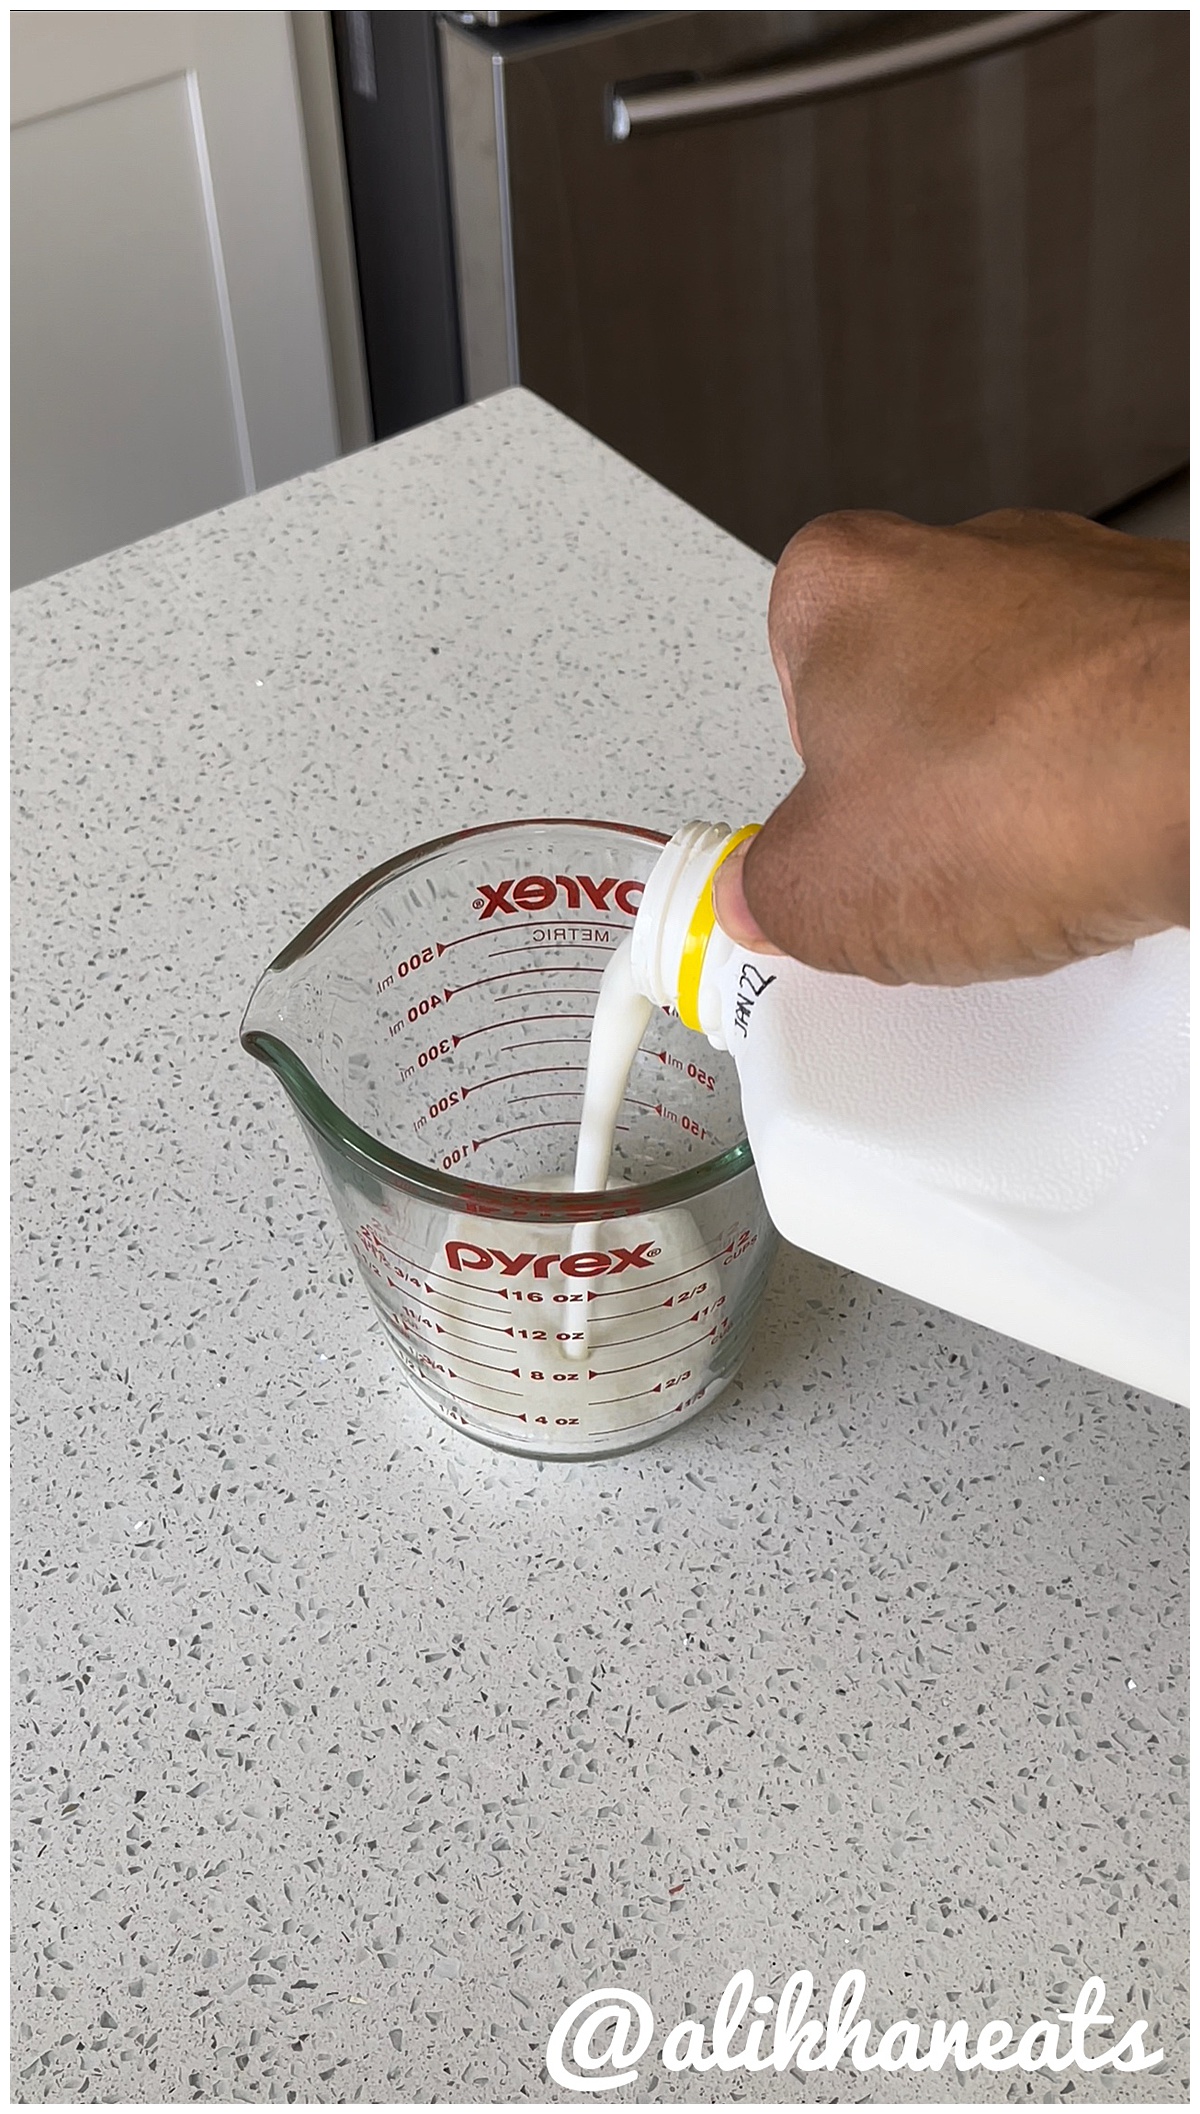
- 1 cup buttermilk, divided
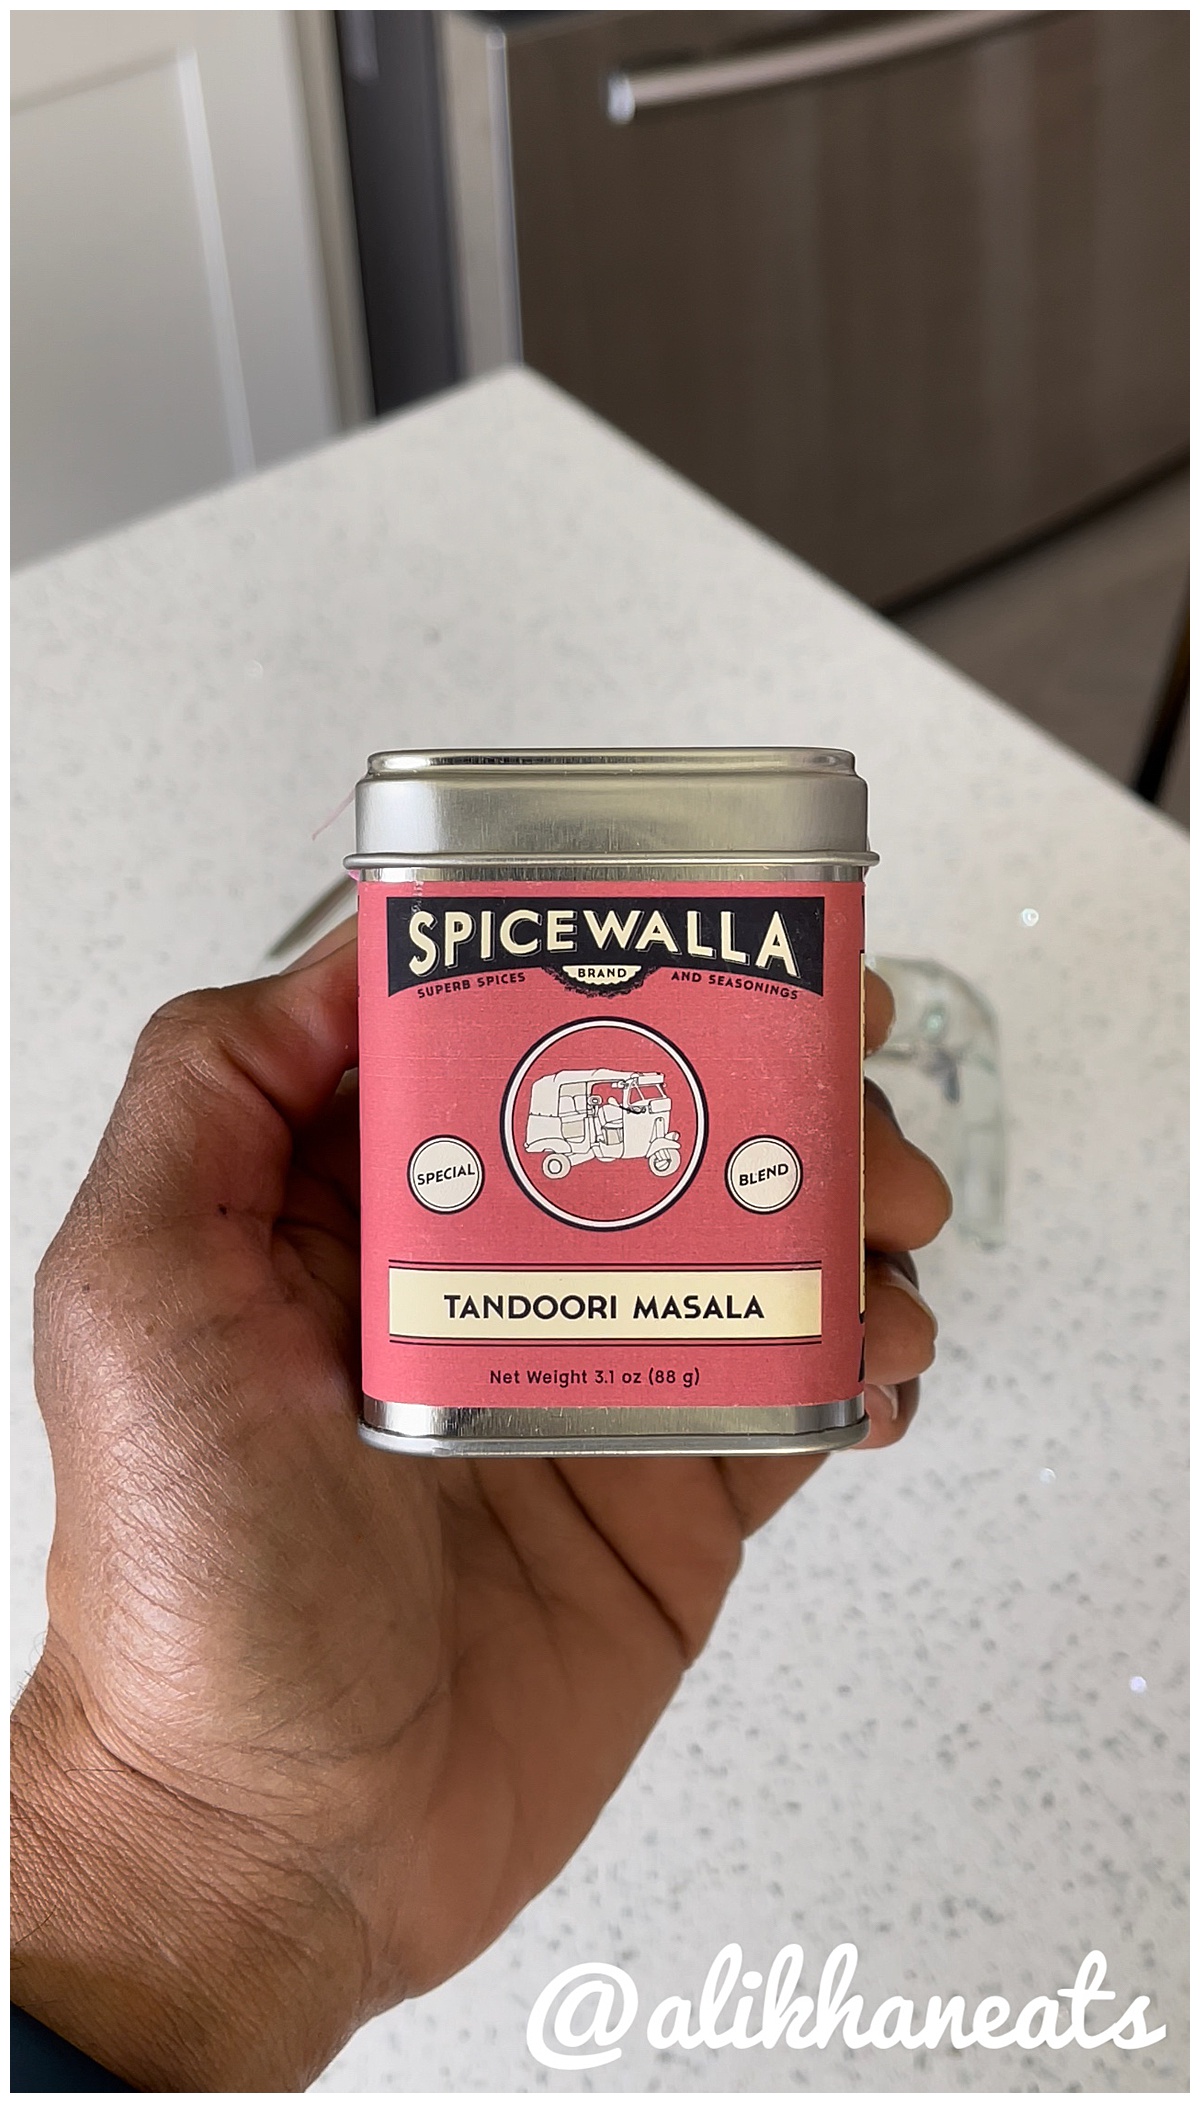
- 2 tablespoons tandoori masala, divided
- 1 teaspoon garama masala
- 1/2 teaspoon Dark Chili powder
- 1/2 teaspoon Kashmiri Chili Powder
- 1 tsp salt, plus more to taste
- pepper to taste
- 1.5 tablespoons minced ginger
- 1.5 tablespoons garlic
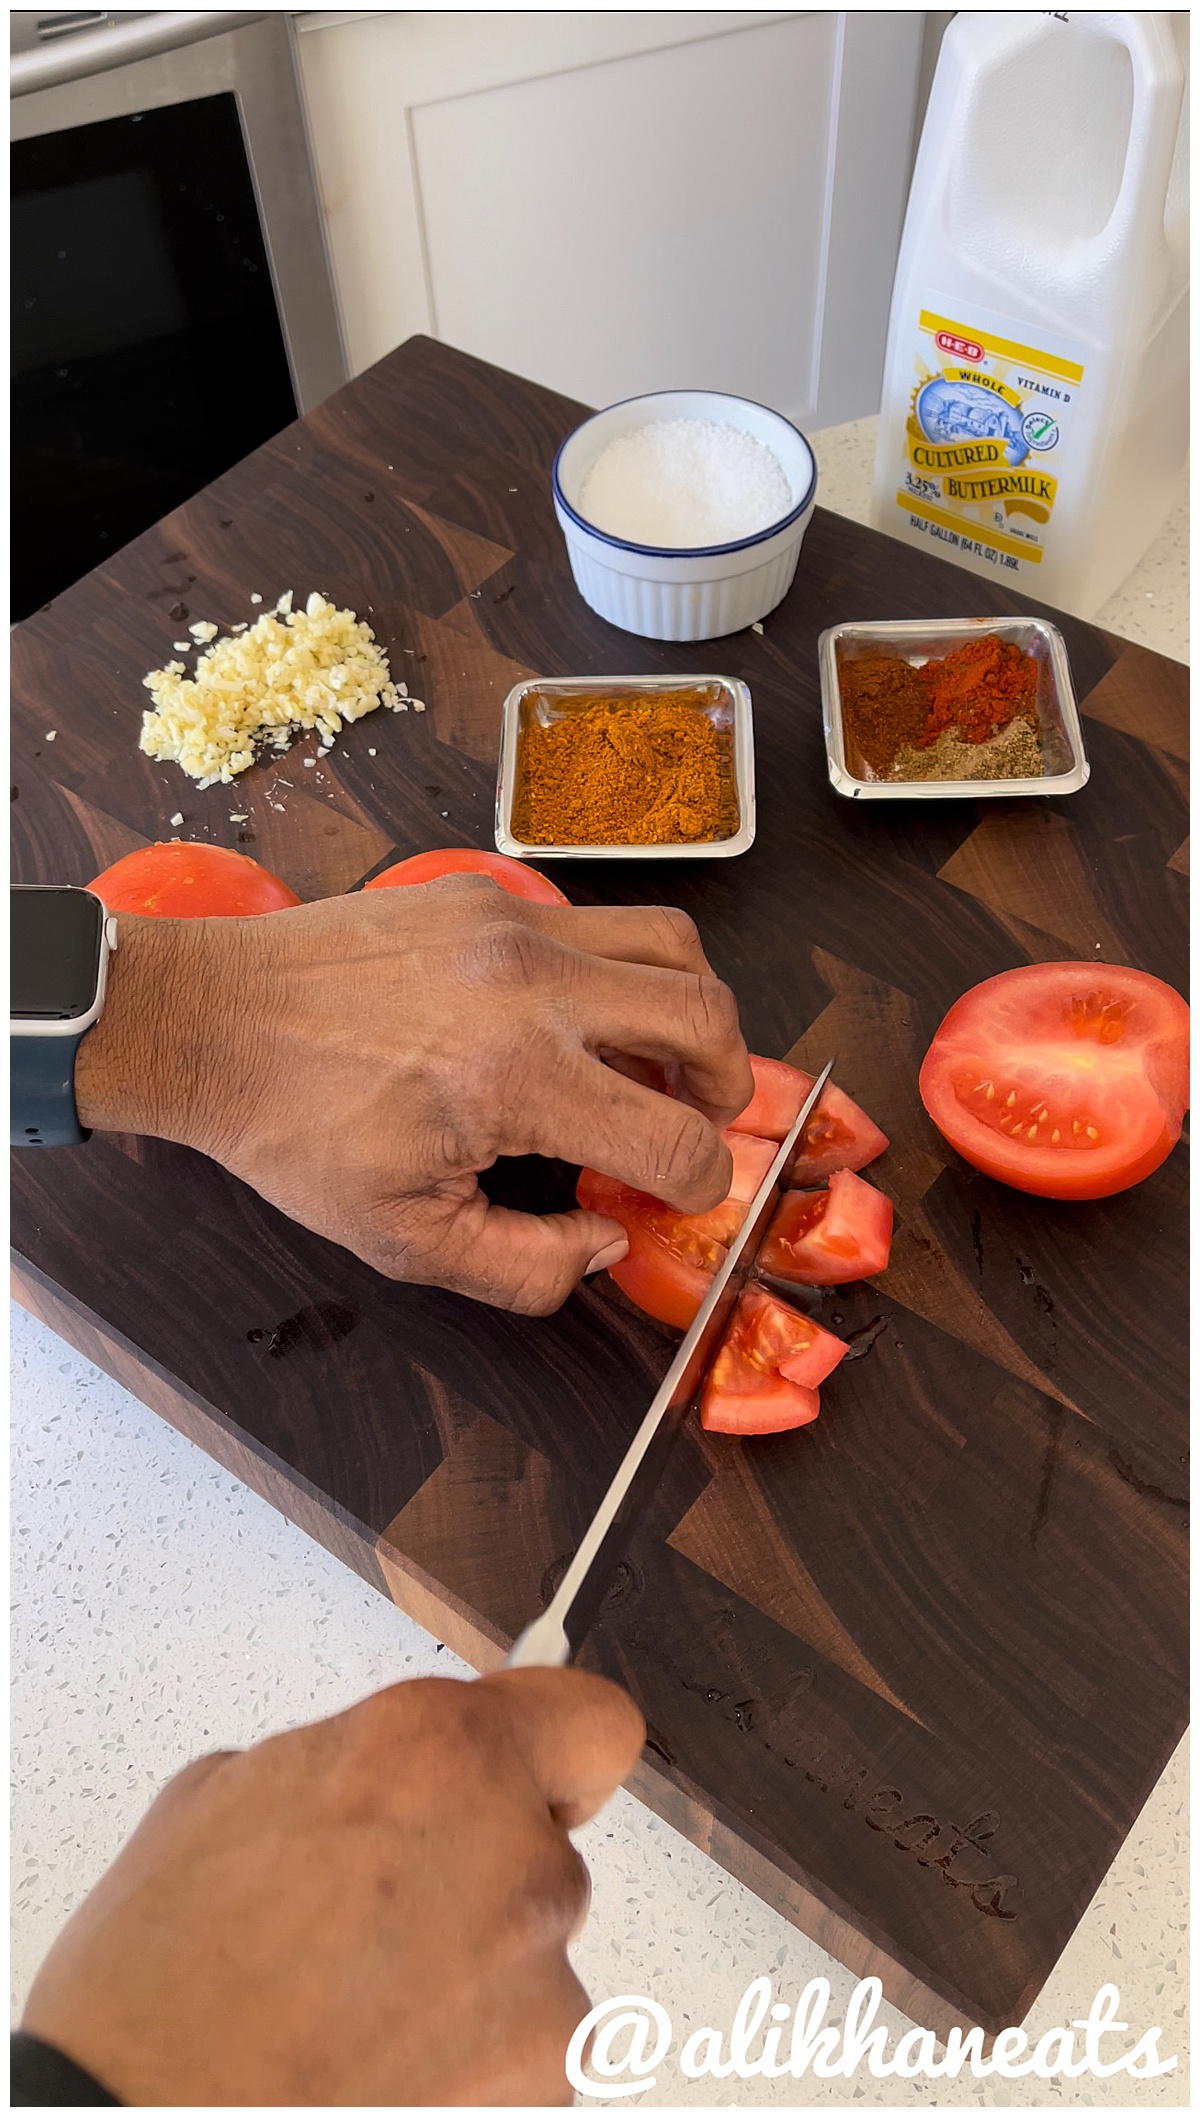
- 3 cups chopped tomatoes
- 4 tablespoons of butter
- sugar to taste
Steps
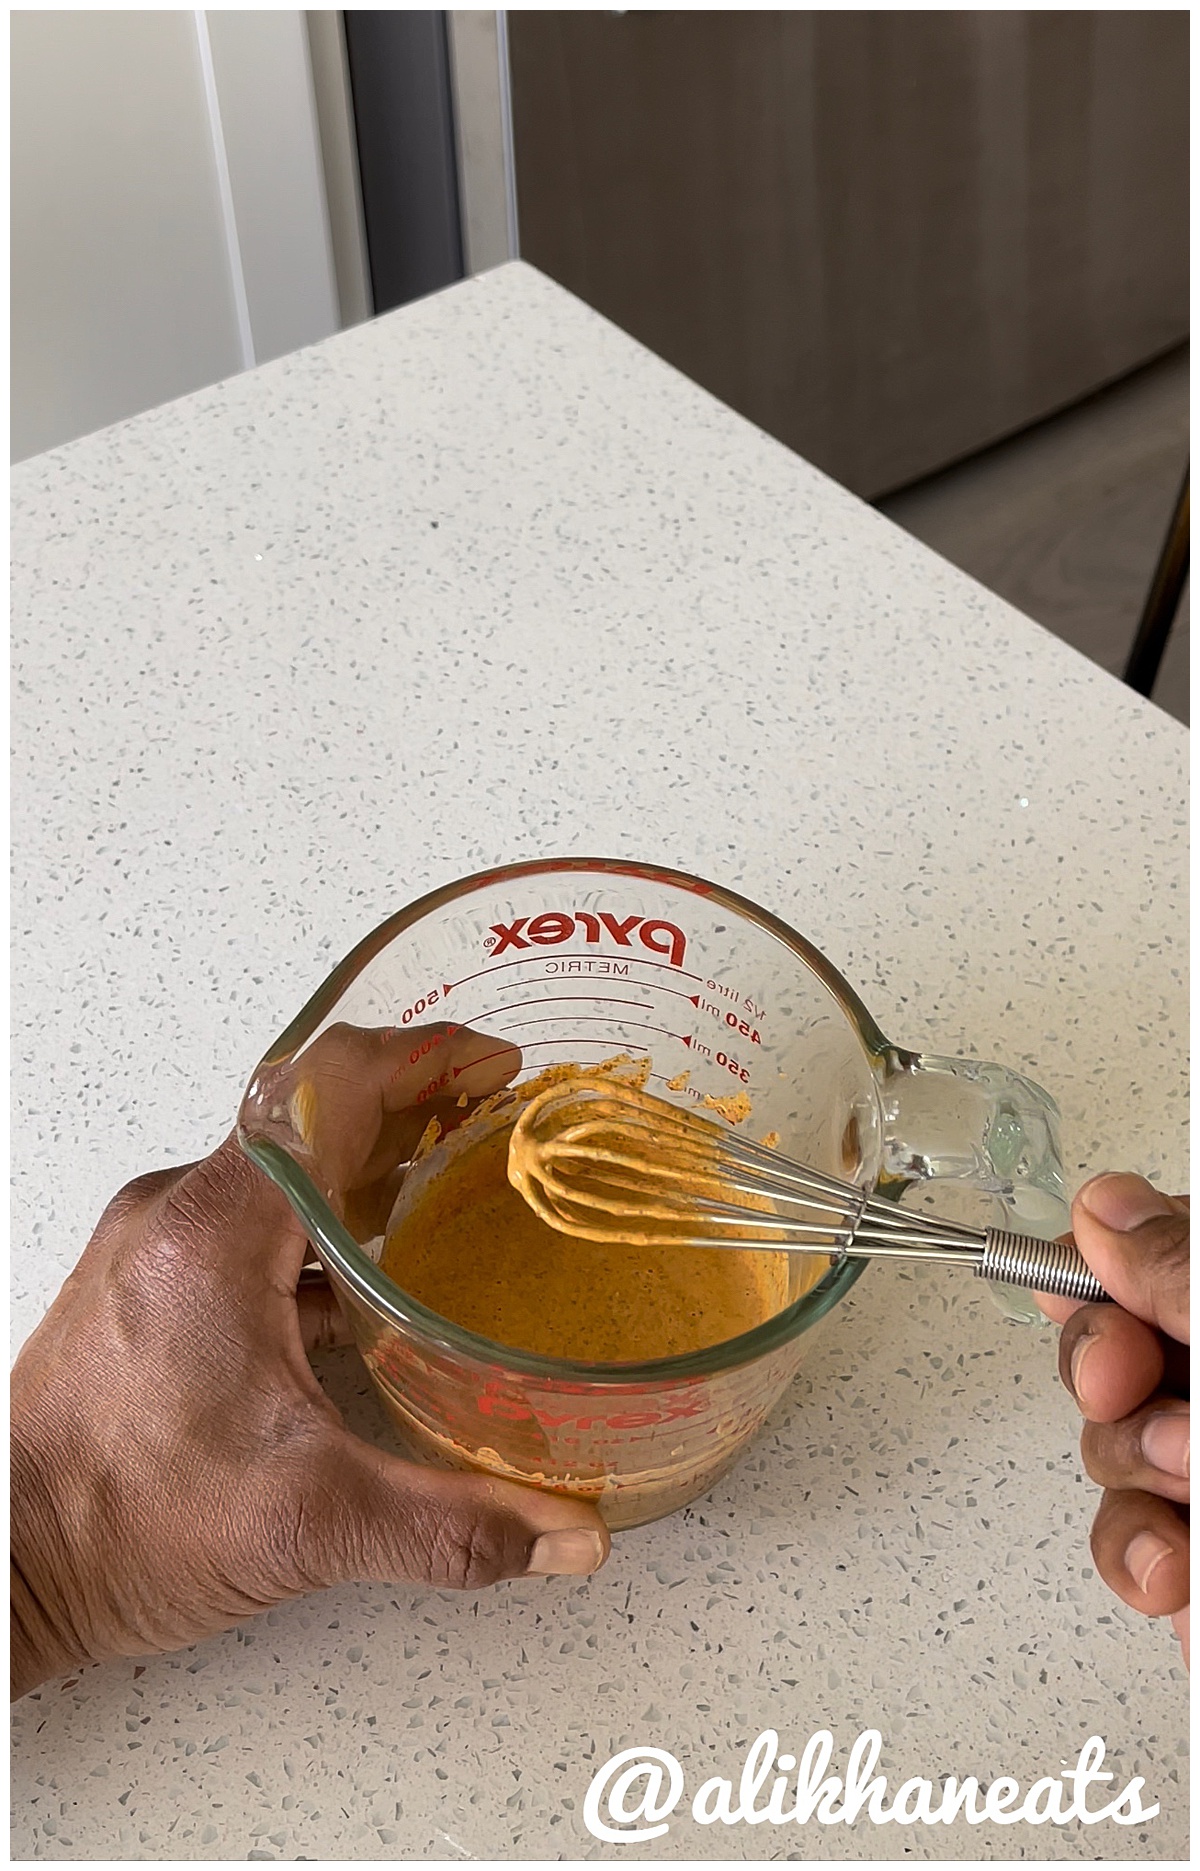
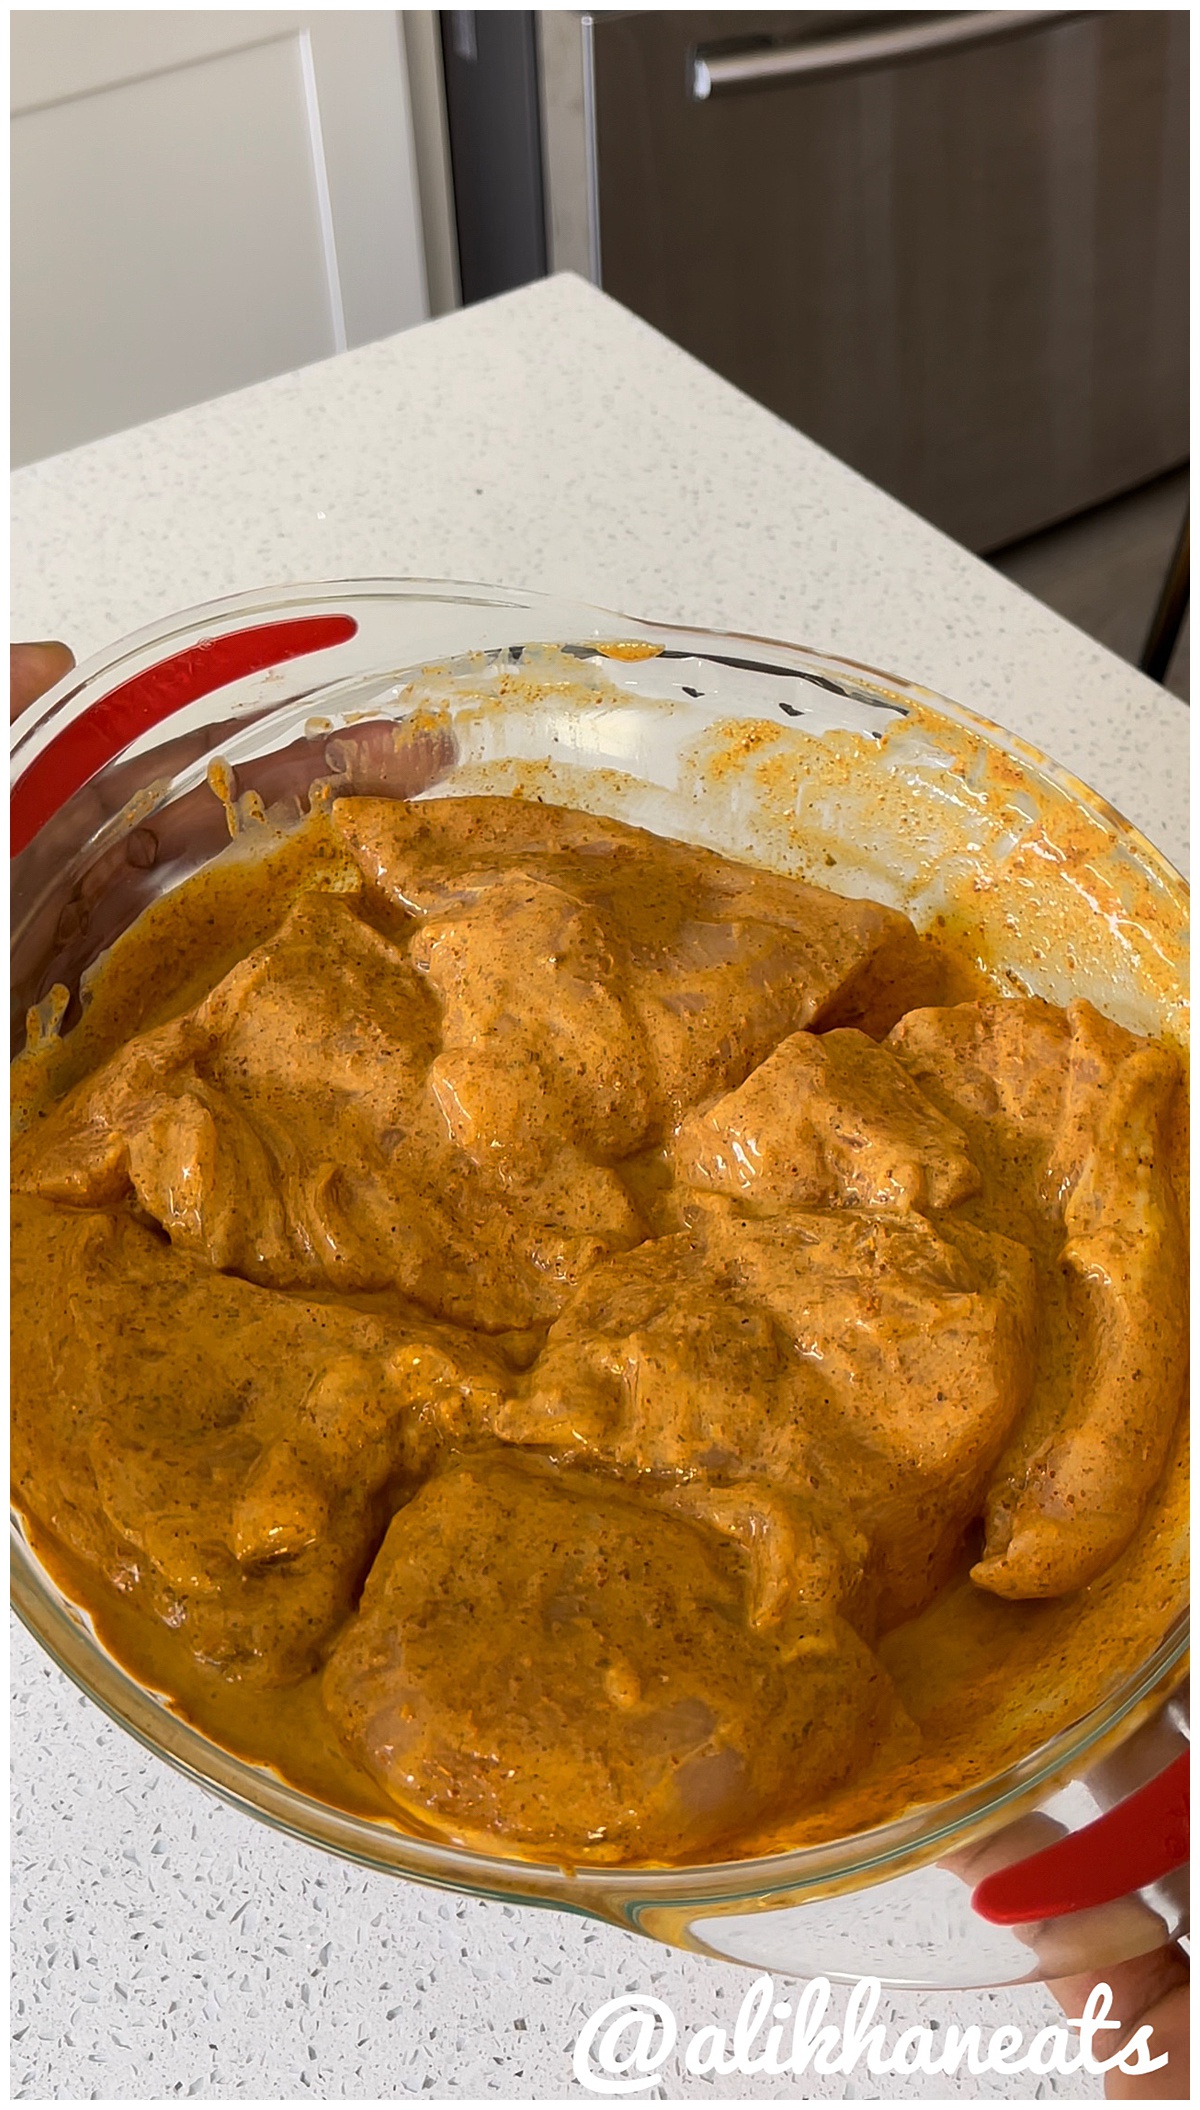
- mix 1/4 cup butter milk, 1 tablespoon of tandoori masala and 1 teaspoon of salt, then marinate chicken overnight.
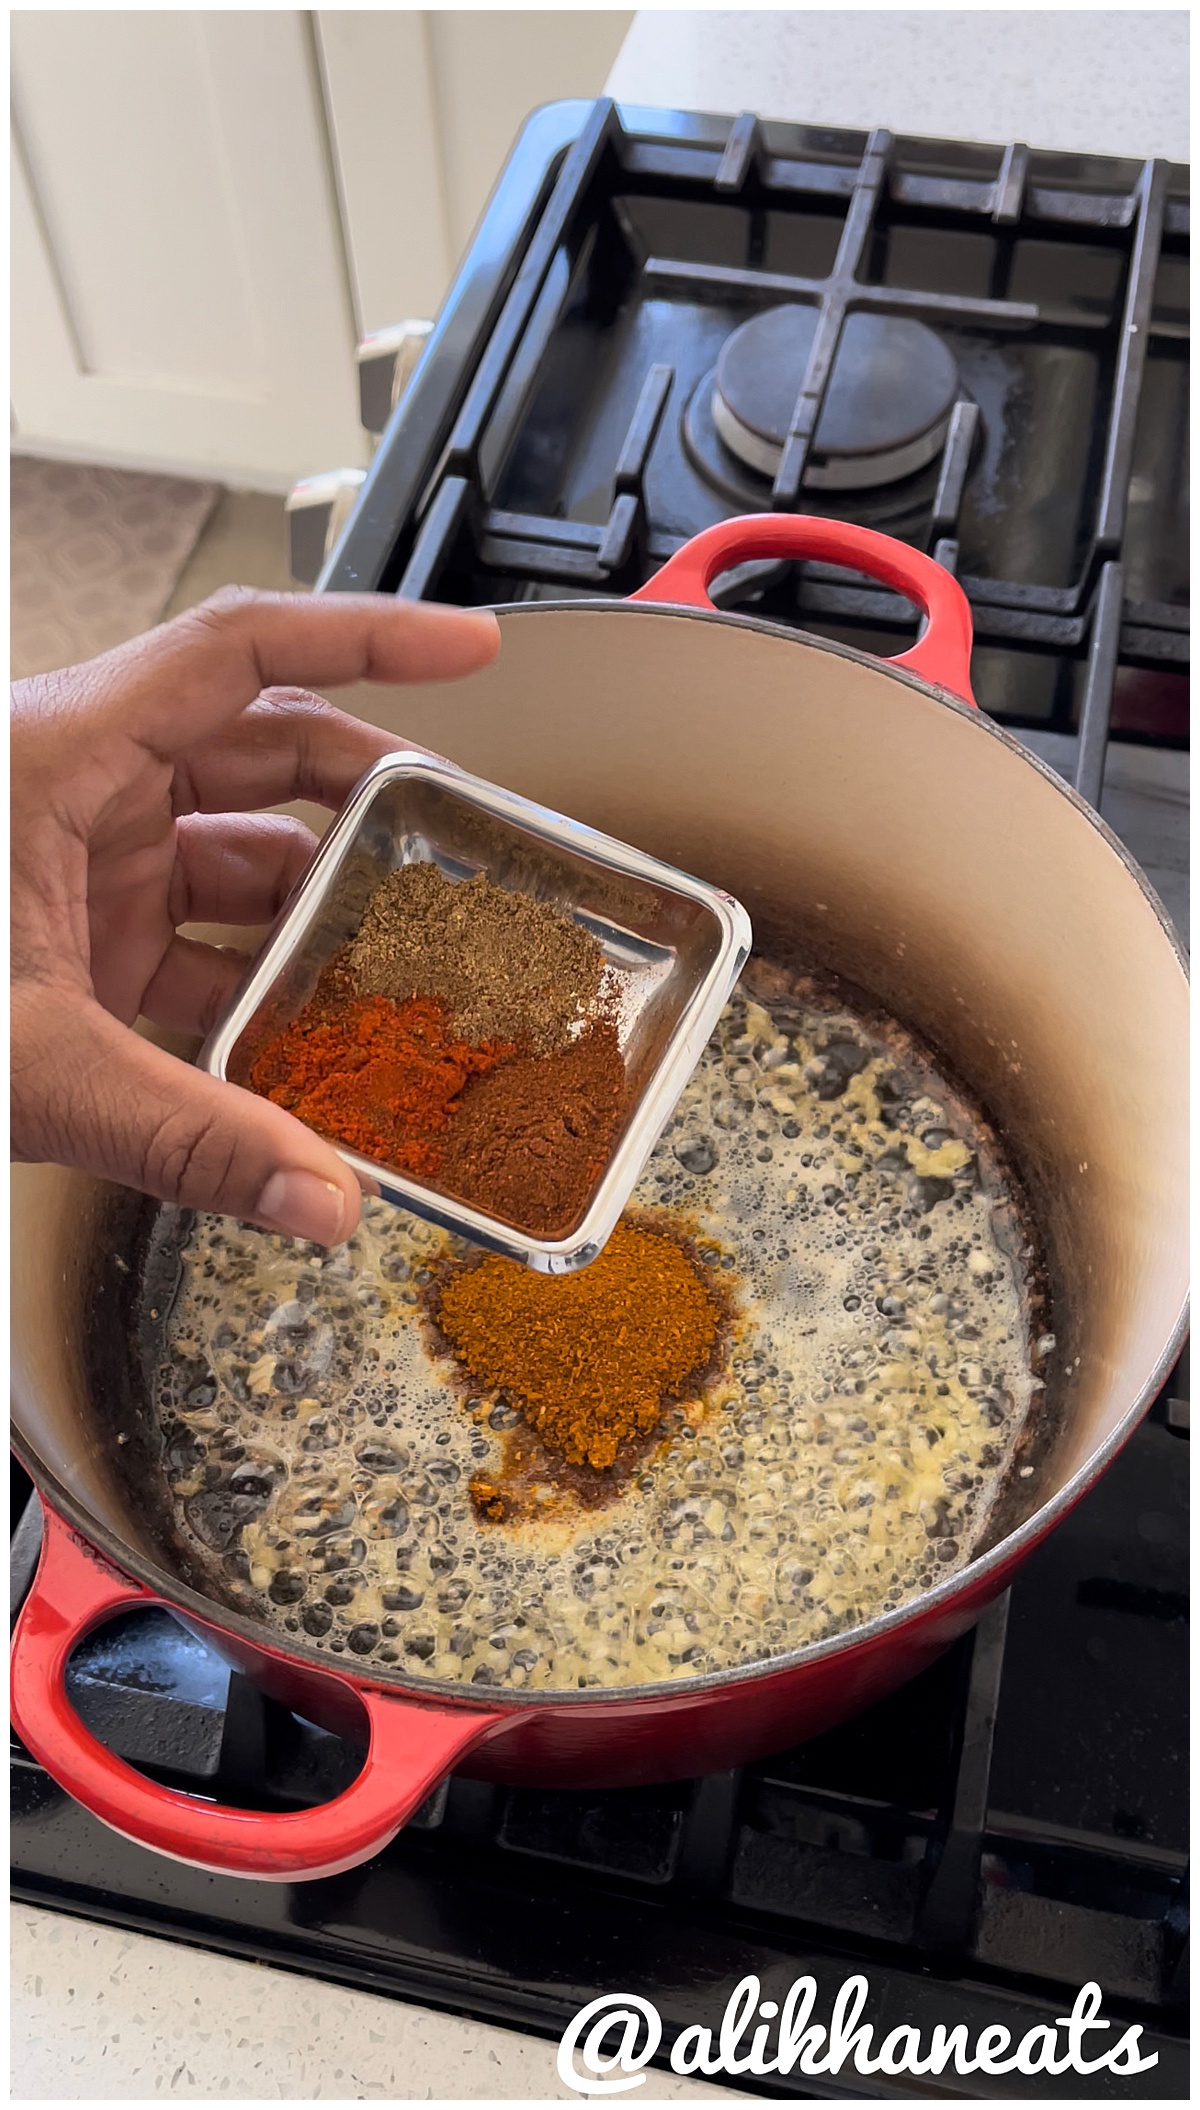
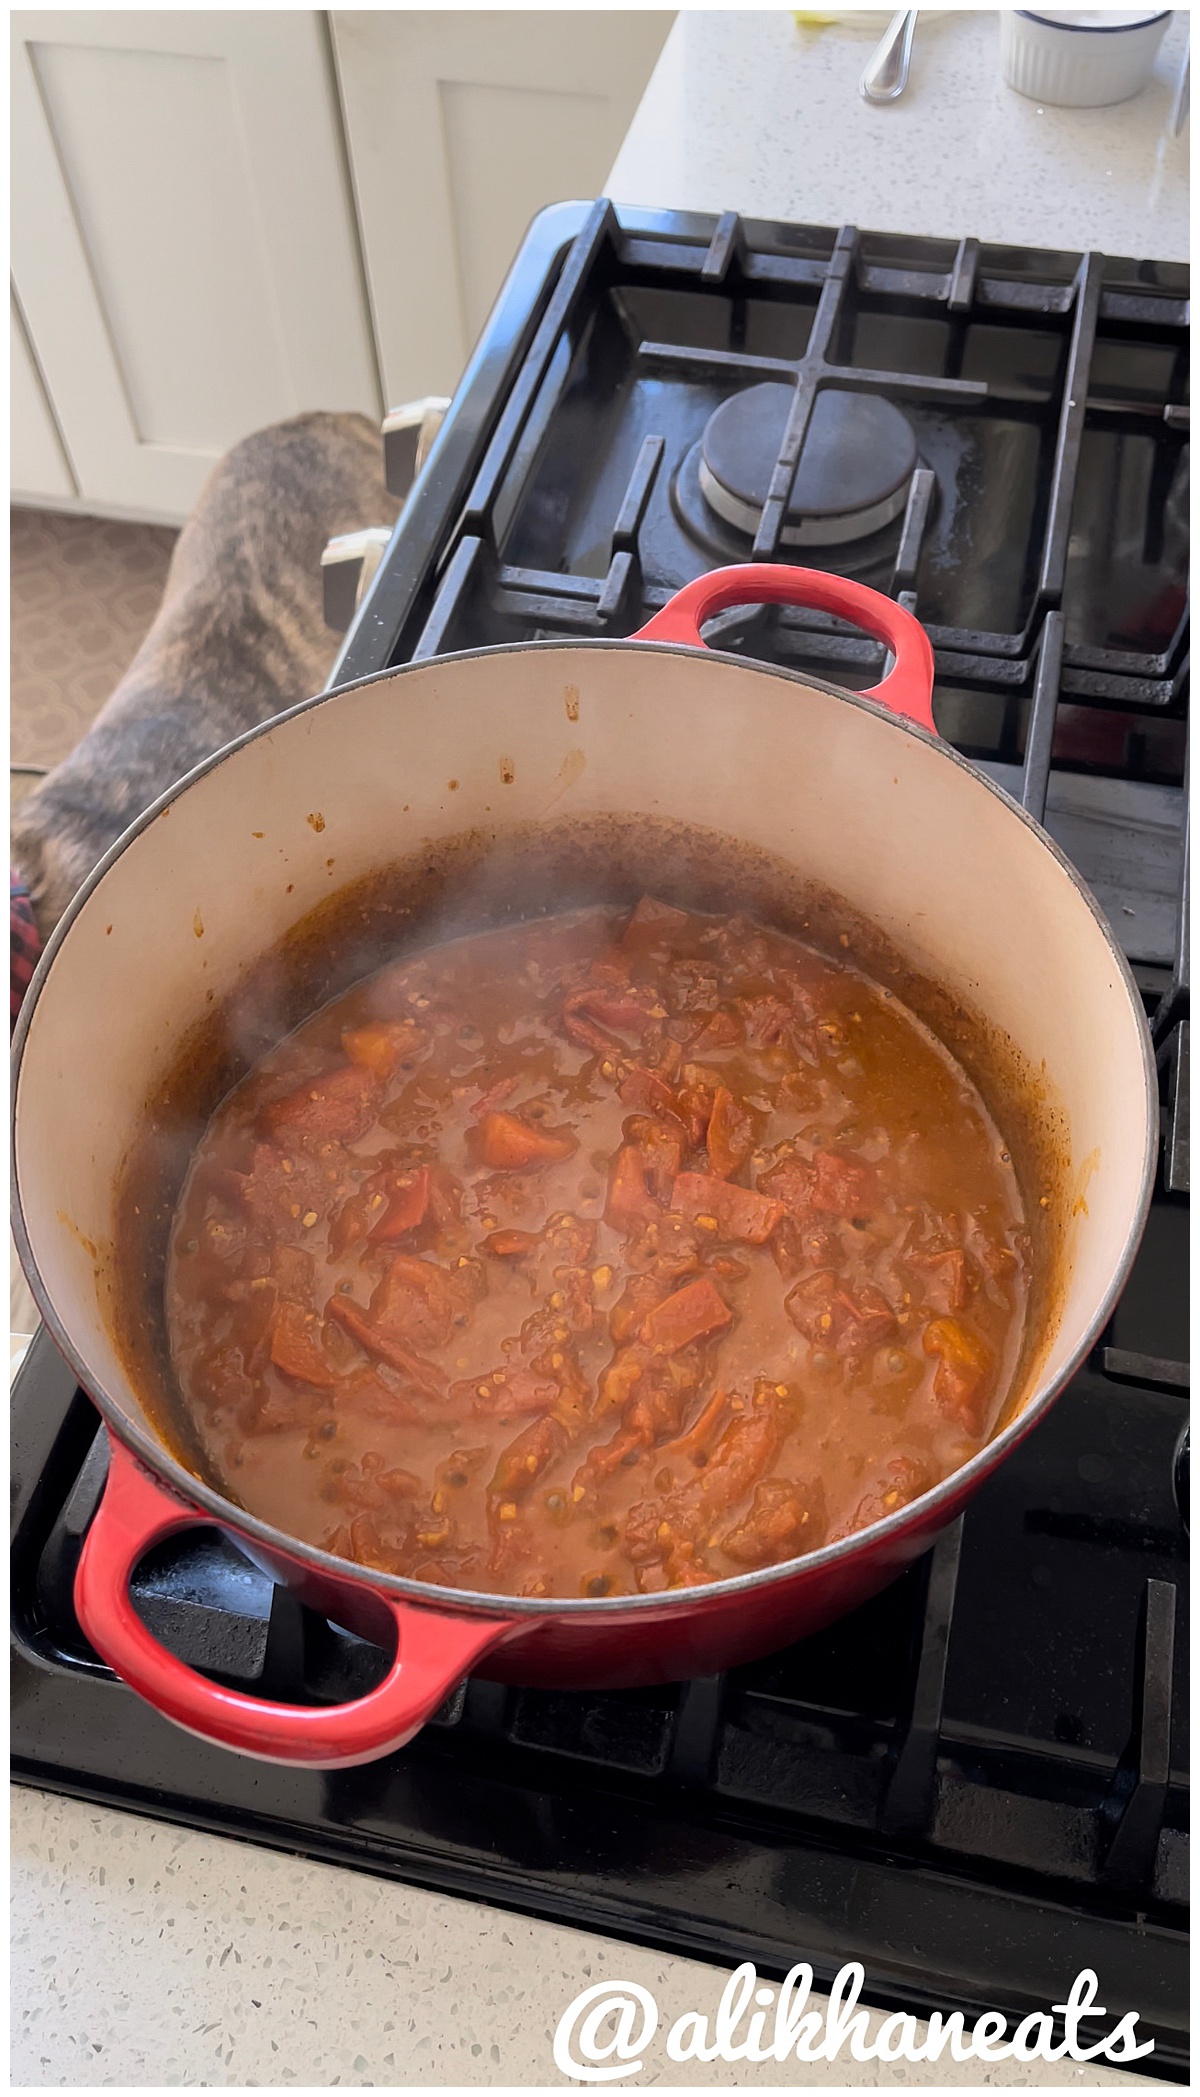
- Sauce: start by browning garlic, ginger, garam masala, chili powders, tandoori masala
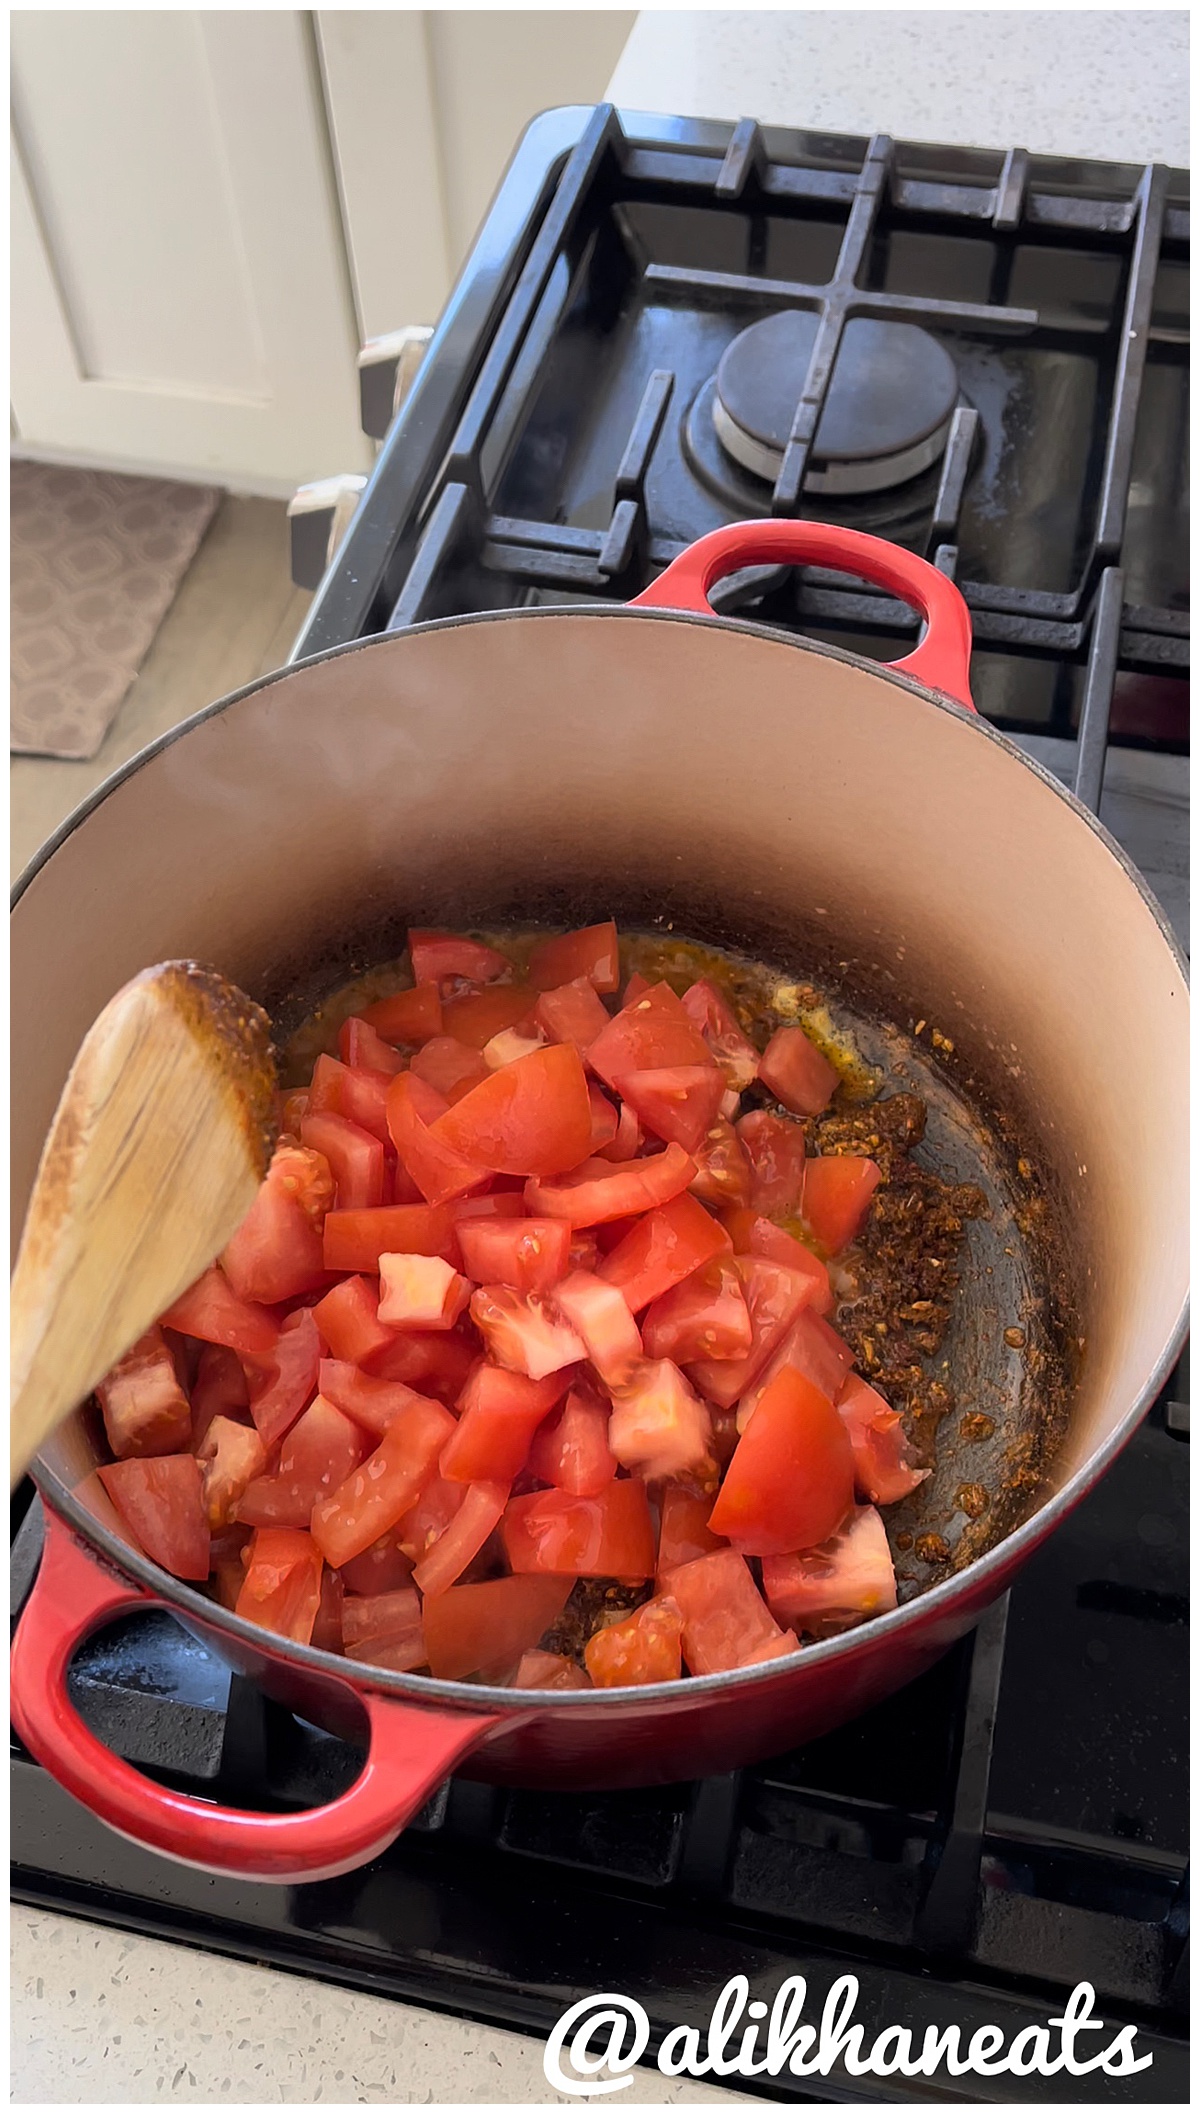
- add chopped tomatoes
- simmer with lid down for 5-10 minutes
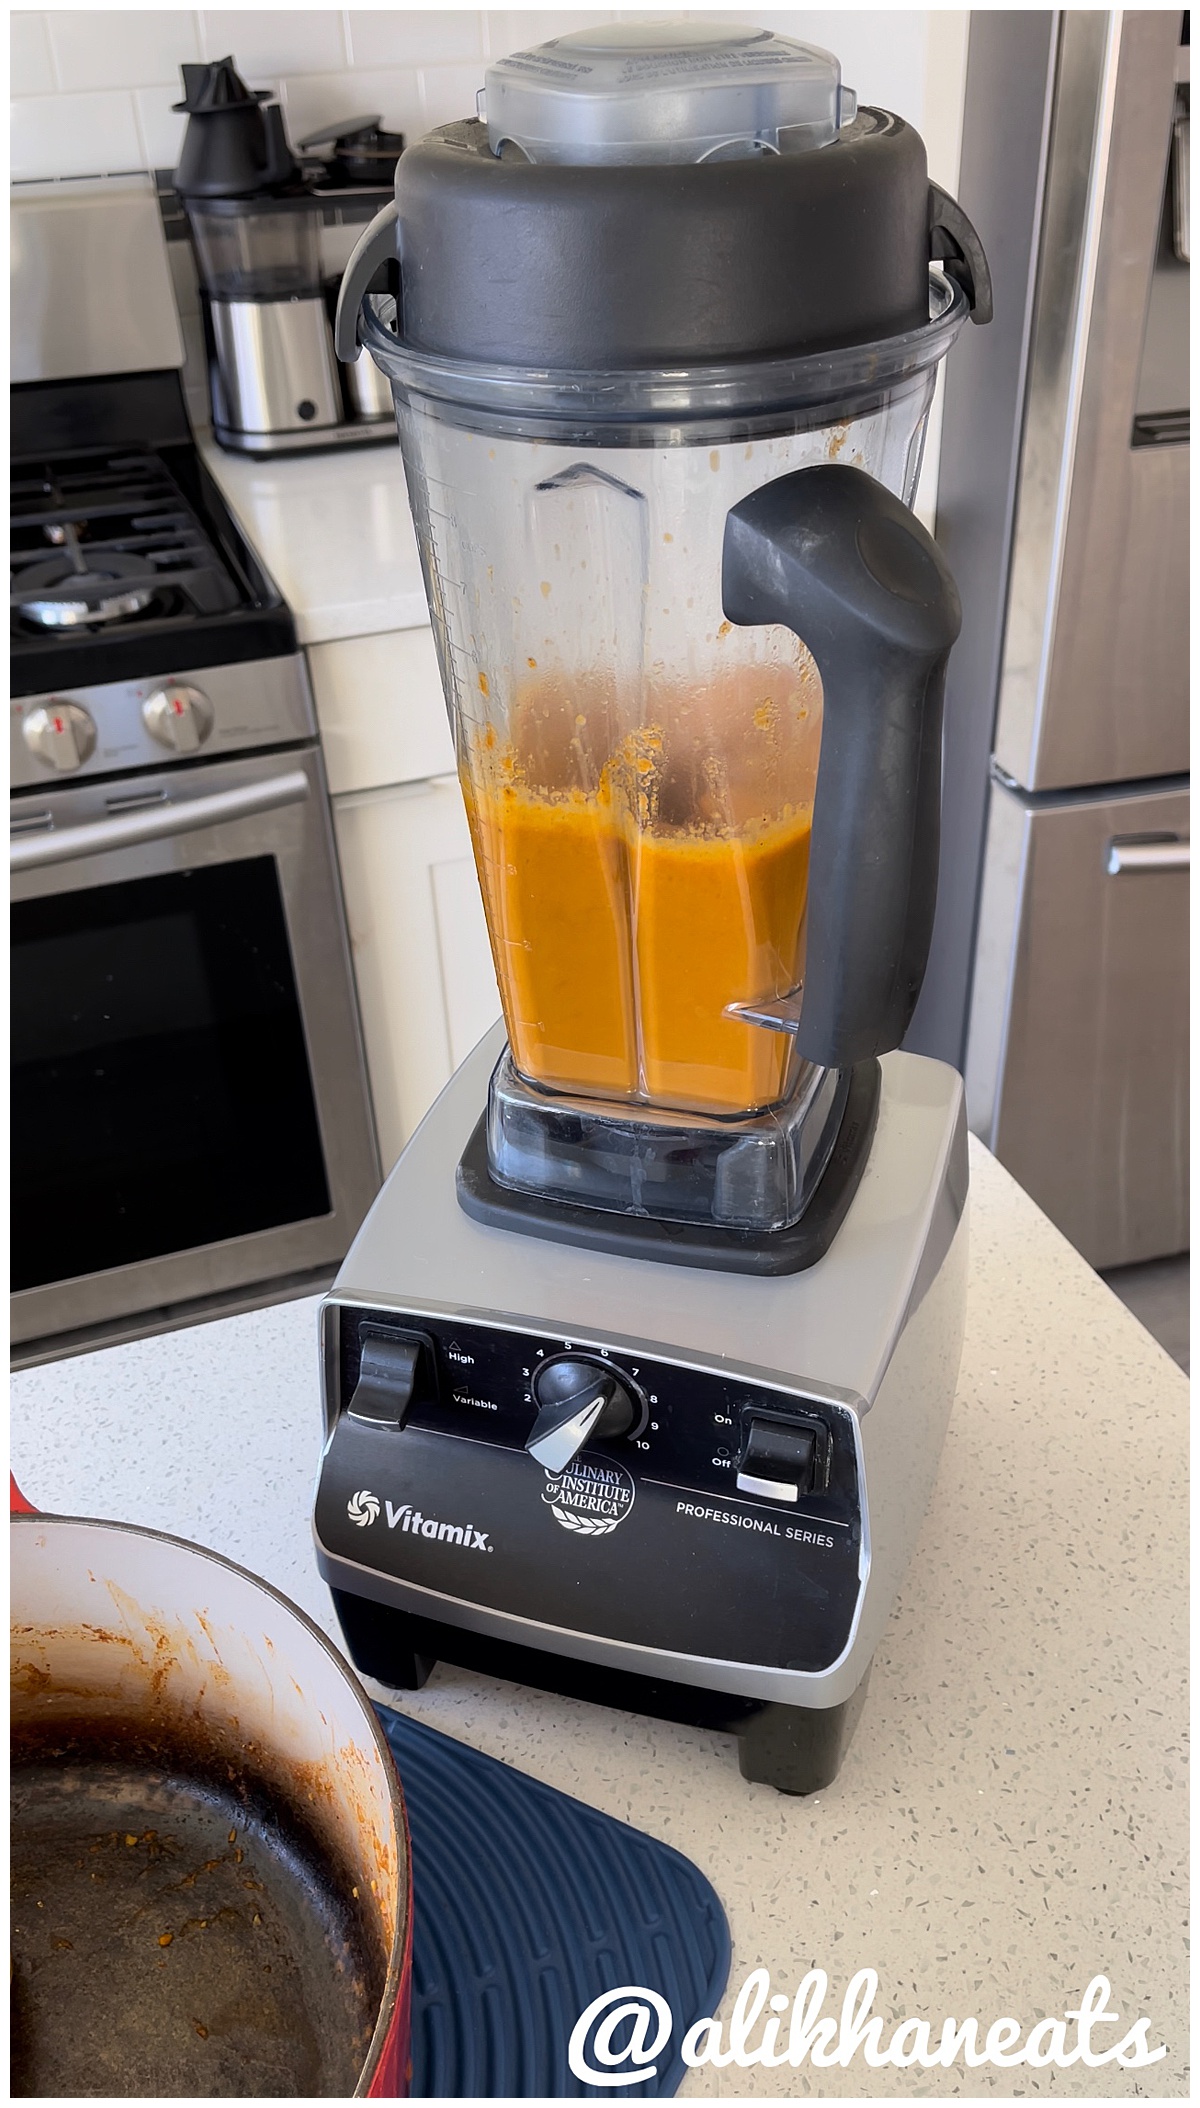
- use stick blender or vitamin simmer to desired consistency
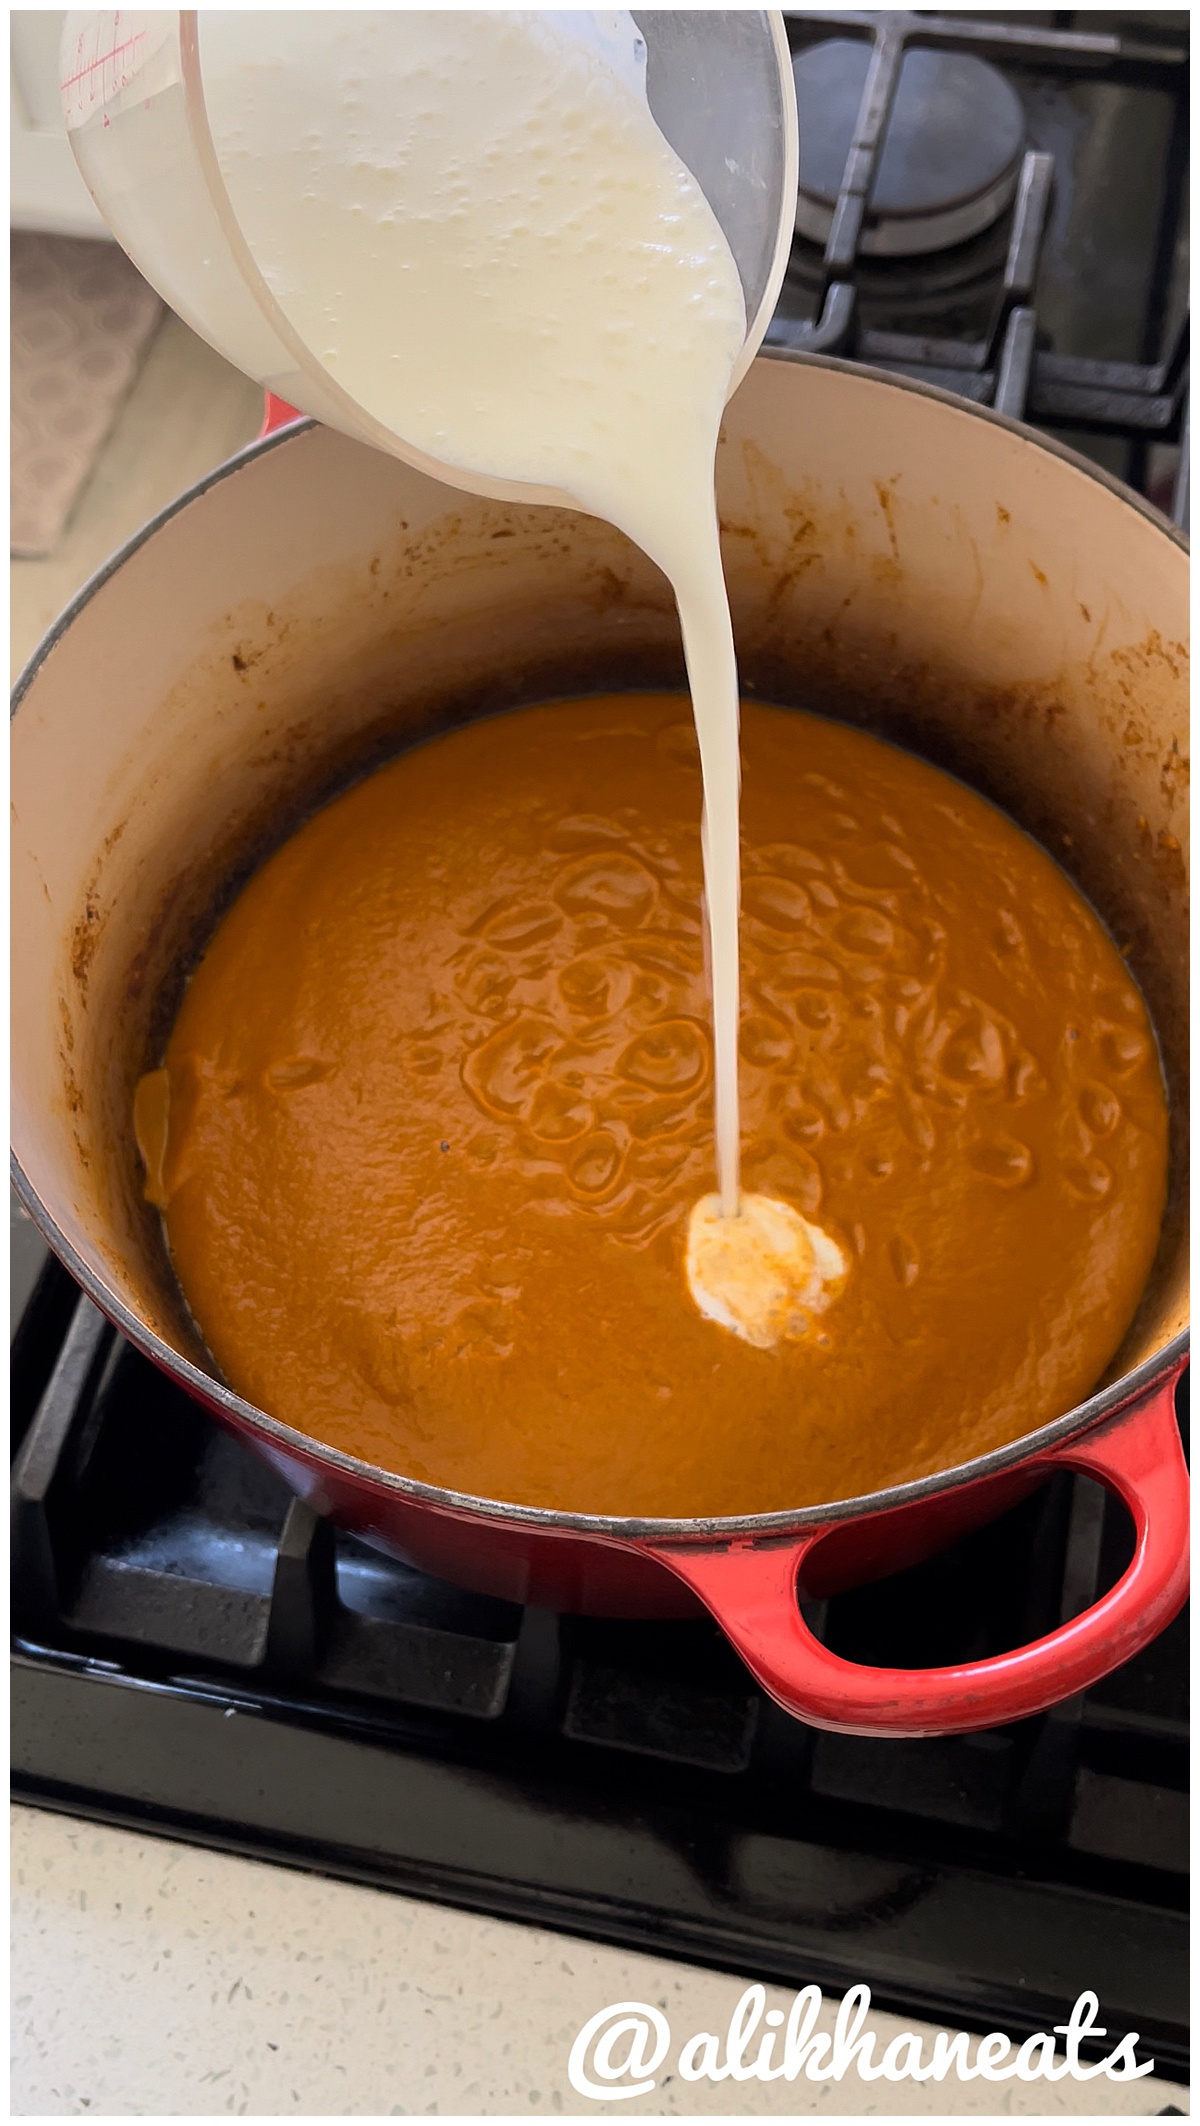
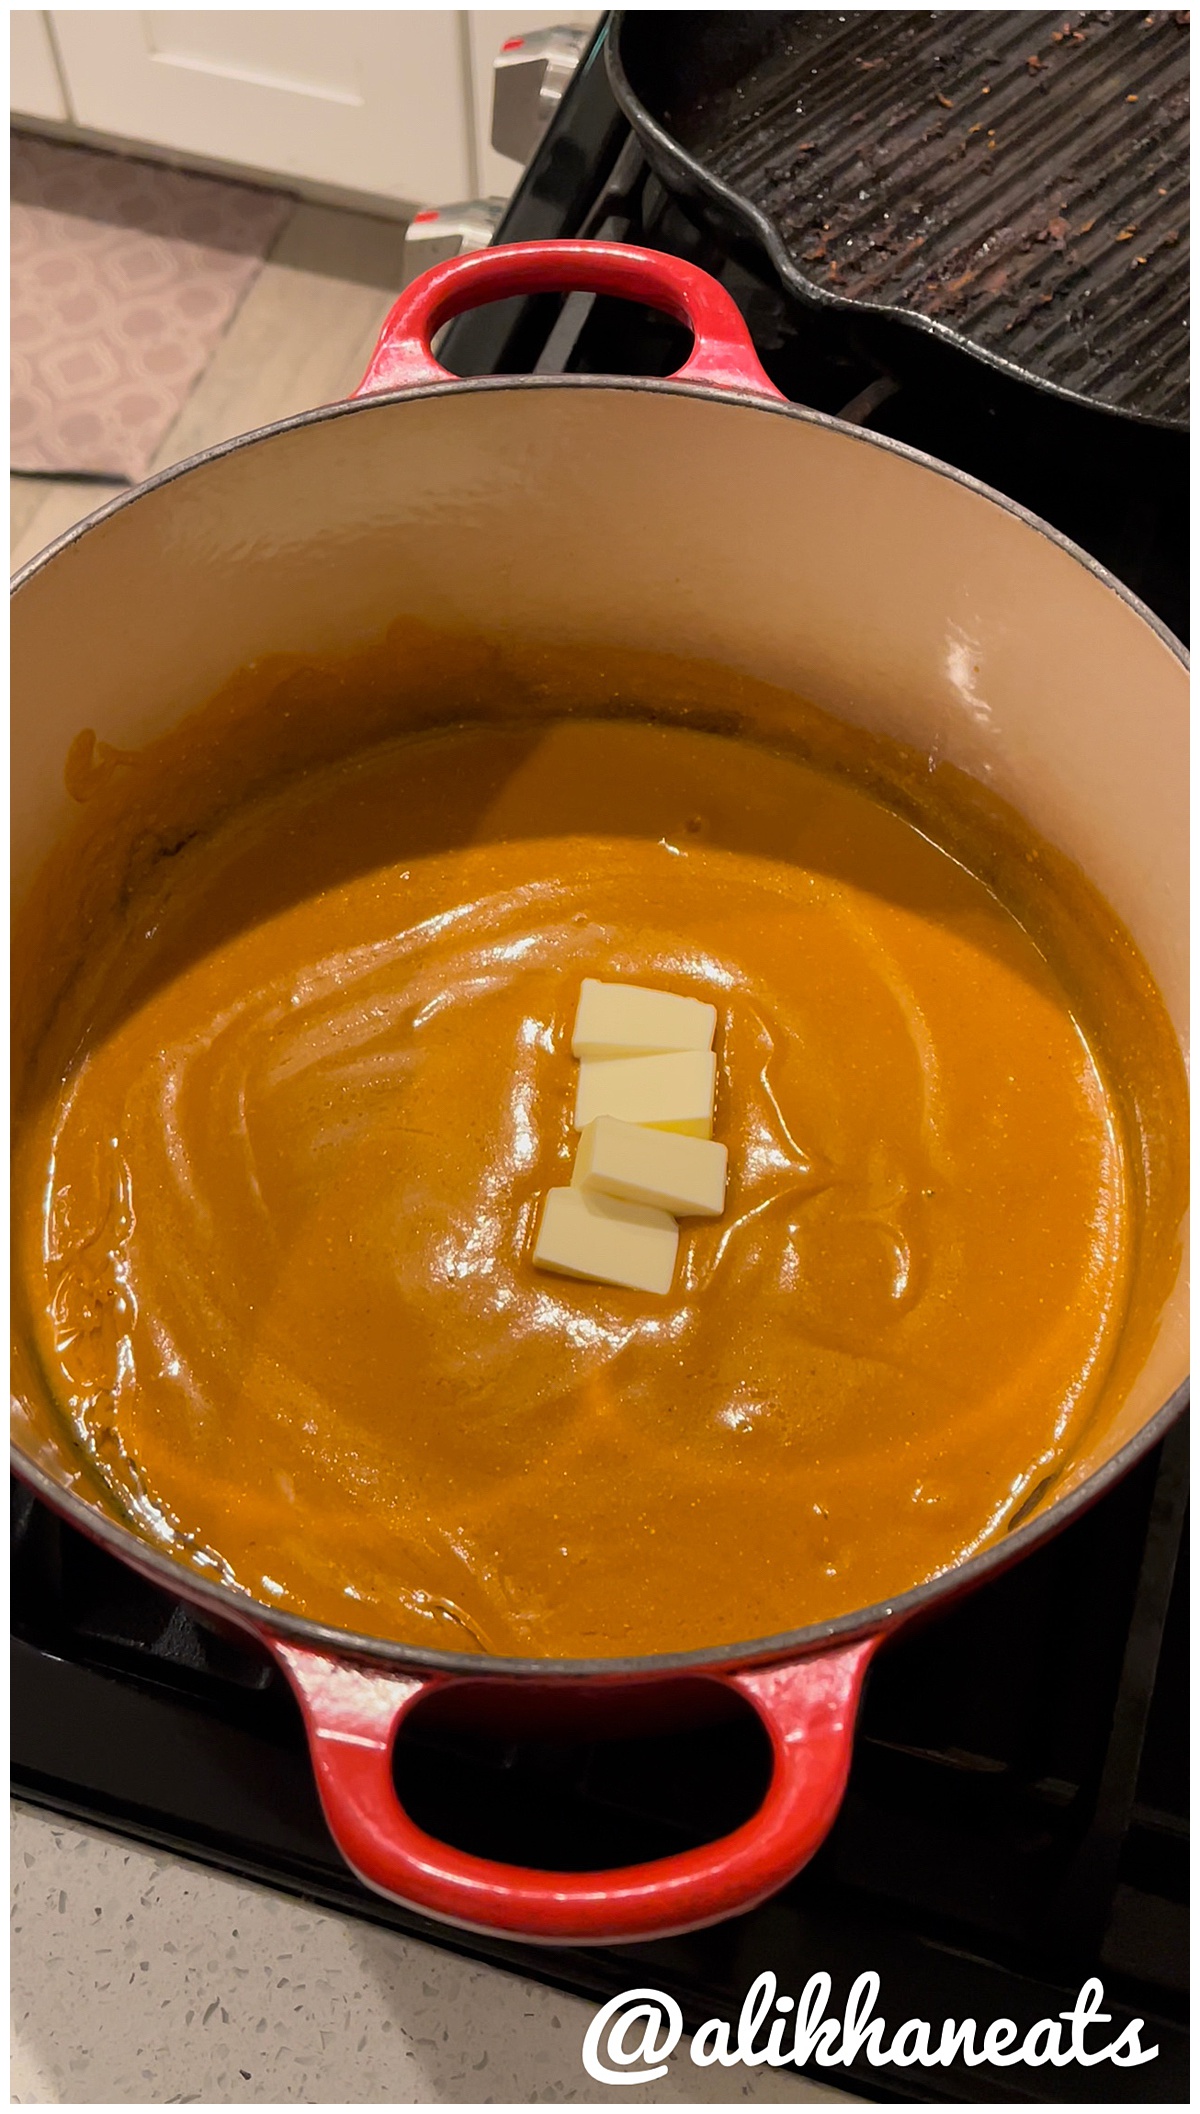
- add buttermilk, butter and sugar(to taste) stir well
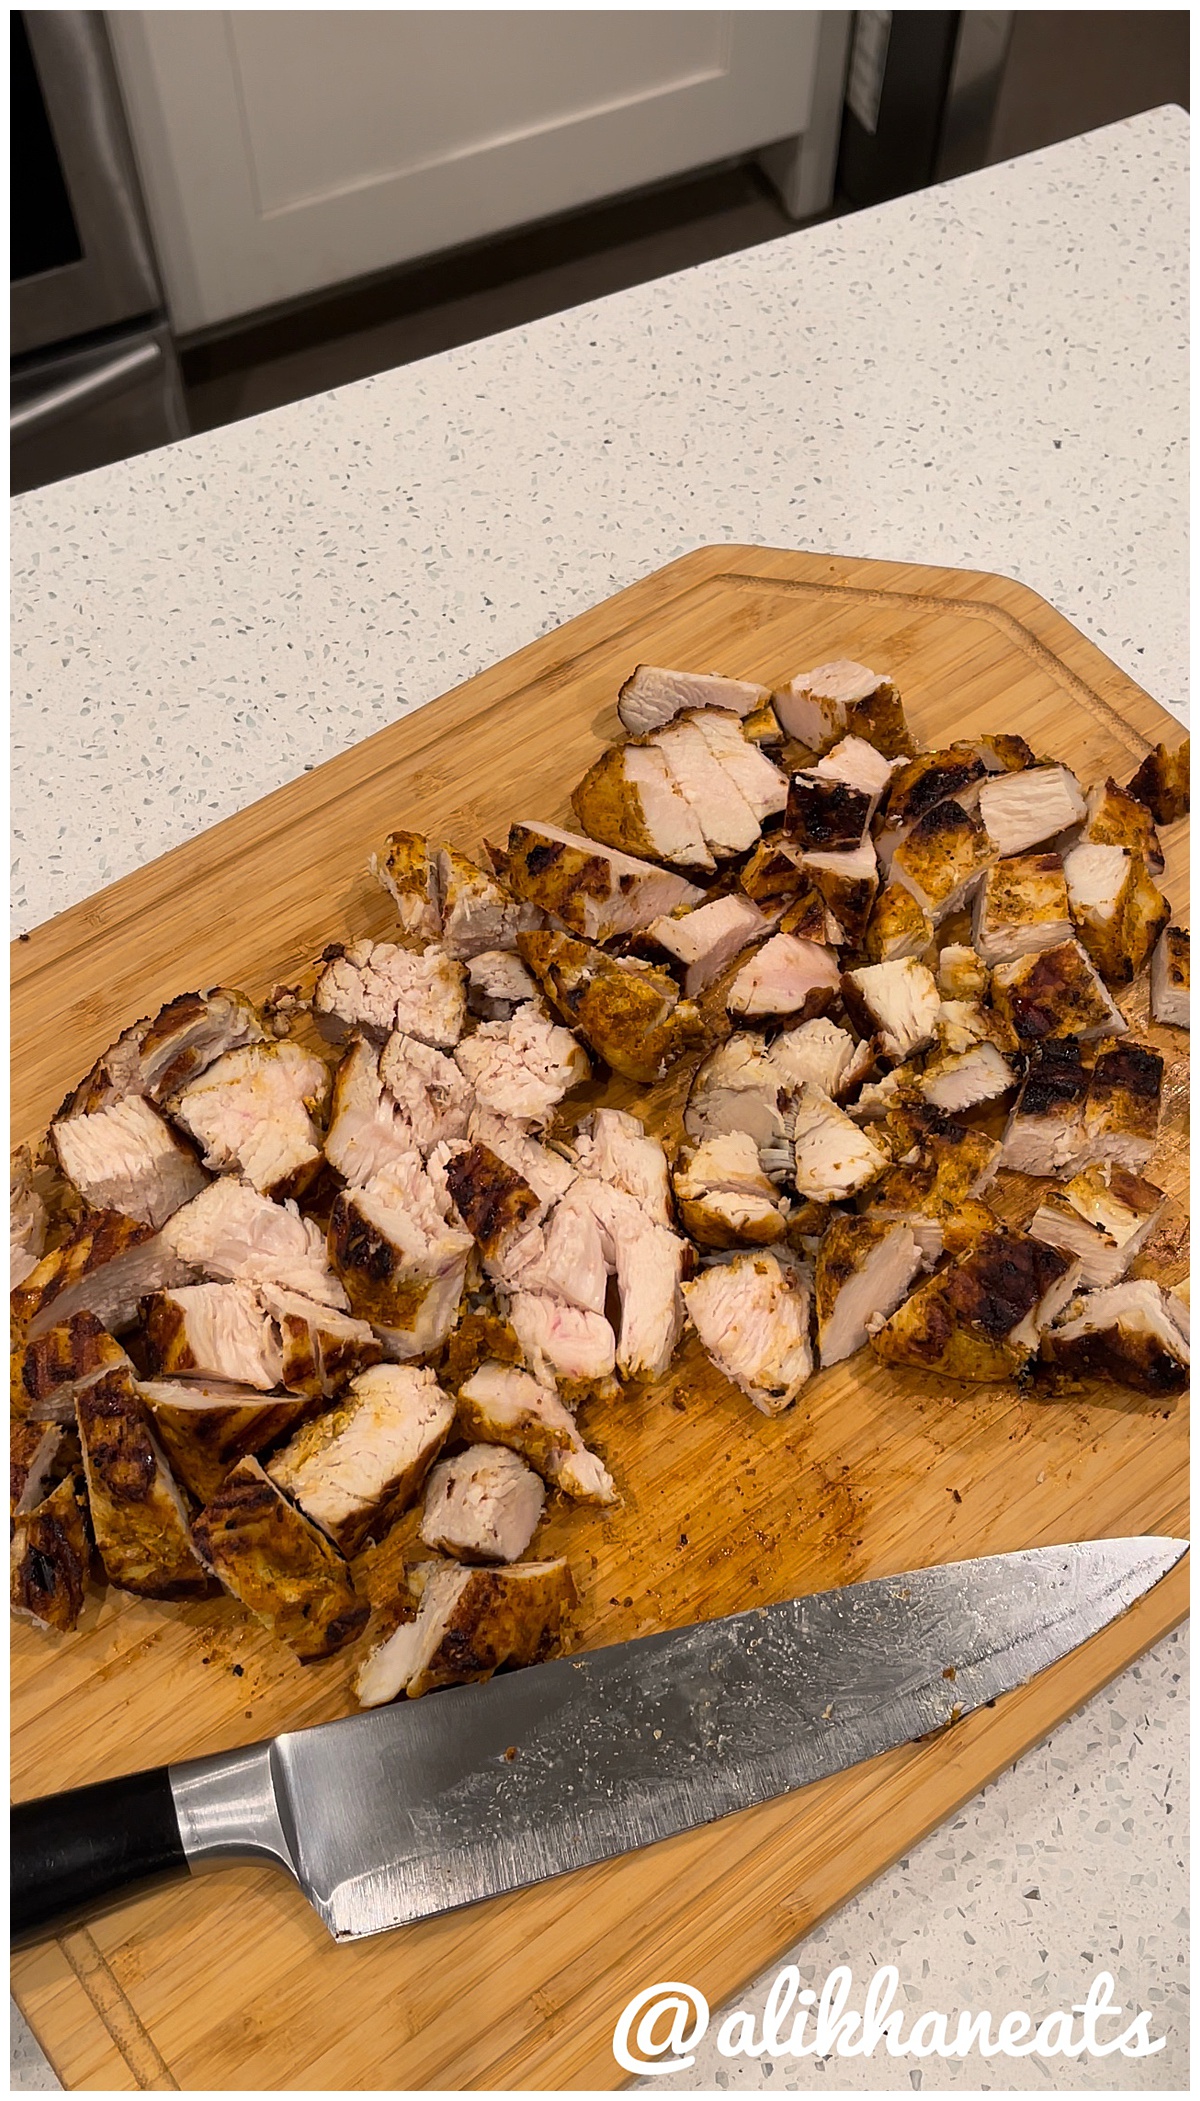
- cook chicken, chop and add to sauce
The day before . . .
You will marinate the chicken.
Big shoutout to
Spicewalla for supplying me a ton of spices including the
Tandoori Masala which is clutch for an all purpose Indian style marinade. I used chicken breast, cut it in half vertically and marianted it overnight in a mix of that Masala and Buttermilk. Why Buttermilk? Well I had some lying around and it made sense. Like yogurt, when you marinade meats in it, it will tenderize. Yogurt, heavy cream or even half and half works too. I personally avoid yogurt as it is so dense and gets in the way of the spices shining in the dish.
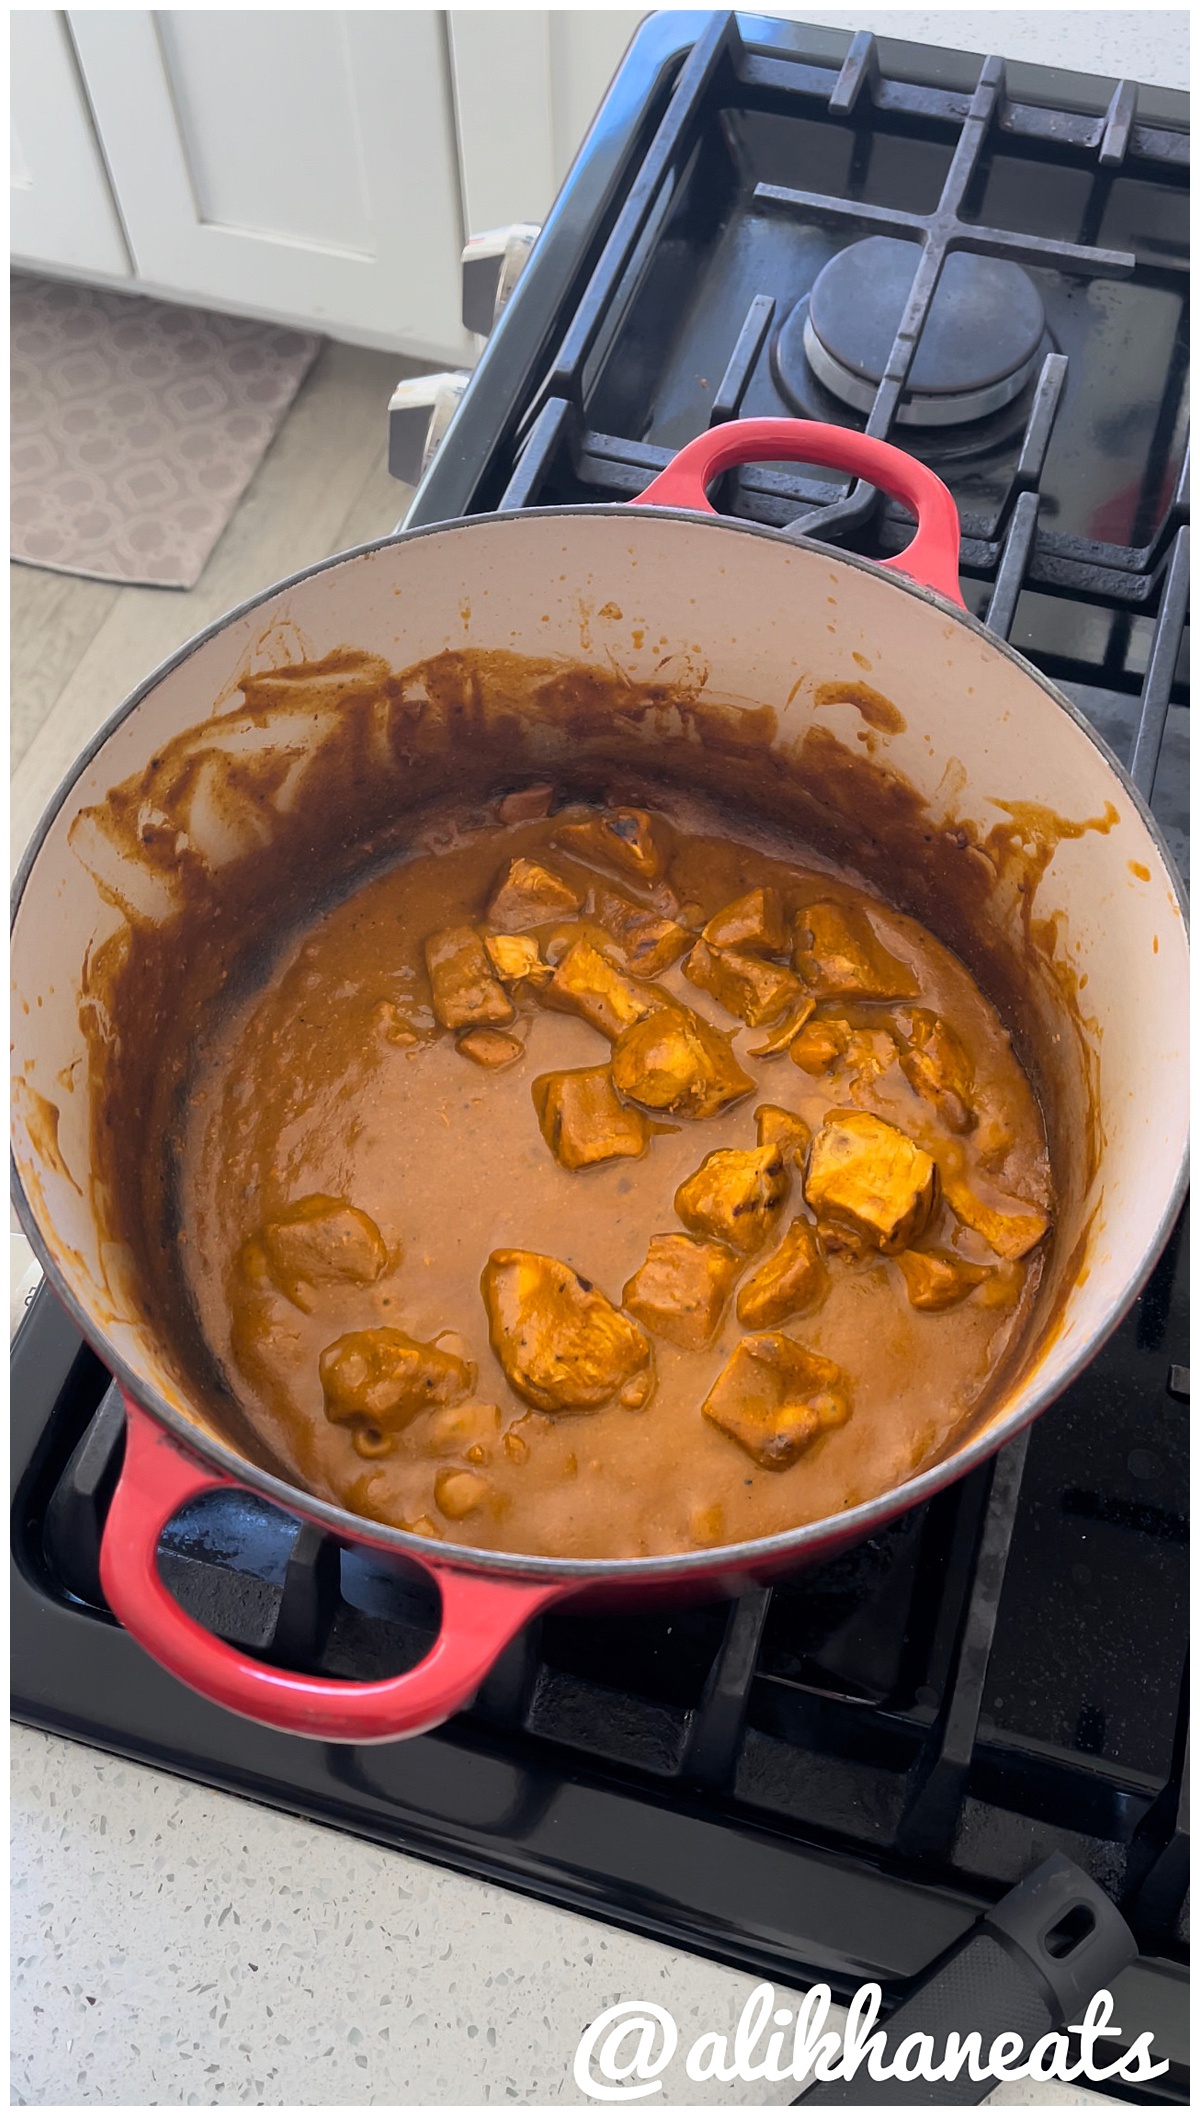
Make the sauce first.
Yeah, you make it separately,
Even the day ahead works, like when you marinate the chicken. Start by cooking up the ginger, garlic, and the spices in a heavy pot. For depth, I added garam masala and for heat, two chili powders(Dark Chili and Kashmiri) along with more Tandoori Masala. Once fragrant, add the chopped tomatoes, cover and simmer for at least 10-15 minutes. Then get it into a blender to use a stick blender and get it smooth like tomato soup. Add the buttermilk, butter and sugar to taste. Depending on how spicy/tangy you want it, taste as you pour the buttermilk and add the butter and sugar.
Cook that chicken
And add it to the sauce.
I like to use a grill pan but an outdoor grill would work wonders. I finish cooking the chicken in the oven if it's really thick but remember even if it's not all the way cooked, it will continue to cook in the sauce.
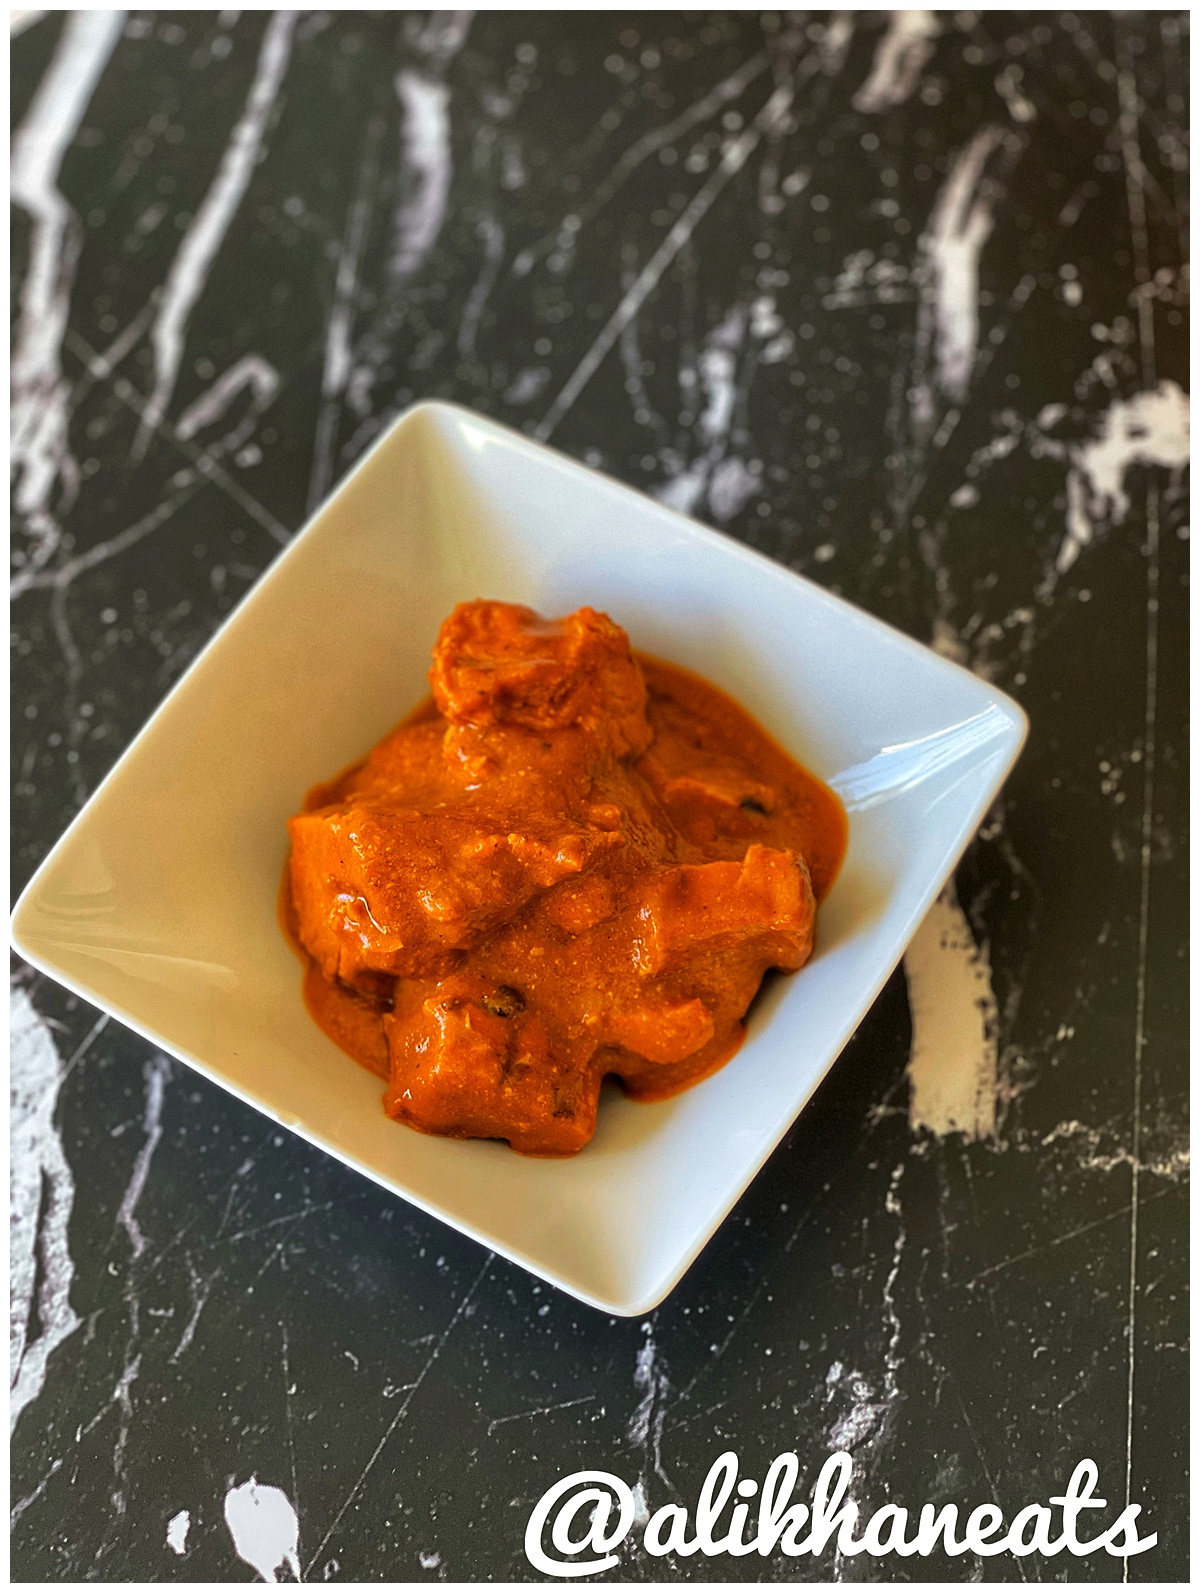
Grab a fork, maybe a spoon.
Serve over rice or cauliflower rice if you're like me and keeping the carbs in check. Of course naan bread is great but so is homemade flour tortillas. Another example of why I don't order Indian takeout anymore. Just get the right spices, that makes a huge difference.
The Vitals:
the spot: Texas Sushiko 440 E St Elmo Rd Ste B-2, Austin, TX 78745 (parked at Texas Sake Company)
the eats: Sushi hand rolls
the bucks: $40-$50 per person
the full nelson: a relative deal for high quality sushi in hand roll formats
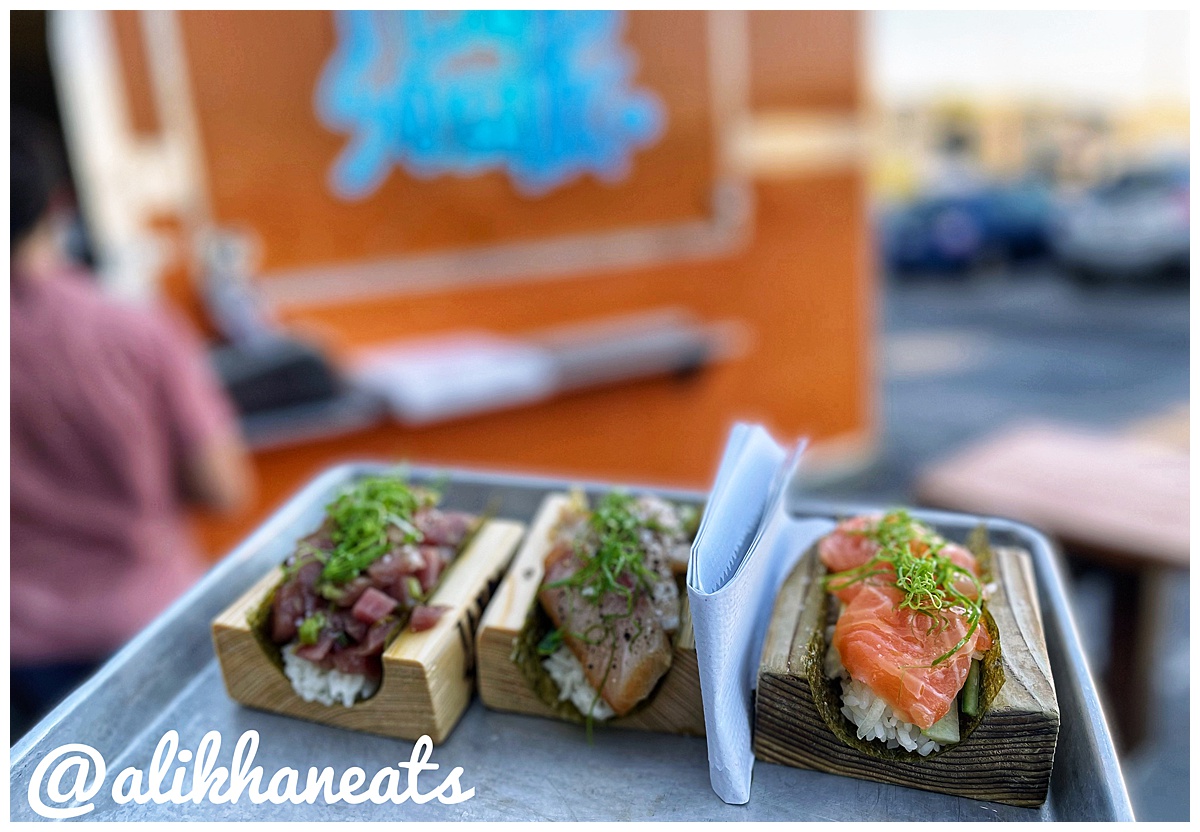
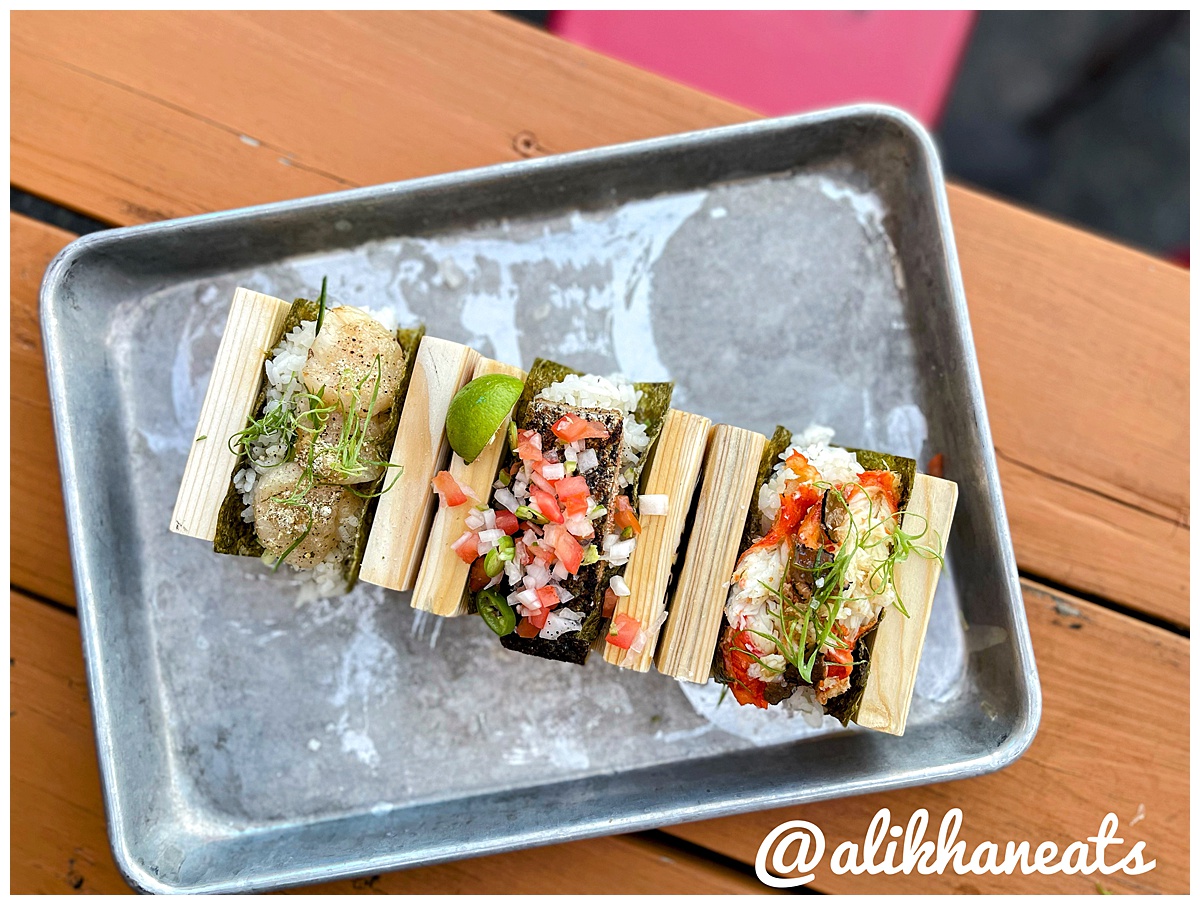
Can Sushi be Tacos too? Texas Sushiko thinks so
Over the summer I dipped over to Texas Sake Co to quench my thirst and try what I had been told was a must visit sushi joint in Austin. What makes Texas Sushiko a must visit? Great quality sushi in a food truck setting. Some might balk that such a thing can't turn out well. I beg to differ. While the effort pulls no punches, the only downside is imagining how this experience could unfold in a proper dining room.
But wait, it's also sushi as tacos. Well, open faced hand rolls at least.
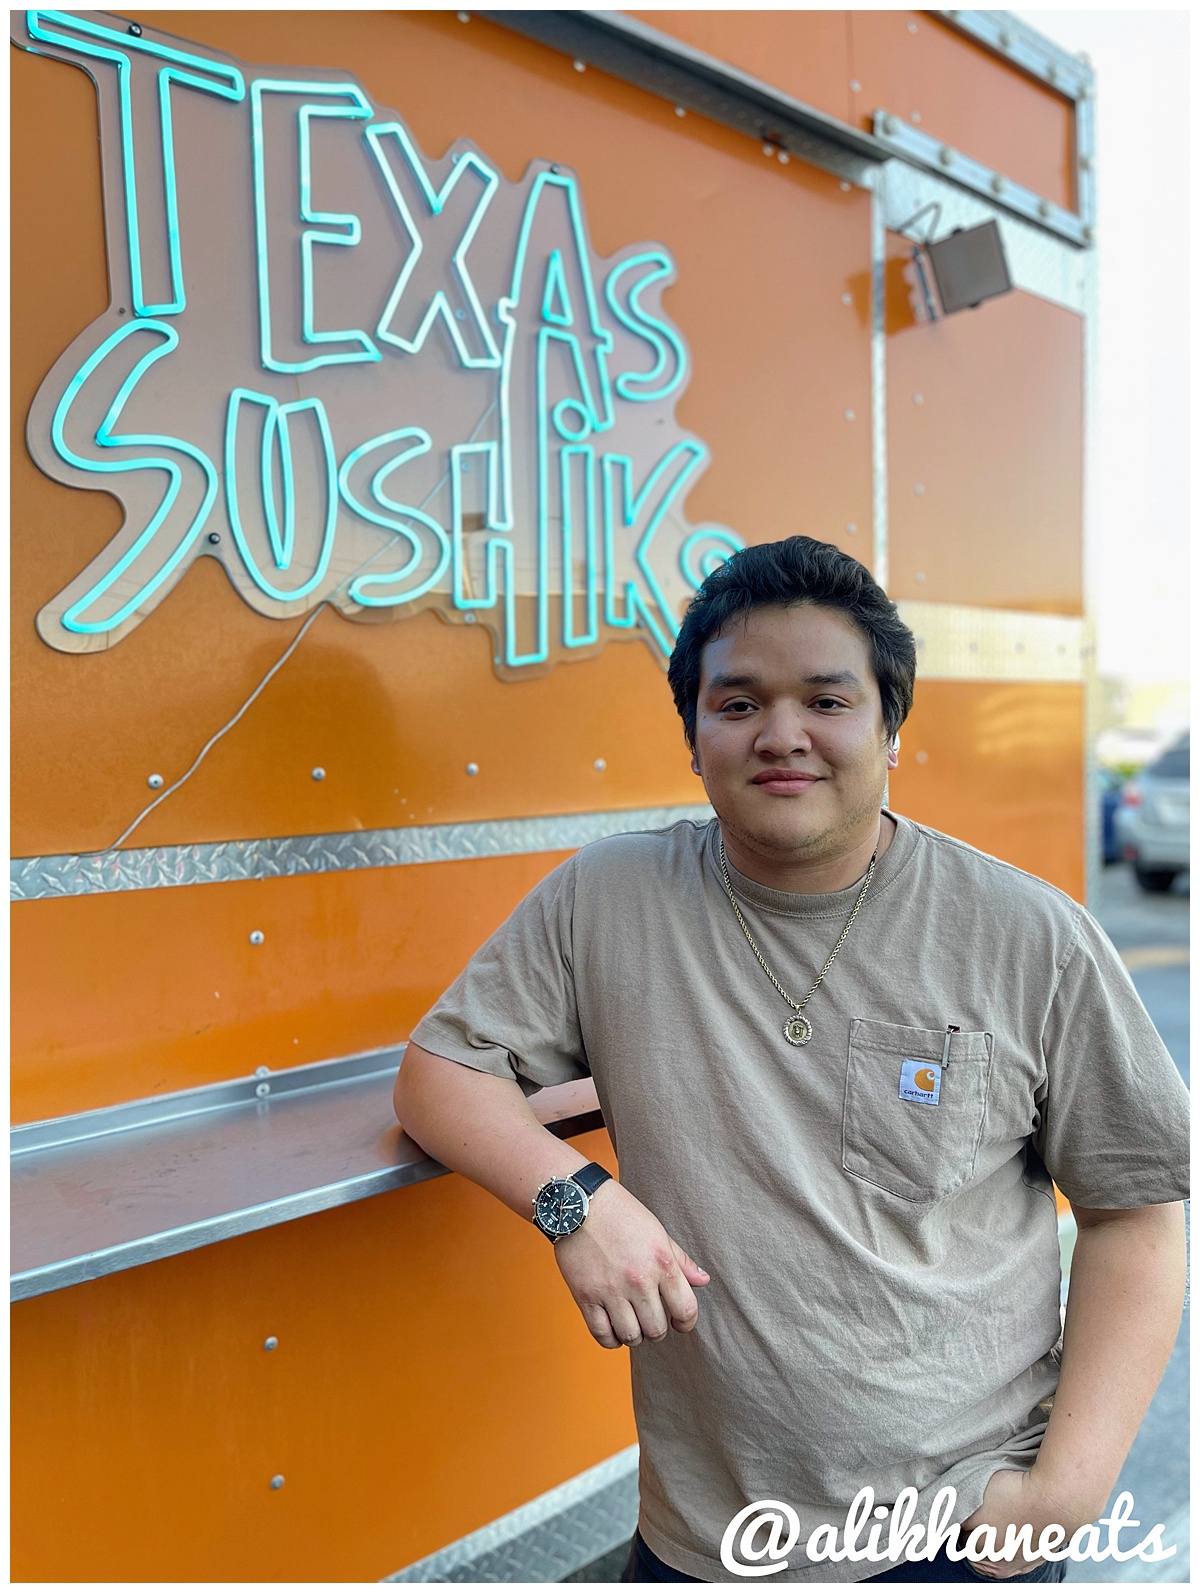
Meet Chef Michael Carranza
Michael and his partner Danielle grew up in South Texas where sushi just wasn't a thing. But it was for these two chefs. Michael has extensive experience at DK Sushi, Uchi, Musashino and Ten Ten. Danielle transitioned from doing the books at Uchi to sushi chef at Tare and now Texas Sushiko. Many of these sushi restaurants are on my bucket list and the reason why I haven't crossed some of them off? Price. Good sushi ain't cheap in Austin but there are
a few exceptions to the rule.
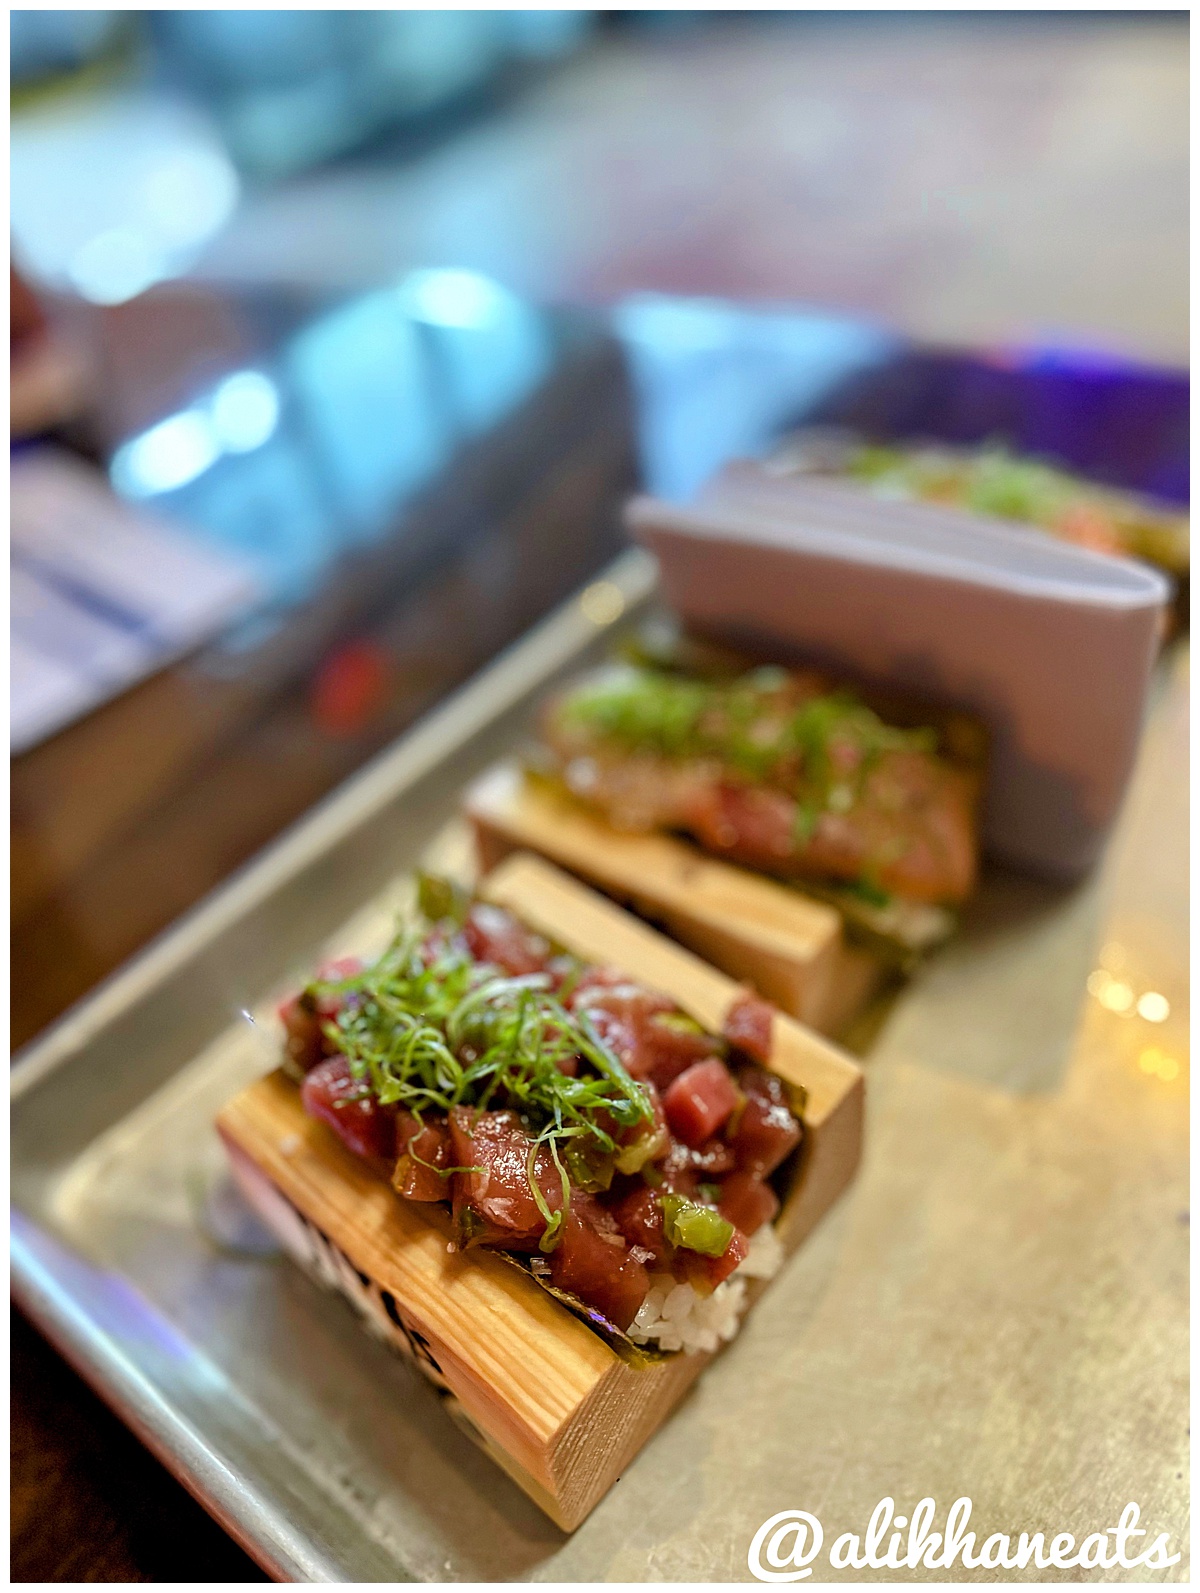
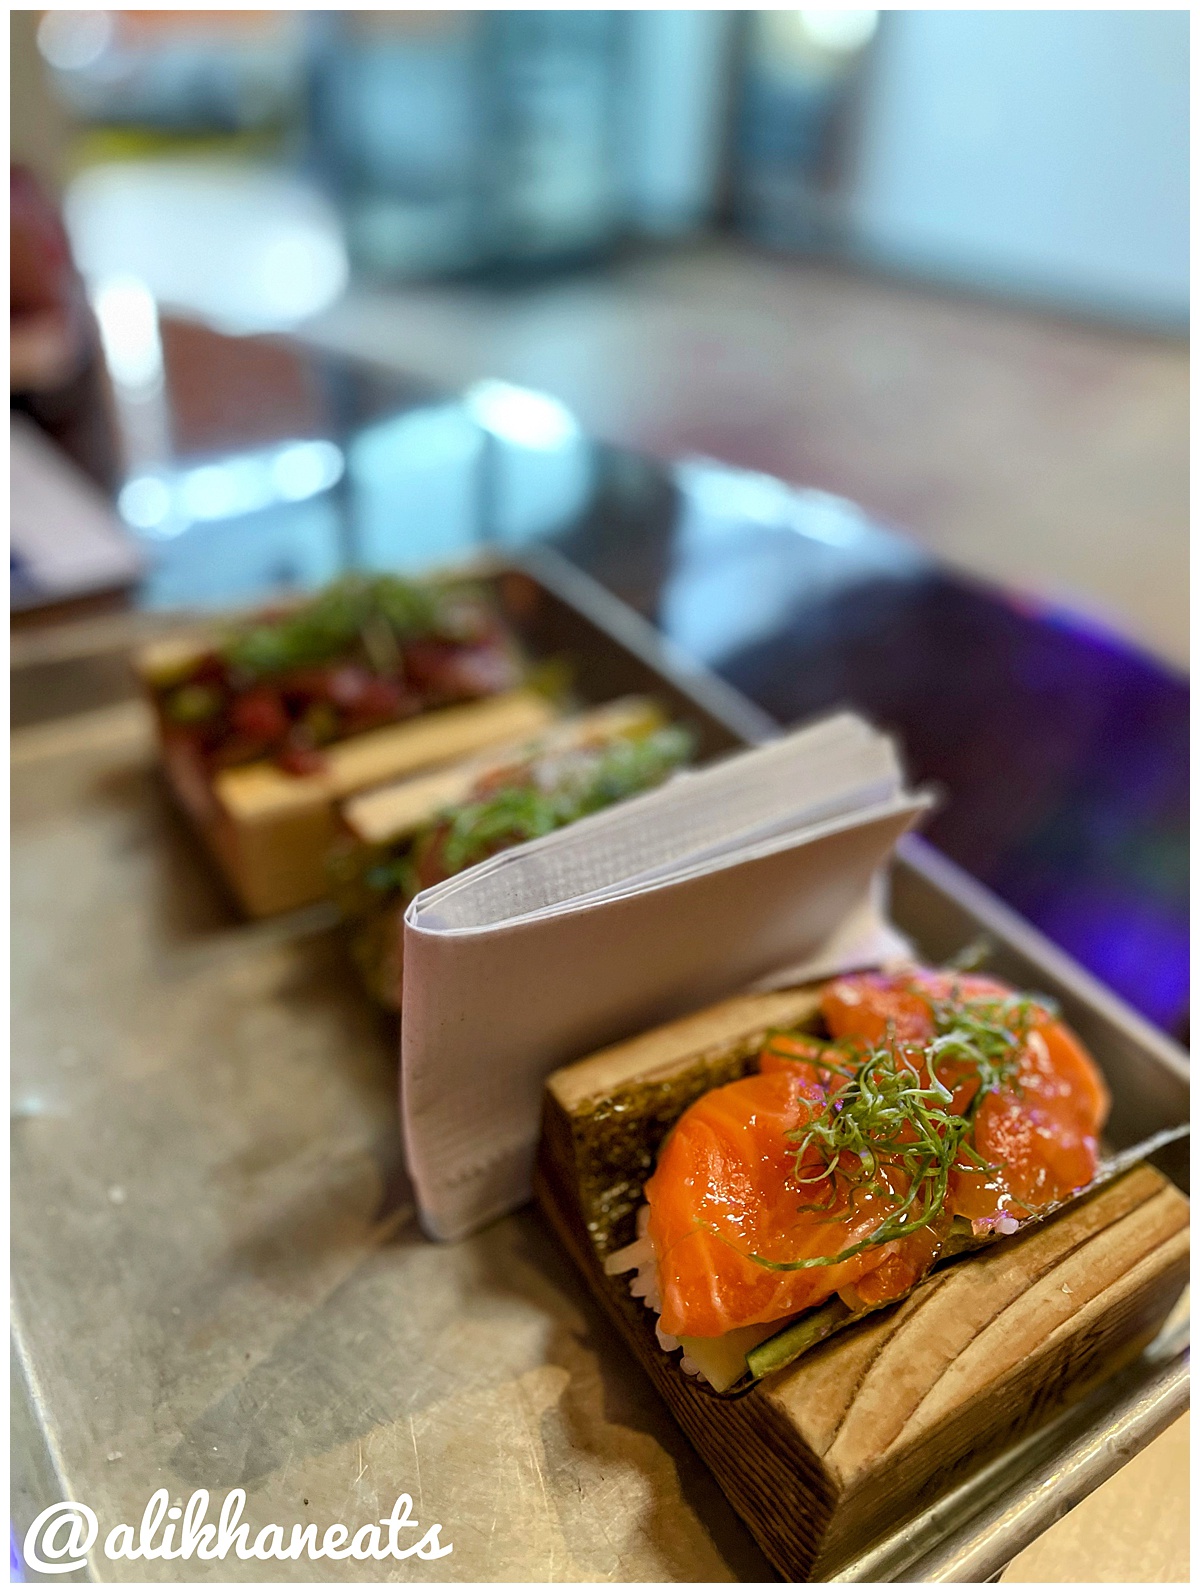
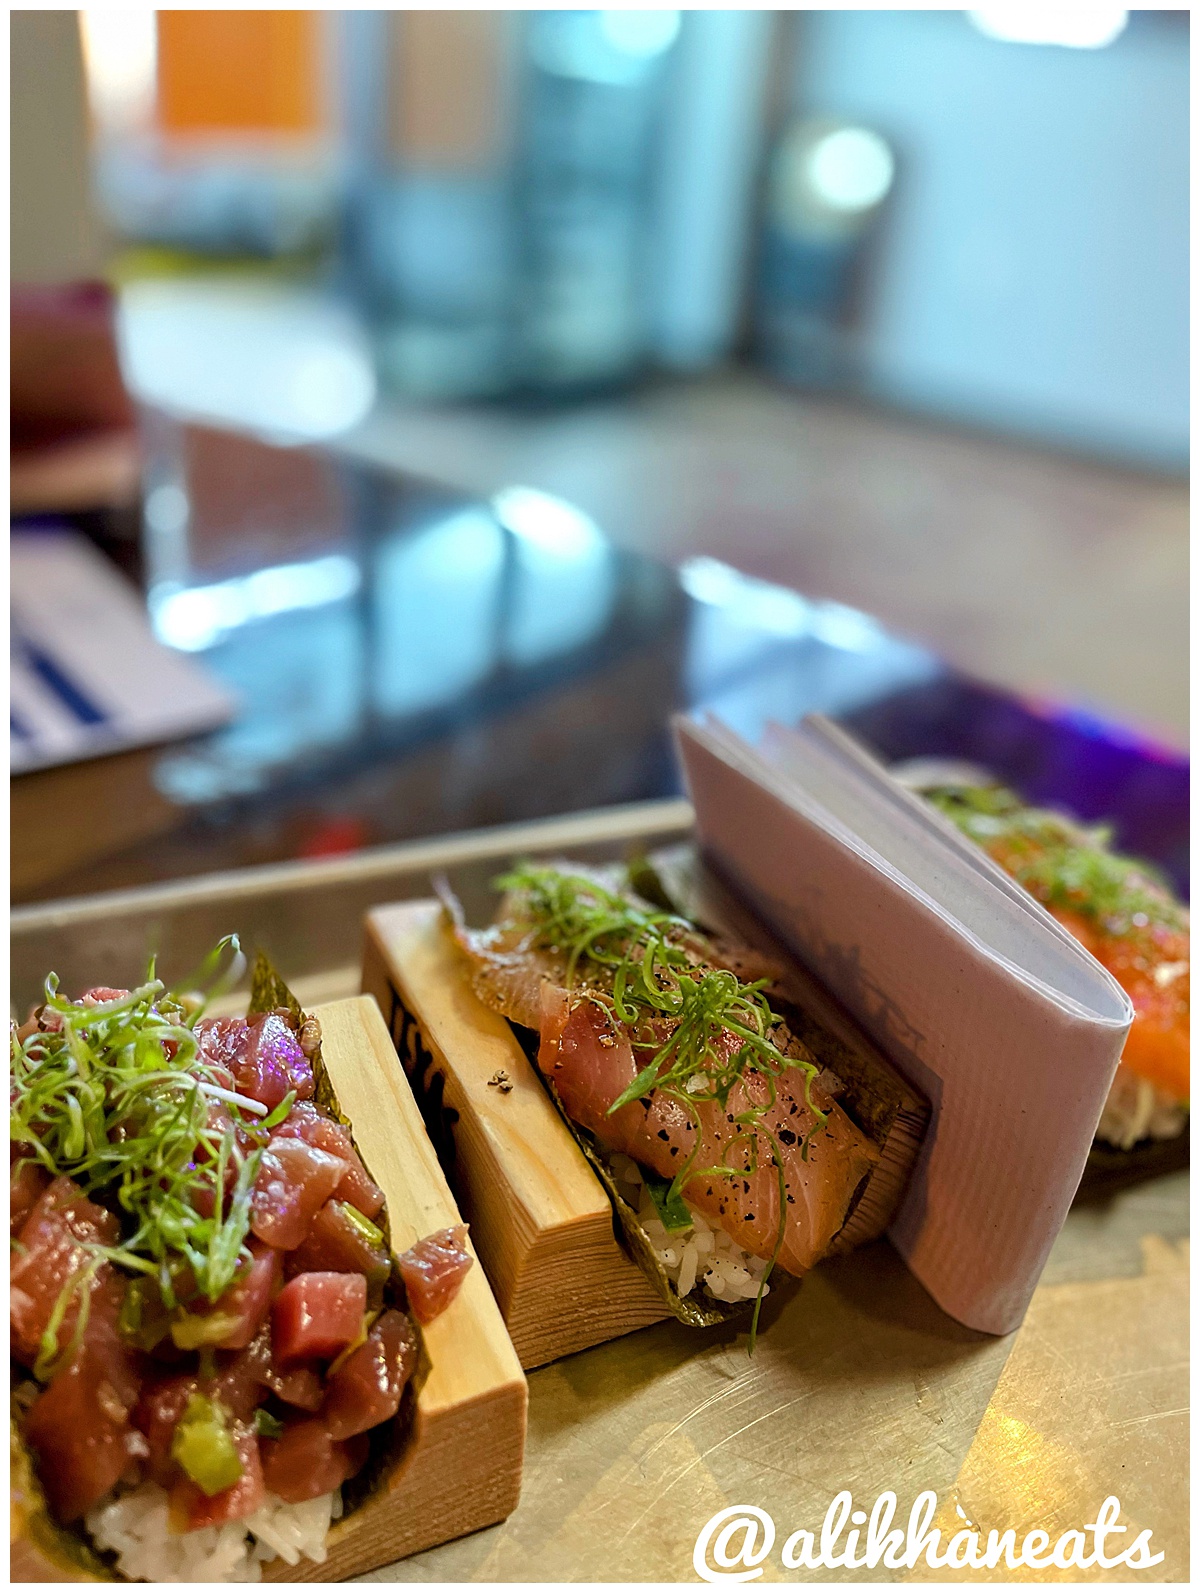
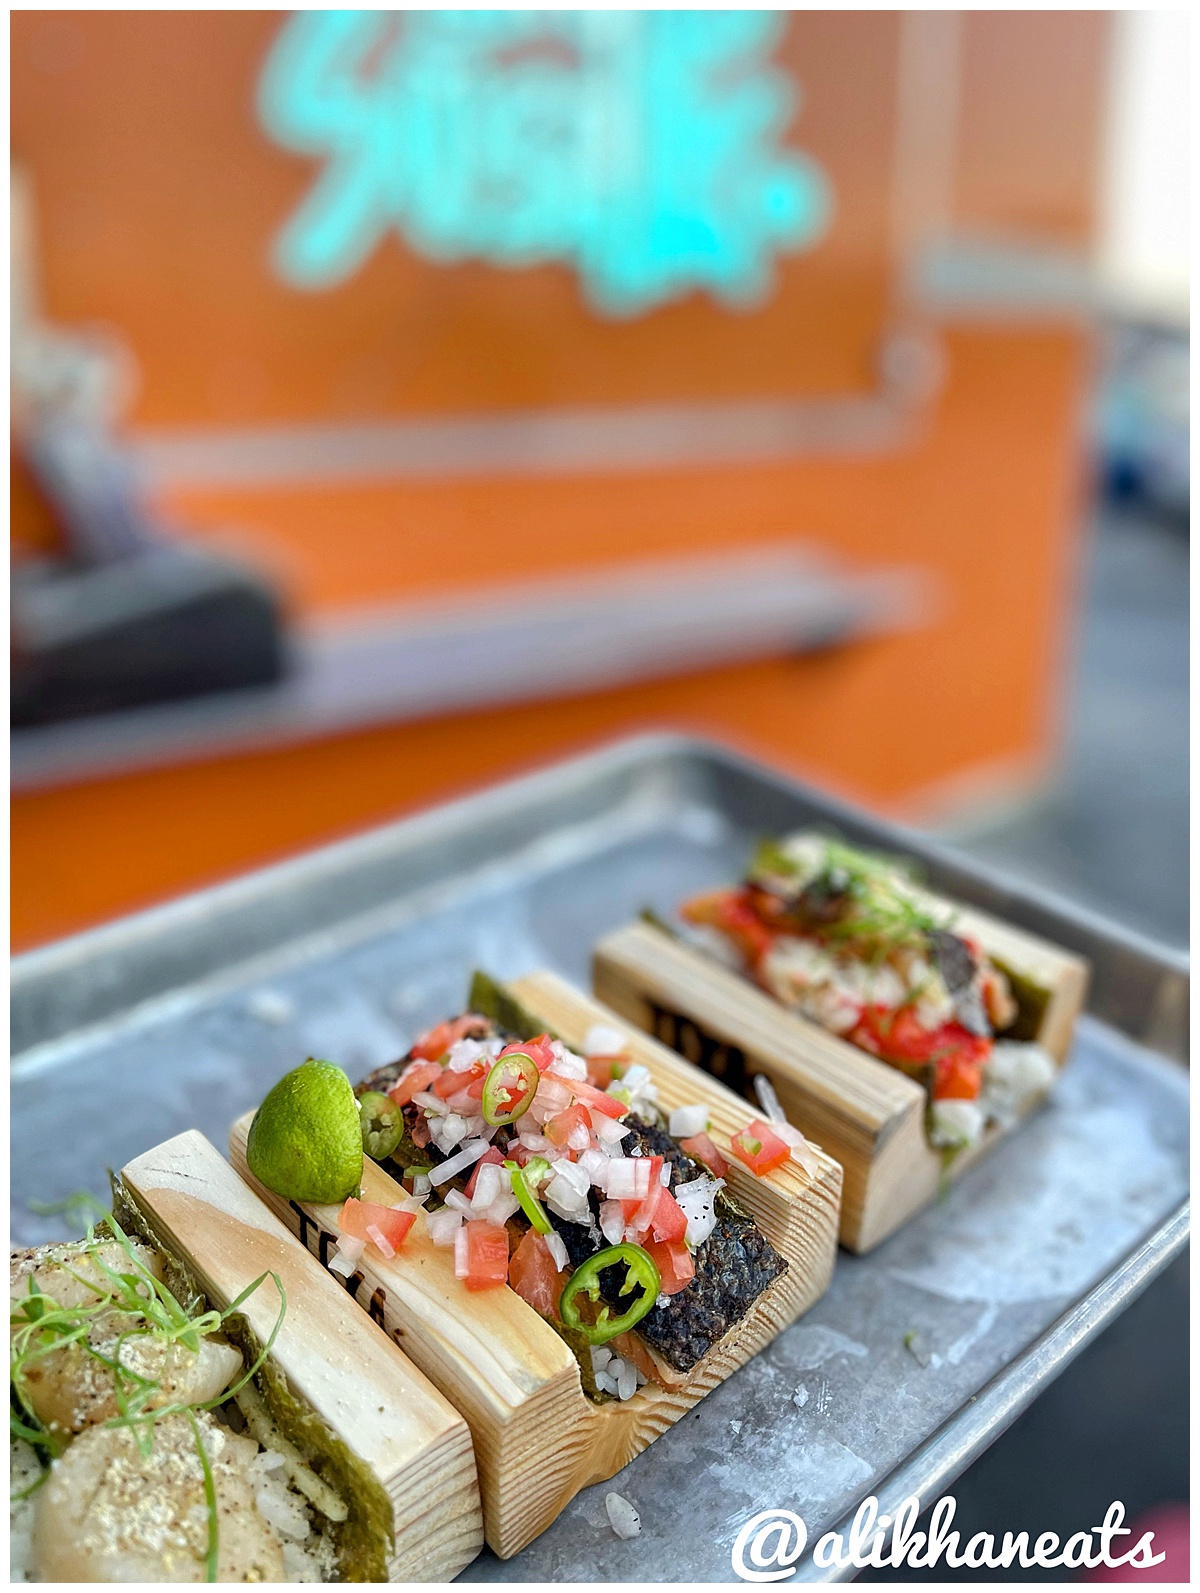
Bluefin Tuna, Yellowtail and Salmon Handrolls
Bluefin Tuna Hand Roll
Salmon Hand Roll
Yellowtail Hand Roll
Ranging from $8 to $15(hello bluefin tuna) these are definitely pricey for "tacos" but you're getting more than a mouthful of Nigiri. Remember when I said good sushi at cheap in Austin? Well the sushi here is pretty darn good, so that means you're gonna spend a little dough. Enough so that I opted for round two.
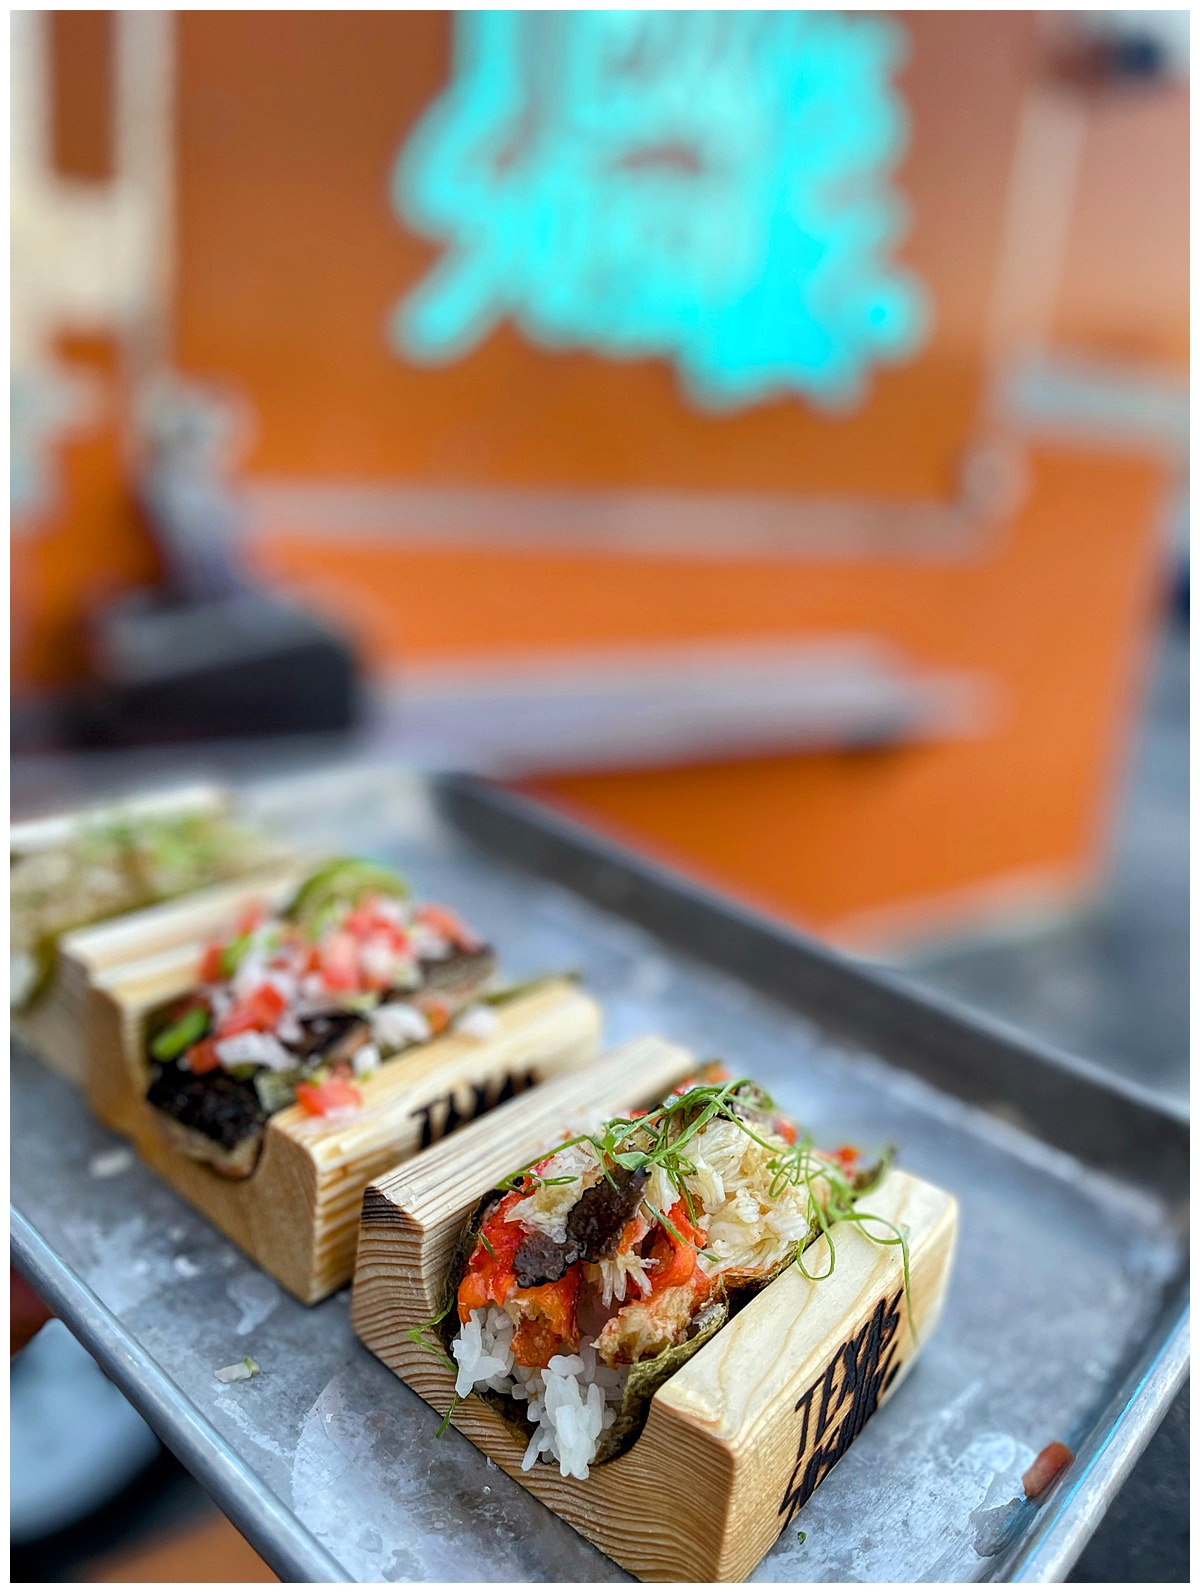
King Crab Hand Roll
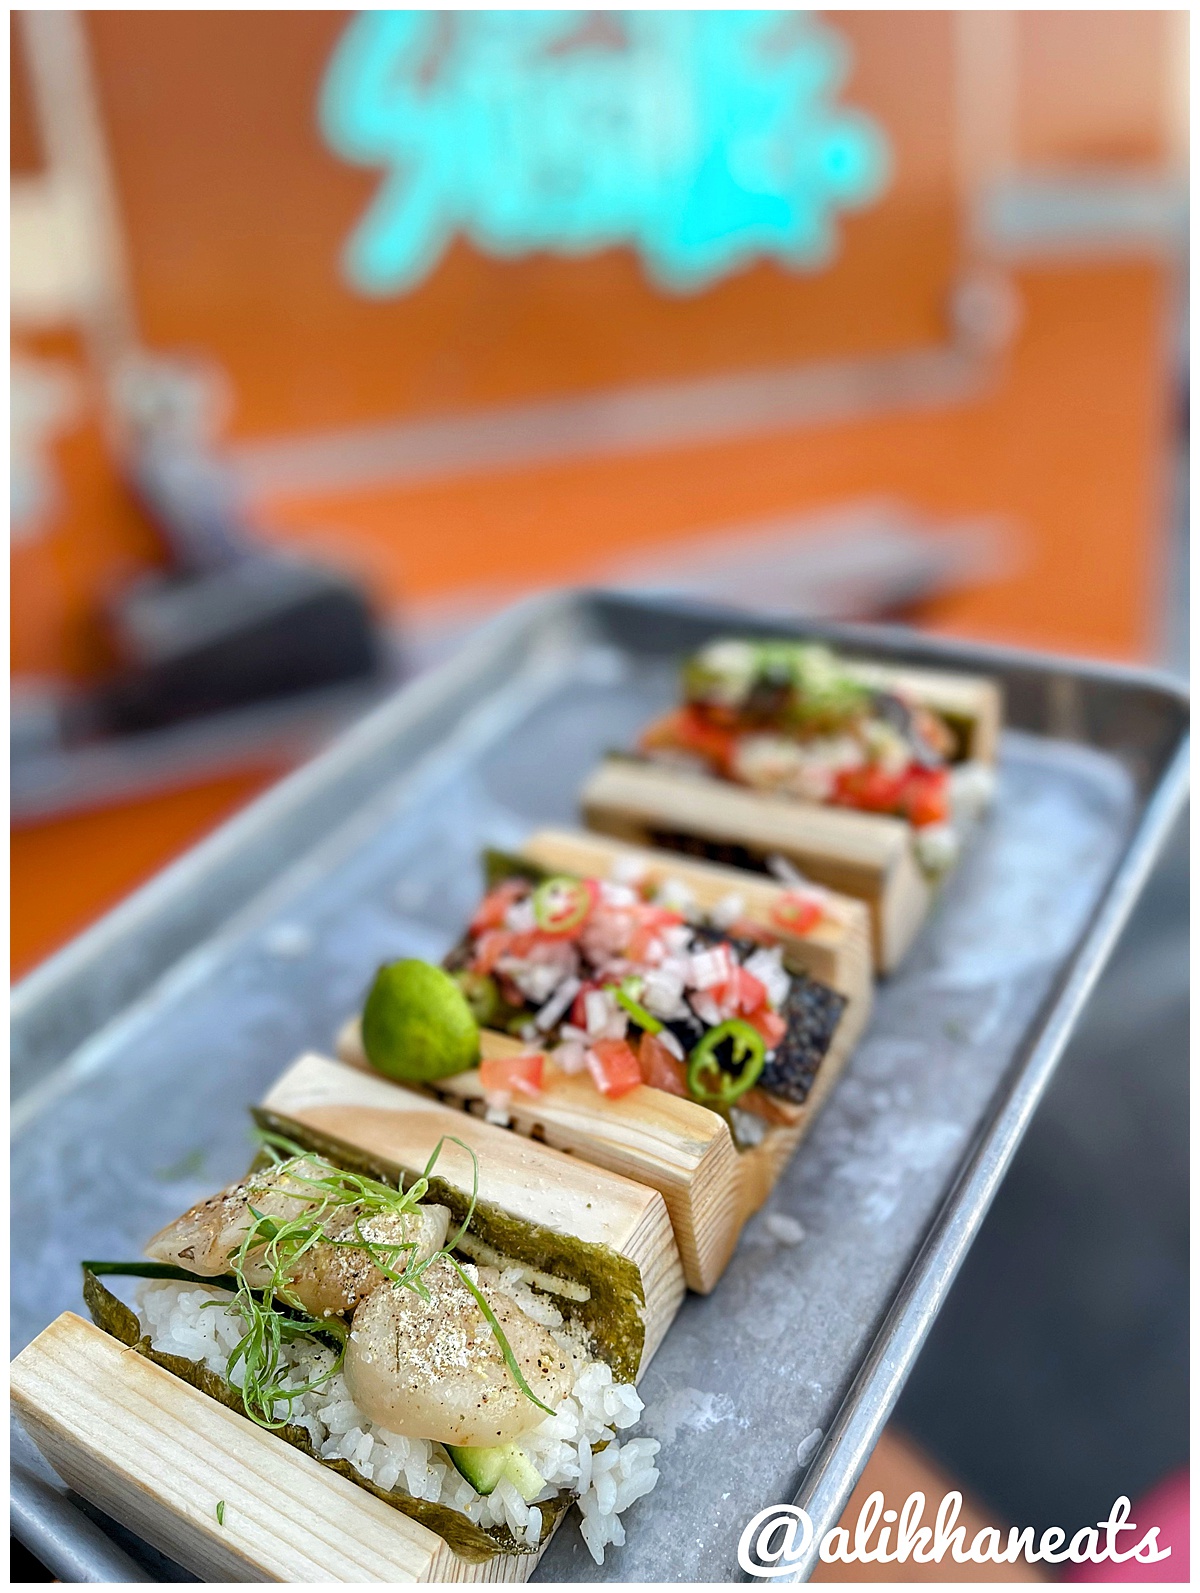
Scallop Hand Roll
Salmon Skin Hand Roll
I splurged on the King Crab hand roll at
a whopping $25. This one is decked to the 9s with black truffles and the crab is poached in butter. As decadent as it sounds, my fav of this bunch was the scallop. The sweet and pristine nature of scallop hits so much more straightforward, it's peak sushi eating.
You might pause and say to yourself "damn I'm eating this in a parking lot?" As far as the salmon skin goes, I didn't mind it but I enjoyed the other fare more so.
This bill rang big($110 w/ tax & tip) but what do you expect? Sushi ain't cheap and it sure ain't cheap in Austin. Still, if you want a taste of what a proper Omakase/chef's tasting menu of sushi could entail and don't feel like investing $150+ per person, Texas Sushiko is a fine start.
Must trys: Bluefin tuna, Scallop, Salmon, Yellowtail. On a budget? You could just go on a salmon bender for a reasonable tab(like half what I spent).